Table of Contents
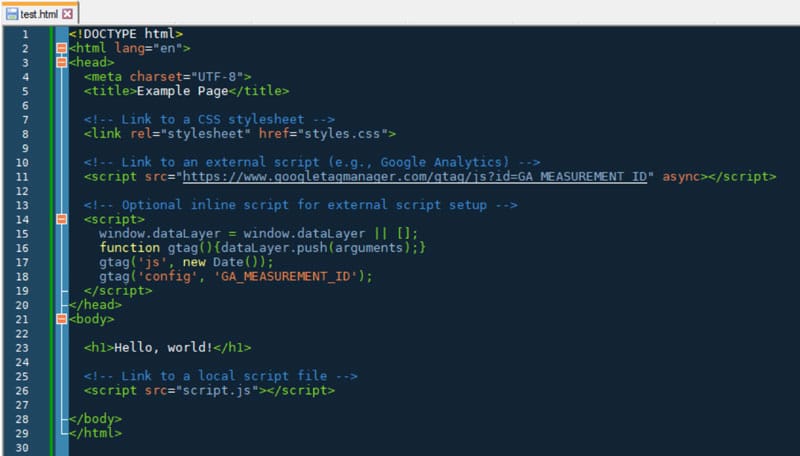
The HTML document is the most basic building block of a web page. When someone visits a website, it’s the first thing their browser requests and receives. The period between that initial request and when the HTML document finishes downloading is known as “document request latency.”
This timing matters because the browser can’t begin rendering the page or loading other resources until the HTML document arrives. That’s why Google is introducing a new insight audit for document request latency to its performance tools, which will become a permanent feature in October 2025.
To help you optimize this aspect of site performance on your own website, the article below explores how document latency is measured, what causes it, and how to diagnose and improve it using practical tools and techniques.
| TL;DR Document Request Latency No time to read the entire post? Alright, here’s a quick summary but promise to come back later, ok? ✅ Document request latency is the time it takes for a web page’s HTML to be requested and fully downloaded. It’s critical because it delays everything else from loading until it’s done. ✅ Google is rolling out a new performance audit for document request latency in Lighthouse and PageSpeed Insights starting October 2025. It checks for redirects, server response time, and compression—three of the main factors that can delay the HTML document. ✅ To reduce document request latency, speed up your server, use a CDN, enable caching, compression, and minification, avoid redirects, and reduce the size and complexity of your HTML document. ✅ If you use WordPress, plugins like WP Rocket can automate most optimizations with just a few clicks. |
What Is the Document Request Latency Insight Audit?
As already established, document request latency describes how long it takes for a web page’s HTML file to load. The reason why it matters is because the document references all other files and content included in the page, such as CSS style sheets and JavaScript scripts.
For that reason, if delivery of the HTML document is slow (i.e. has a lot of latency), that puts the brakes on the entire website experience. It directly affects Core Web Vitals like First Contentful Paint (FCP) and Largest Contentful Paint (LCP).
The two main factors that affect the loading time of the HTML document are:
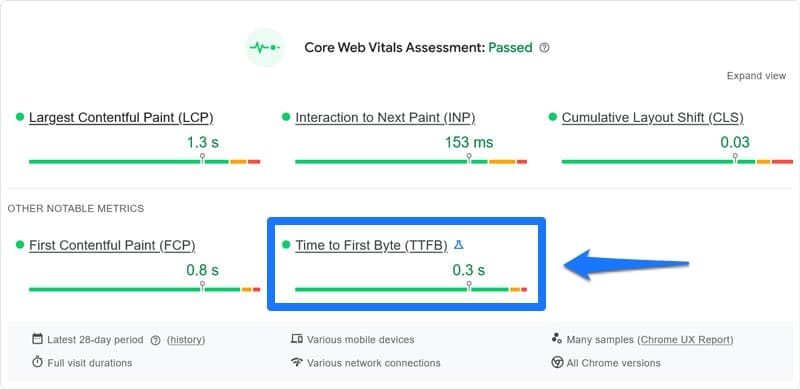
- Time to First Byte (TTFB): This means how quickly the first piece of data arrives from the server in the browser. Google recommends a TTFB of 0.8 seconds or less.
- Document download time: Depends on the complexity and size of the document.
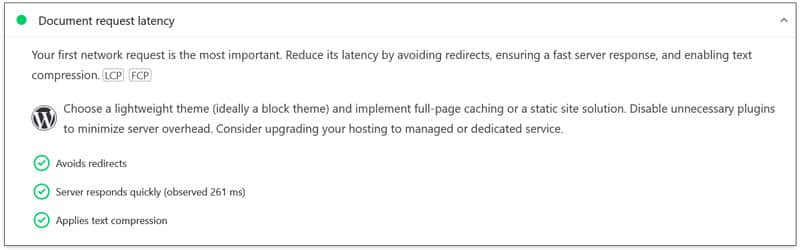
For that reason, Google’s new insight audit checks three aspects that impact document request latency:
- Is the request redirected one or more times?
- Does the server take longer than 600ms to respond?
- Was the response compressed or not?
This folds three earlier metrics, namely redirects, server-response-time, and uses-text-compression, into one comprehensive insight.
How to Measure Document Request Latency
While document request latency becomes a default insight in Google Lighthouse and PageSpeed Insights in October 2025, you can already test your site for it before that date.
When you measure your website performance in either of those tools, you will find a button on the results page that says Try insights. Click it to switch between the new metrics and classic audits.
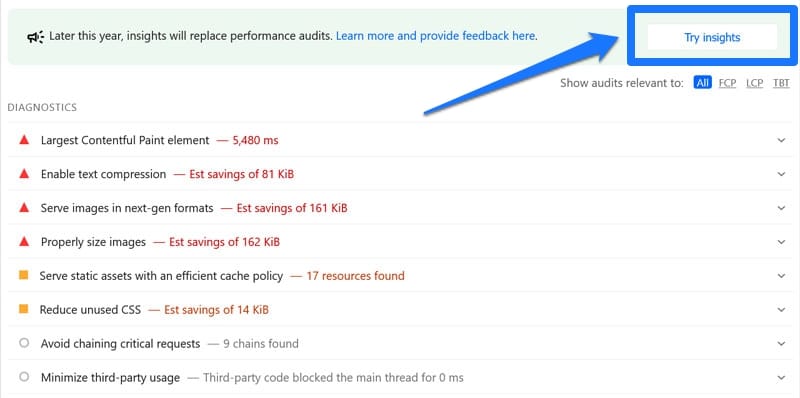
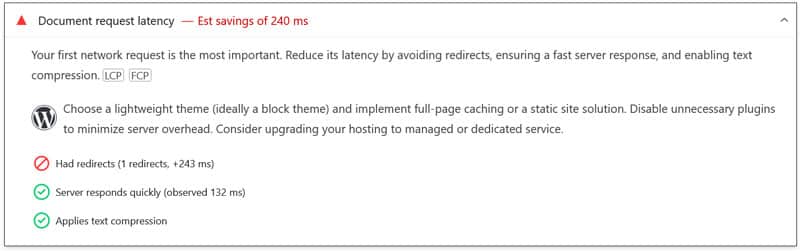
If your site fails any of the checks audited by document request latency, you will find a notification of that under Insights. Otherwise, you can find it under Passed Audits.
Take note that, even if document request latency doesn’t indicate a problem, your visitors might have a different experience. The server response the insight measures is lab data, which can be different from real-life data. So, if it’s available, additionally check the time-to-first-byte timing on top of Google’s performance reports.
Another possibility to get real-life data is real-user monitoring (RUM).
How to Improve Document Request Latency Manually
The speed at which your visitors’ browsers receive your site’s HTML document mainly hinges on the following factors:
- How fast and powerful your server is
- Visitor distance to the server (the further away, the longer data has to travel)
- The amount of work needed to render the HTML
We’ll cover how to improve each of these issues manually first. Afterwards, we’ll also discuss a simpler way for less technical users.
1. Address Slow Server Response
The first thing to look at is the machine your website is hosted on—the server. If your speed test indicates that your server contributes to document request latency by responding late, you have the following options to improve it:
- Change your hosting: Some hosting providers are better than others. If you suspect the quality of your hosting is contributing to a lack of performance, maybe it’s time to move your site somewhere else.
- Upgrade your plan: Another possibility is that your hosting plan is not suitable for your needs. Shared hosting especially can come with performance losses. Consider upgrading to a higher plan with better hardware, more memory, and fewer sites running on the same server.
- Update the server stack: Besides hardware, a slow server response can also be a software issue. For example, updating your server’s PHP version, database engine, or HTTP implementation can significantly boost performance. Therefore, check your basic server technology.
- Use a Content Delivery Network (CDN): Sometimes the problem is the distance between the server and the visitor. A CDN can help with that by placing your website files across a network of servers around the world, so visitors can always receive them from the closest source.
2. Enable Caching
Caching means storing copies of files in a temporary location to make them available for quick access. For example, it’s possible to cache your site’s HTML, CSS, JavaScript, and image files, so browsers can access them more quickly and process your website’s document faster.

The two main types of caching are server and client-side caching. The first happens on the machine that houses your website, the second on the visitors’ side, meaning in the browser on their computer.
Client-side caching is built into modern browsers and happens automatically. Server caching, on the other hand, is up to the website owner—meaning you.
Here, too, you have different options:
- Page caching: Saves an already-compiled HTML version of a web page on the server. That way, it doesn’t have to be created from scratch for every visitor.
- Object caching: Here, the server saves frequent database requests for reuse, such as product searches on an online store.
- Fragment caching: This means caching only specific website elements, usually static files like images.
- CDN caching: We’ve already talked about this above.
| 📖 Check our detailed caching guide to learn how to enable caching manually. |
3. Switch on Compression
Compression means shrinking files to make them faster to transmit. If you’ve ever created a zip file, you already are familiar with the concept. It’s also possible to apply it to website files and is one of the things the document request latency checks for.
That’s because compression shrinks the size of files. Smaller files arrive more quickly at the visitor’s browser, so it can start rendering the website faster.
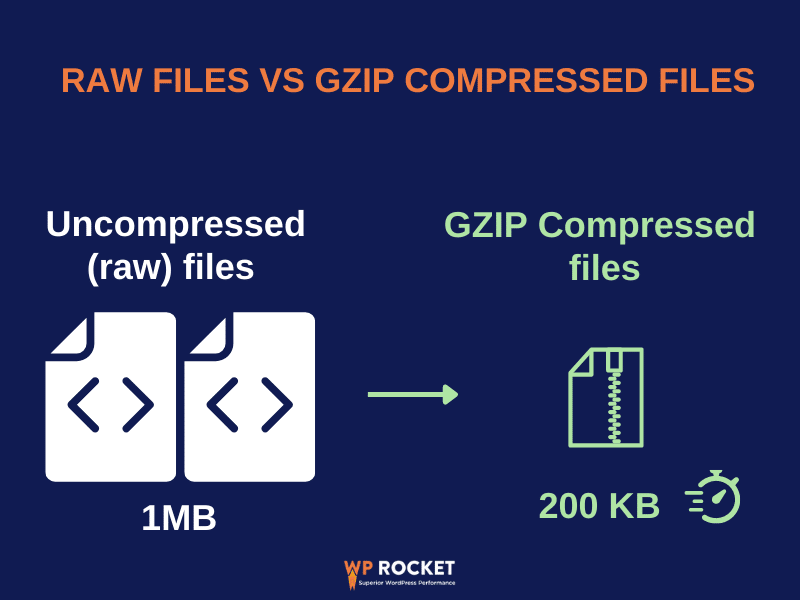
In the context of document request latency, the most relevant type is text compression. Here, you have two main options: Gzip and Brotli. Both are supported by all modern browsers.
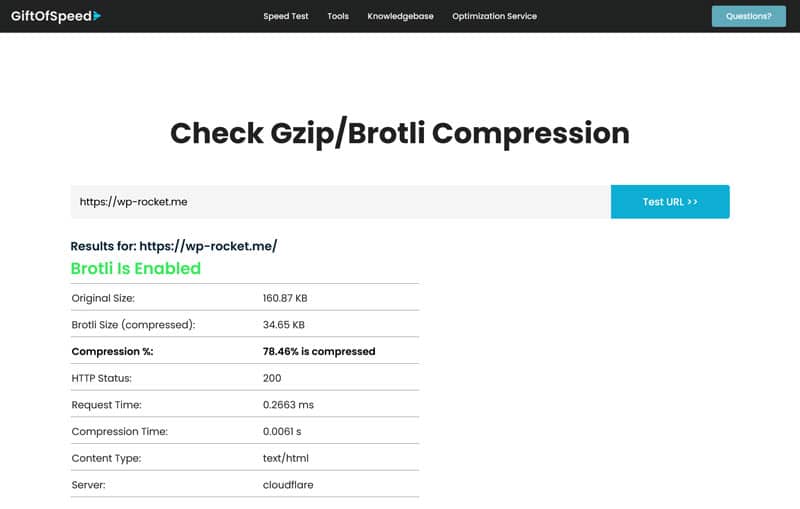
To find out if your website is already using compression, use a testing tool like Gift of Speed.
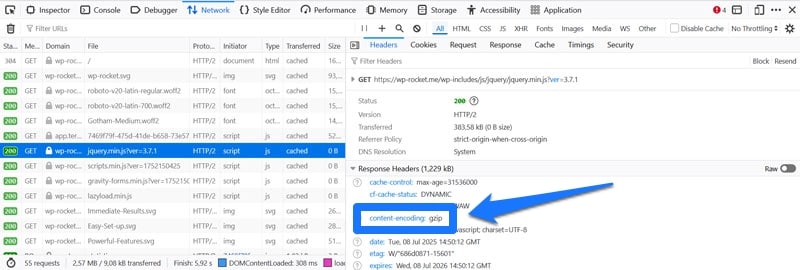
Alternatively, you can also look at your site’s HTTP headers in the Network tab of your web development tools under content-encoding.
If you find that your site is currently uncompressed, we have an article with detailed instructions on how to enable text compression. CDNs often automatically compress files (in case you are using one), but it helps to double-check.
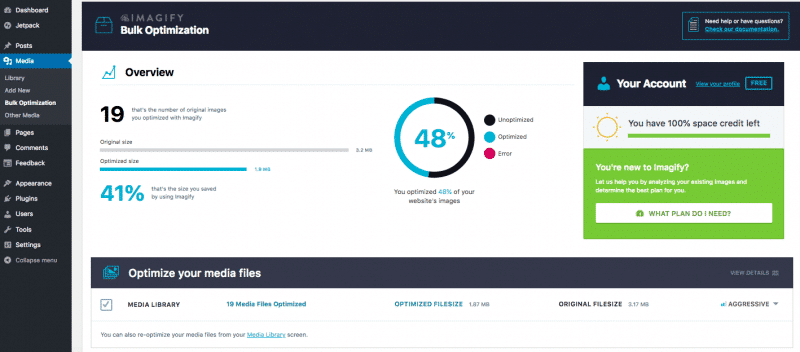
| 💡Quick tip: Another type of page element that can greatly benefit from compression is images. They often make up a large part of a web page’s data. Compressing them is one of the main ways to optimize images for performance besides using modern image formats like WebP and AVIF and correctly sizing them. |
If you use WordPress, you can automate this process with a plugin like Imagify. It automatically converts, compresses, and resizes images uploaded to your site individually or in bulk without loss of quality.
4. Use Minification
Minification is another example of how to shrink the size of text files like HTML documents to make them faster to transmit. It’s the process of removing whitespace, tabs, comments, and other formatting from code that makes it more human-legible but is unnecessary to run it.
There are different ways to apply minification to your website files:
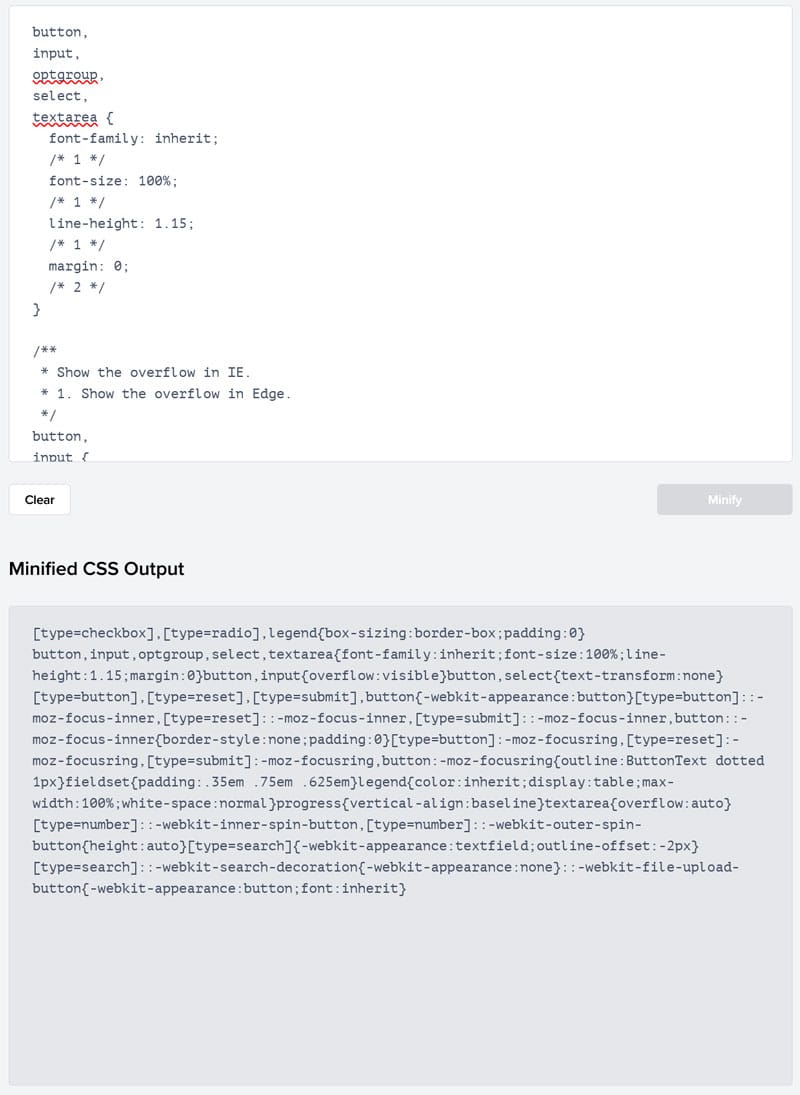
- Online tools: You can do it manually with an online tool like Minifier. Simply copy and paste your code, then run the tool to minify it.
- Offline tools: Most code editors and IDEs (integrated development environments) have extensions that can minify code files automatically. There are also downloadable standalone tools.
- WordPress plugins: If you are running a WordPress website, there are several plugins you can use to minify website files (including WP Rocket, more on that later).
| 👉 Check our list of the best free minification tools for more information. |
5. Avoid Redirects
As discussed, another thing the document request latency insight audit specifically checks for is redirects.
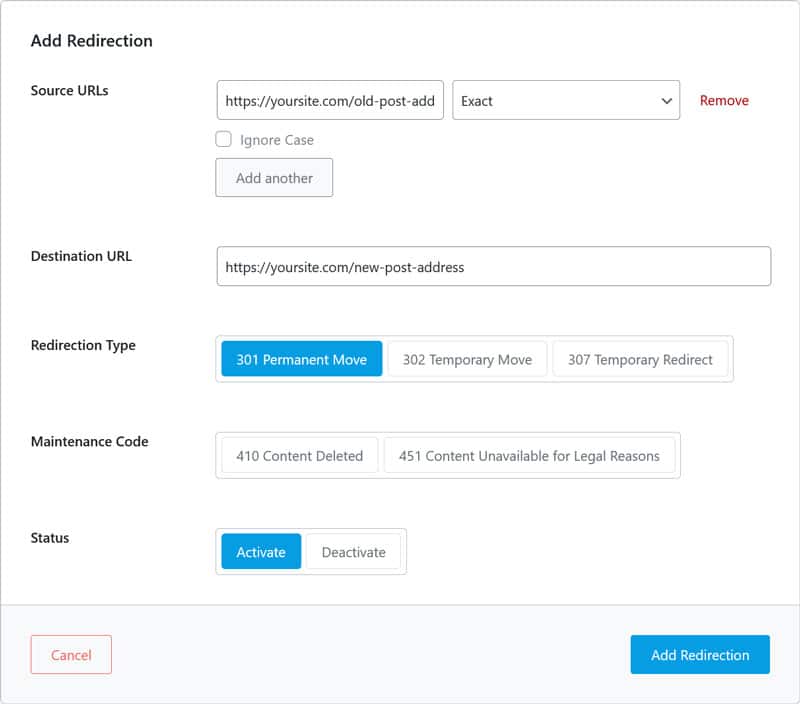
A redirect is like a digital signpost saying, “the web page you are looking for isn’t here; you can instead find it at the following location.” It’s a very useful tool, especially if you move your site to a new domain, a page to a new URL, or delete content and don’t simply want visitors to land on a 404-error page.
The problem is that redirects add time to the loading process and document request latency. For every redirect, the browser has to start a new HTTP request. That’s why it’s especially problematic if you have several redirects in a row—it adds up.
It’s also why it’s important to use field data to measure TTFB. While you usually use final page URLs in speed tests, real-life visitors may access your site through a different address and encounter redirects along the way.
You can find redirects and redirect chains by scanning your site with a tool like Screaming Frog or Sitebulb. They will also show up in the Network tab of browser development tools (look for 301 or 302 status codes), in the waterfall diagram of performance tools, or as a warning in PageSpeed Insights.
Once you have identified redirects or redirect chains on your site, eliminate them. Make sure your links and site address point directly on the final website URL with nothing in between. If that’s not technically possible, at least avoid more than one hop.
One thing that helps is to set up the Strict-Transport-Security HTTP header. It forces browsers to use HTTPS for current and future requests, eliminating redirects from the HTTP to HTTPS version of your site.
6. Reduce Your Document Size
The final way to address document request latency is to make the HTML document as small as possible. This reduces the amount of work the server and browser must do to download, prepare, and process it.
The way to do that is to audit your site and web pages for ways to eliminate non-essential elements:
- Reduce third-party scripts: Remove calls to JavaScript files that are not absolutely necessary.
- Disable non-crucial plugins: Plugins often add unnecessary markup, styles, or JavaScript to the page. To avoid that, get rid of any extension you don’t need.
- Use a lean theme: Choose a theme or template with minimal HTML bloat and an efficient layout structure.
- Remove page elements you don’t need: See what clutter you can get rid of to make your pages leaner.
- Optimize media: Avoid hosting videos on your own server; embed them from a third-party service like Vimeo instead. In addition, follow the image optimization guidelines mentioned above.
Reducing Document Request Latency with a WordPress Plugin
Trying to manually address document request latency can be a bit intimidating and tedious. If you are looking for a better way to optimize your WordPress site, you can also use a performance plugin like WP Rocket.
All you need to do is install and activate the plugin and it automatically implements many of the steps mentioned above, including:
- Caching (with a separate mobile cache)
- GZIP compression
- Minifying CSS and JavaScript files
This helps reduce your website’s document request latency without any active involvement on your part. The plugin also gives you the ability to easily connect your site to a CDN (including our own RocketCDN) to further improve server response time across the board.
Besides that, it comes with many other features to make your site faster:
- Lazy loading for images and videos
- Deferring render-blocking resources
- Preloading cache, links, external files, and fonts
- Database optimization
As a matter of fact, WP Rocket implements 80% of performance best practices by itself, and you can switch on additional features mostly by simply checking a few boxes.

It’s a much more beginner-friendly way to improve the loading speed of your HTML document than doing it by hand.
Pass Google’s New Insight Audit
Document request latency is just one factor in your website’s performance. However, it can be an important one, which is why Google is adding a dedicated audit for it to their speed testing suite.
If you find your website flagged in this way, take it as a sign to look at your server and basic site infrastructure. It could be impeding the user experience of your site.
If you are looking for a holistic solution to improve your site’s loading speed beyond that, give WP Rocket a try — risk-free for 14 days!