
Table of Contents
Last update on
Google Fonts is one of the most popular ways to add custom typography to websites. Custom fonts make your site look better, more engaging, and help preserve your branding online. Self-hosting your Google Fonts can further improve this process from a control, performance, and privacy standpoint.
This post will cover what exactly Google Fonts are, what self-hosting means, its pros and cons, and step-by-step instructions for three different ways to host Google Fonts locally on your WordPress site. We’ll also do a case study where we test self-hosting against remote-hosting and see which performs better.
What Are Google Fonts?
Before getting to Google Fonts, let’s talk about web fonts first. As the name suggests, they are typefaces you can display on websites. In the past, those were limited to fonts already present in the computer operating systems of your visitors.
But then CSS3 made it possible to load third-party fonts into the browser. Since then, websites can show almost any typography, opening up a lot of web-design possibilities.
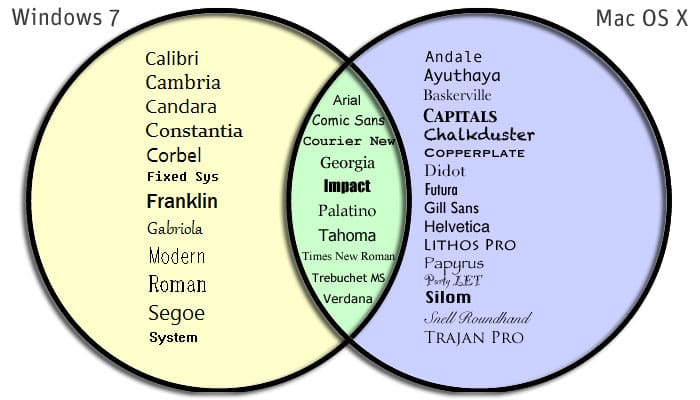
One of the biggest libraries of web fonts is Google Fonts, a service run by Google.
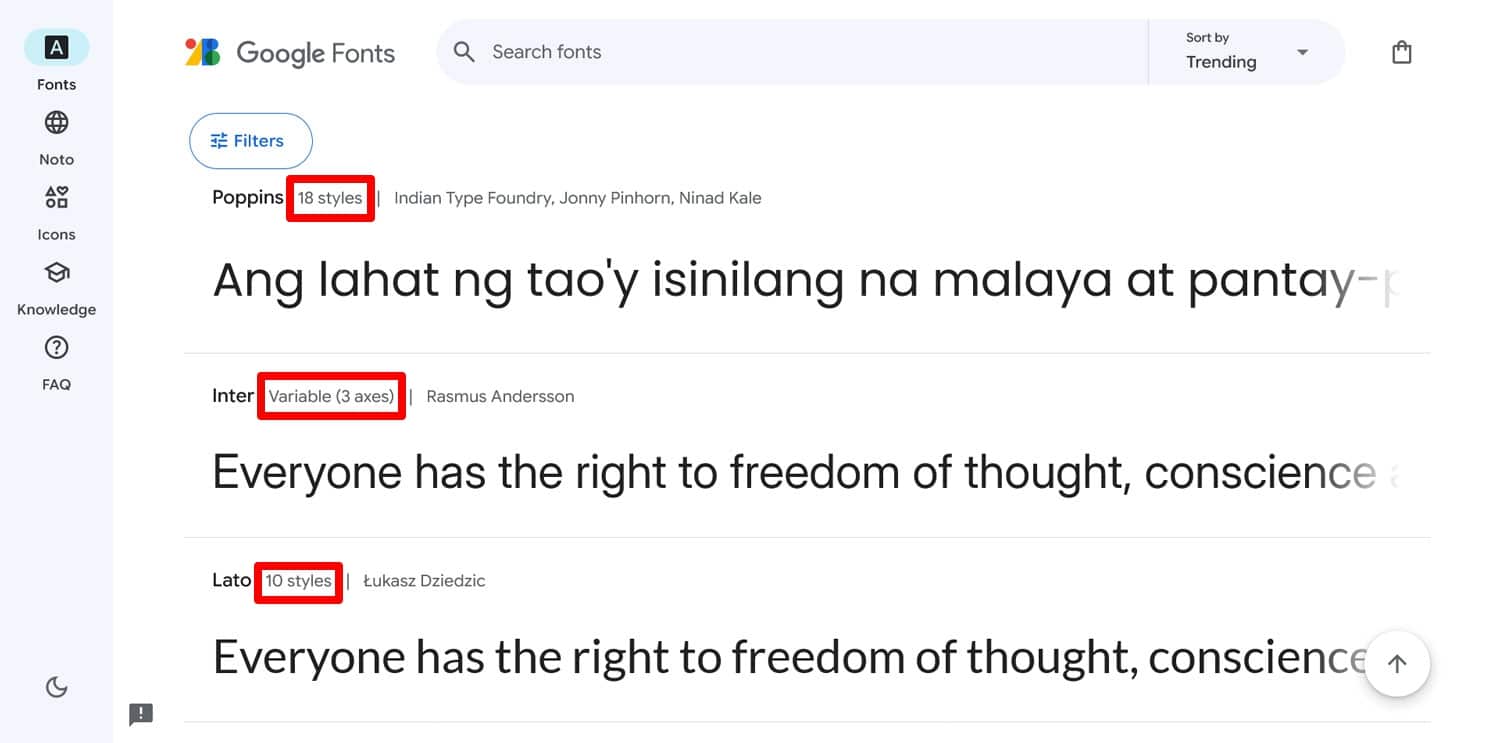
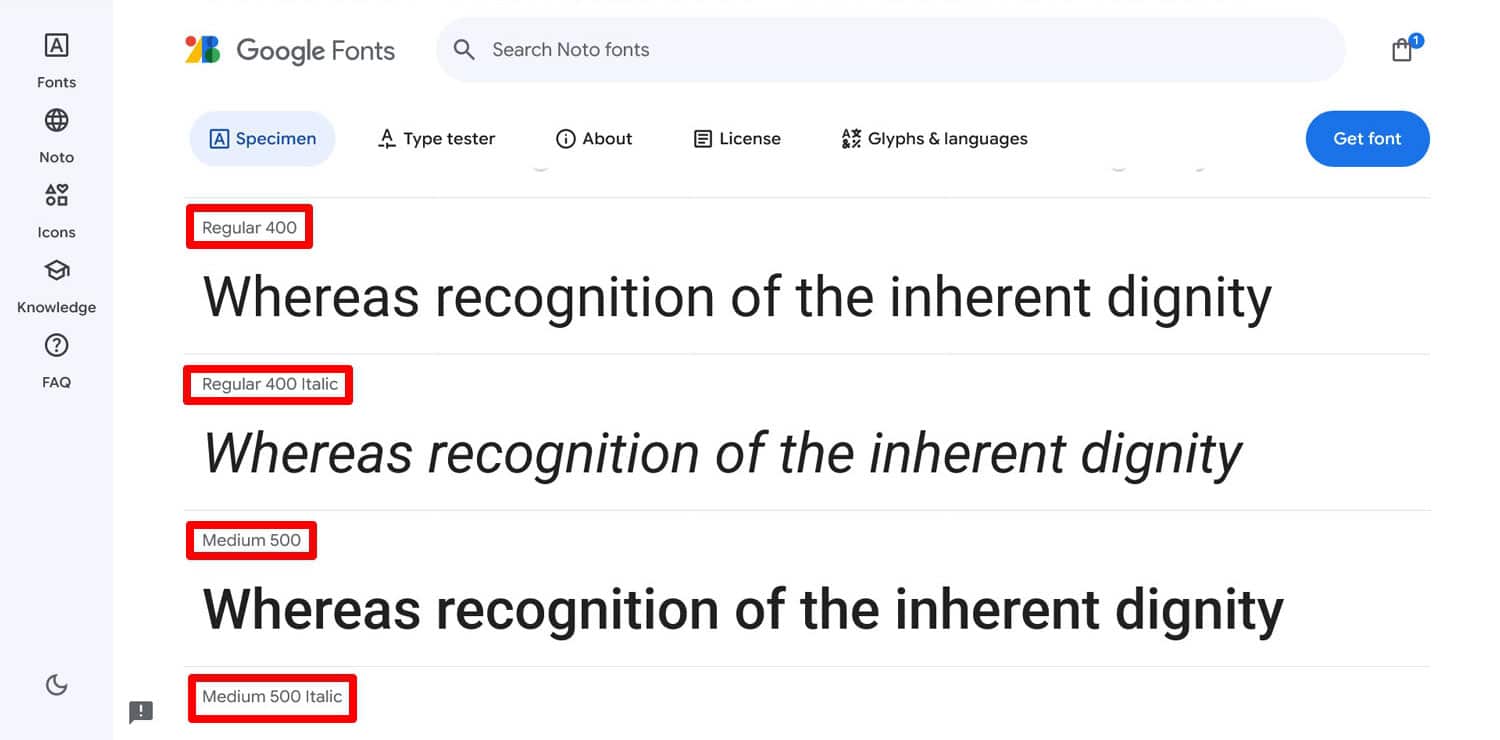
At the time of this writing, it contains almost 1,800 different font families (you can find our favorites here) covering hundreds of languages. You’ll find many different styles from elegant to adventurous.
The library is searchable and you can filter fonts in many ways to find something you like. Most fonts are also available in different styles and weights.
What’s special about Google Fonts is that everything it offers is open source. That means the fonts are free to use by anyone and for any purpose. Google takes care of the licensing.
In addition, Google also takes care of the hosting for you. You can simply load fonts into your site, and Google takes care that they’re delivered as fast as possible, in the correct file format, and optimized for display. They even provide the necessary code.
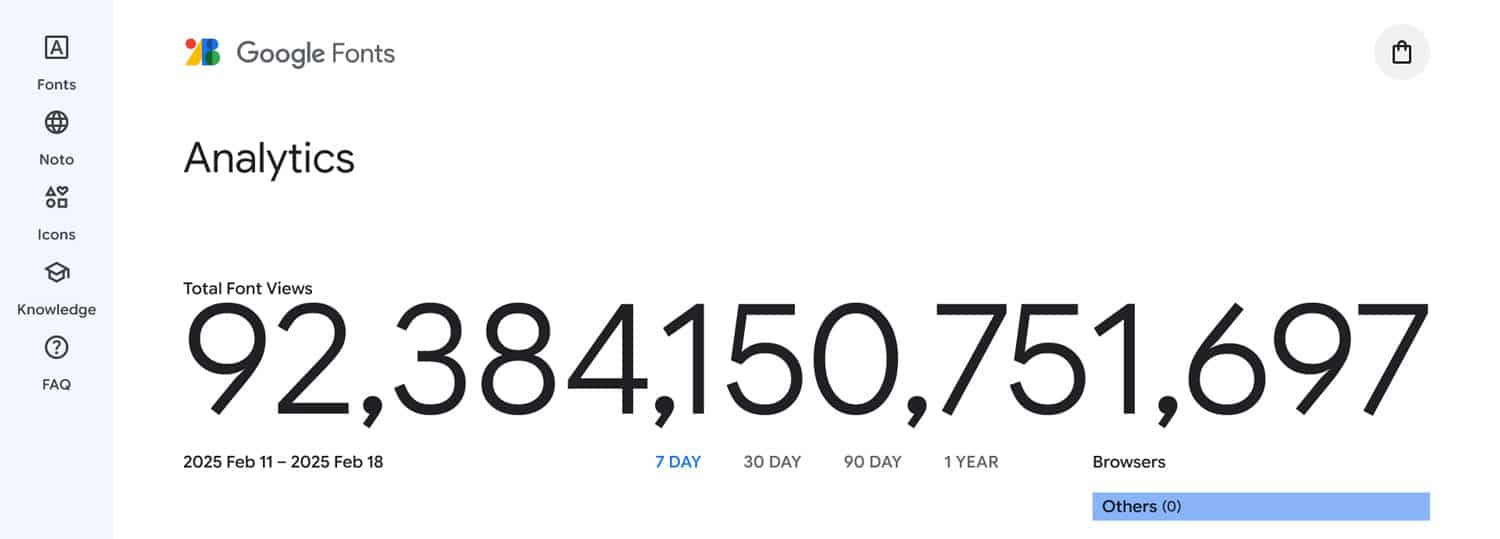
This convenience has made it very popular. Fonts hosted on Google Fonts have been viewed over 92 trillion times across the web (February 2025).
What Does Hosting Google Fonts Locally Mean?
Google Fonts basically acts like a CDN for font files. Embed a font on your site and your visitors’ browser will pull it remotely from Google’s servers to make it appear on your site. In this case, the fonts are hosted remotely, because the source is removed from your website.
In contrast to that, when you self-host Google Fonts, you take the font files and place them on the same server as the rest of your website instead. That way, they don’t originate from another server but directly from your site. The rest of the process stays mostly the same, only the font source changes.
Self-Hosting Google Fonts: Pros & Cons
There are numerous reasons to consider hosting Google Fonts locally.
Control
On Google’s servers, the font files are completely outside of your control. You can load them into your site but otherwise have no access to them.
This isn’t usually a problem. As mentioned, Google’s servers are optimized for fast delivery and their service is very reliable. Still, you might want the font files on your own site from a control point of view.
The most important issue is that it gives you control over the expiration period for caching. This helps with the notice to “Serve static assets with an efficient cache policy” you might receive when speed testing your website.
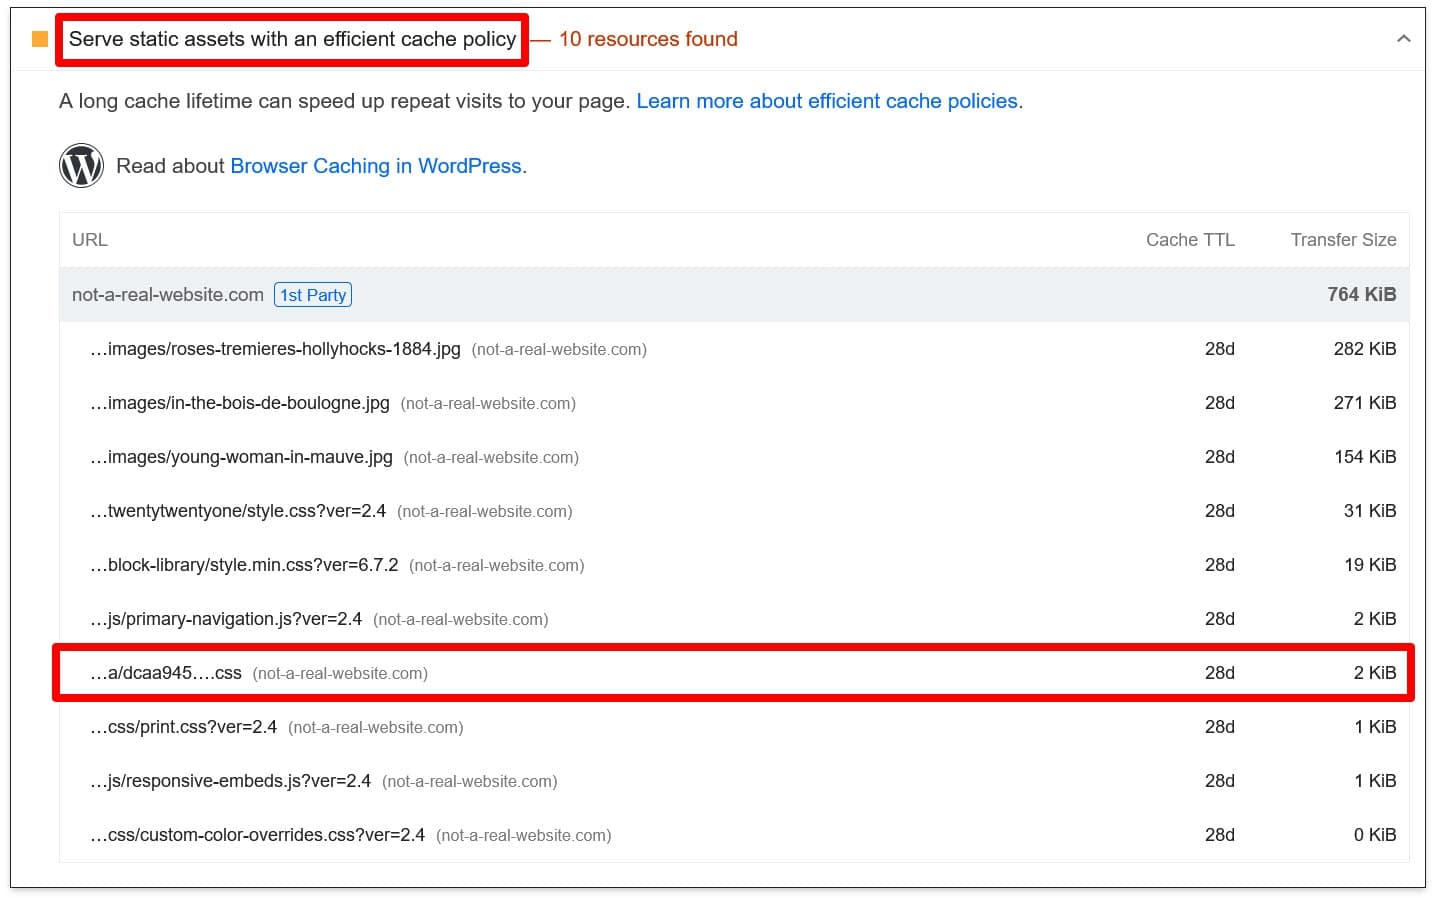
Self-hosting Google Fonts allows you to increase the caching period so repeat visitors don’t have to download the font files every time they come to your site. In addition, it allows you to pre-load your font files. Both steps help make your site faster.
Performance
Fonts that load remotely are third-party resources, which can be a factor in website performance. One of the ways to make sites faster is reducing such requests.
While Google’s servers are usually fast, you are dependent on that being the case. If they have a problem, it also becomes yours.
We will run a test below to measure the performance effects of self-hosting vs third-party hosting fonts.
User Experience
A special consideration in website performance is Core Web Vitals. These are metrics Google uses to gauge important parts of the user experience on websites.
They measure how quickly web pages appear, how well they respond to user input, and how visually stable they are during load. Core Web Vitals are also a ranking factor.
Web fonts are of particular concern for Largest Contentful Paint (LCP) and Cumulative Layout Shift (CLS). That’s because they can slow down overall page loading speed and lead to layout shifts through temporarily invisible or unstyled text when they don’t load fast.

That’s something hosting fonts locally can help with.
GDPR Issues
One of the main reasons for self-hosting Google Fonts, in particular, is if your site caters to visitors from the European Union. The Google Fonts servers are located in the US, and the service possibly collects personal information like the IP addresses of your visitors when loading fonts.
European courts have ruled this practice illegal under EU privacy guidelines, so loading Google Fonts remotely could lead to legal problems. While you can ask your visitors for consent, you would have to use a fallback font before it is given, which could lead to design shifts.
Again, self-hosting alleviates this problem.
So, Should You Self-Host Google Fonts?
The question of whether or not you should host font files from Google locally on your website comes down to your particular situation. If you are subject to GDPR or similar privacy laws, doing so makes a lot of sense because it’s simply much easier from a legal standpoint.
The other big question is website performance. Here, it’s a good idea to just run a test. Get concrete results if your site is faster with remote-hosted or self-hosted Google Fonts. We’ll show you how to do that in the following section.
How to Manually Host Google Fonts Locally in WordPress
Manually self-hosting font files takes the most work. But it also helps you understand how the process works, so it’s worth going through to understand the technicalities.
1. Download the Font Files From Google
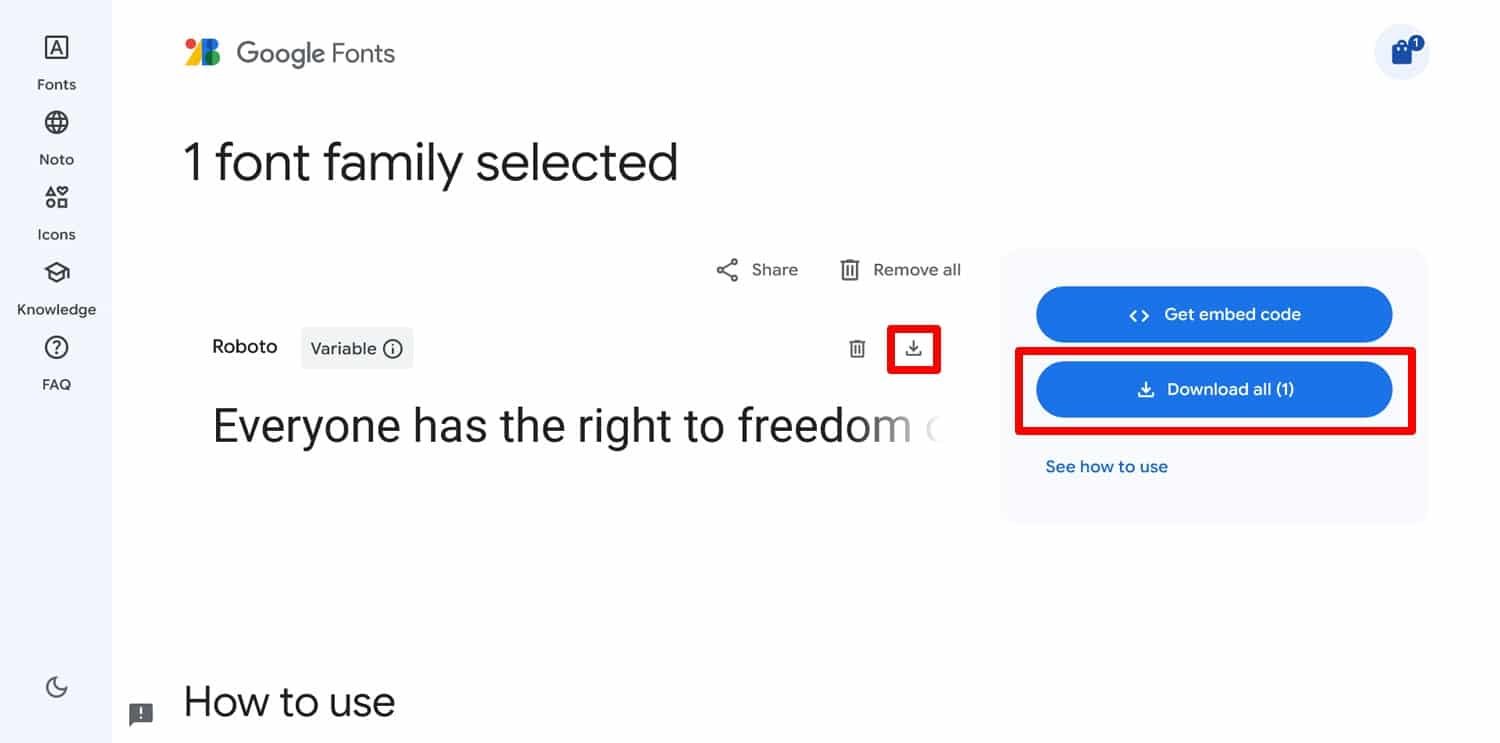
You can download files from any typeface on Google Fonts by using the Get font button in the upper right corner.
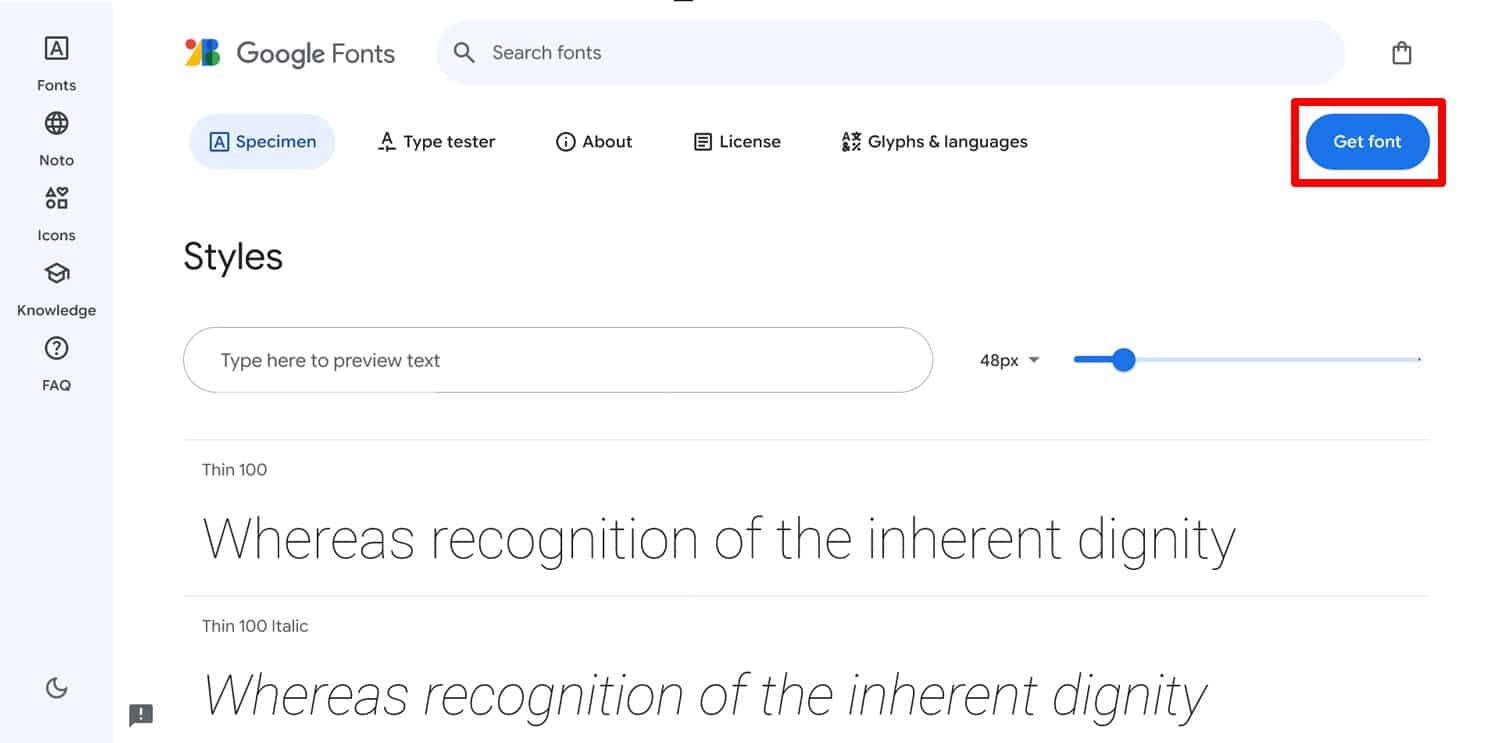
This will add them to your “shopping bag.” Once you have made your choices, click it to see the entire list. From here, you can acquire your desired files by clicking Download all or the button for each individual font family.
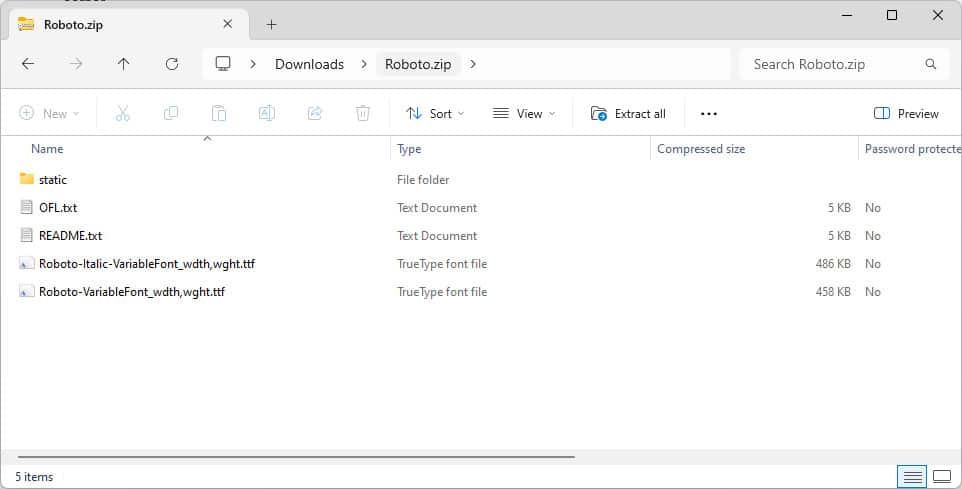
This should result in a zip file with font files on your hard drive.
2. Choose the Right Files and Format
Depending on your chosen fonts, you might find one or several files in your download. That’s because there are two types of web fonts—static and variable.
The difference is that static fonts have individual files for each font variation (e.g. italic, bold, and regular), while variable fonts save all of them in a single file.
One of the main consequences of this is that, when using a static font, you have to pick exactly which files to upload and embed in your website. It should be those variations you will actually use. Otherwise, you’re just making visitors download files they don’t need, making your site slower in the process.
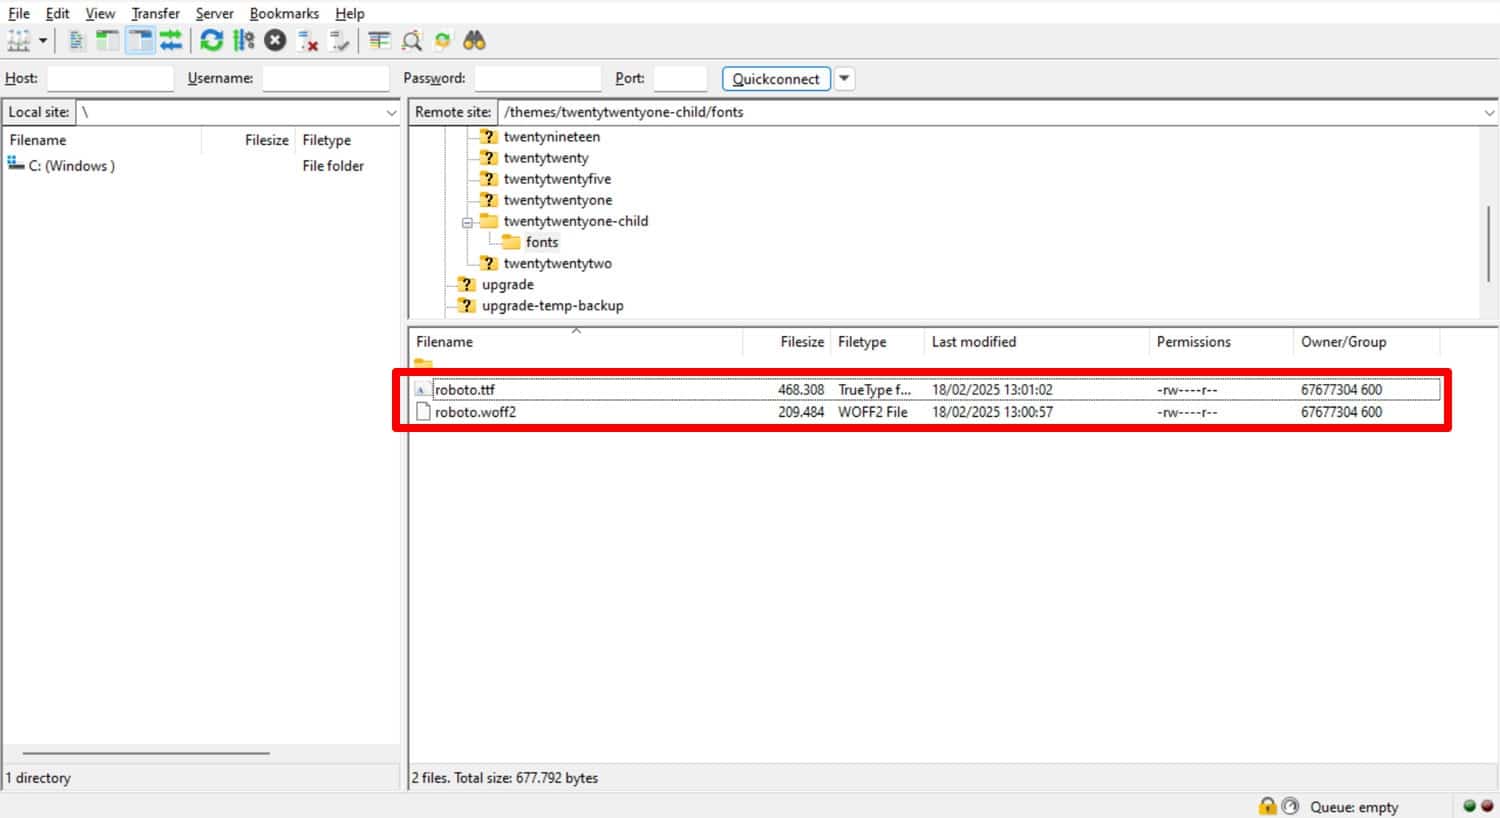
Another issue is file type. Google Fonts usually gives you TTF or TrueType Format files. But you usually want to have your fonts in the WOFF and WOFF2 formats as well. They are smaller, load faster, and are compatible with all modern browsers. In fact, many websites only use WOFF and WOFF2 but if you want to improve support for older browsers, you can also include TTF.
You can convert your files using tools like Convertio or CloudConvert.

3. Upload Fonts to Your Server
As you know, self-hosting means placing your Google Fonts on your own server, so that’s the next step. The easiest way to do this is to use an FTP client like FileZilla or a server management tool such as cPanel or Plesk.
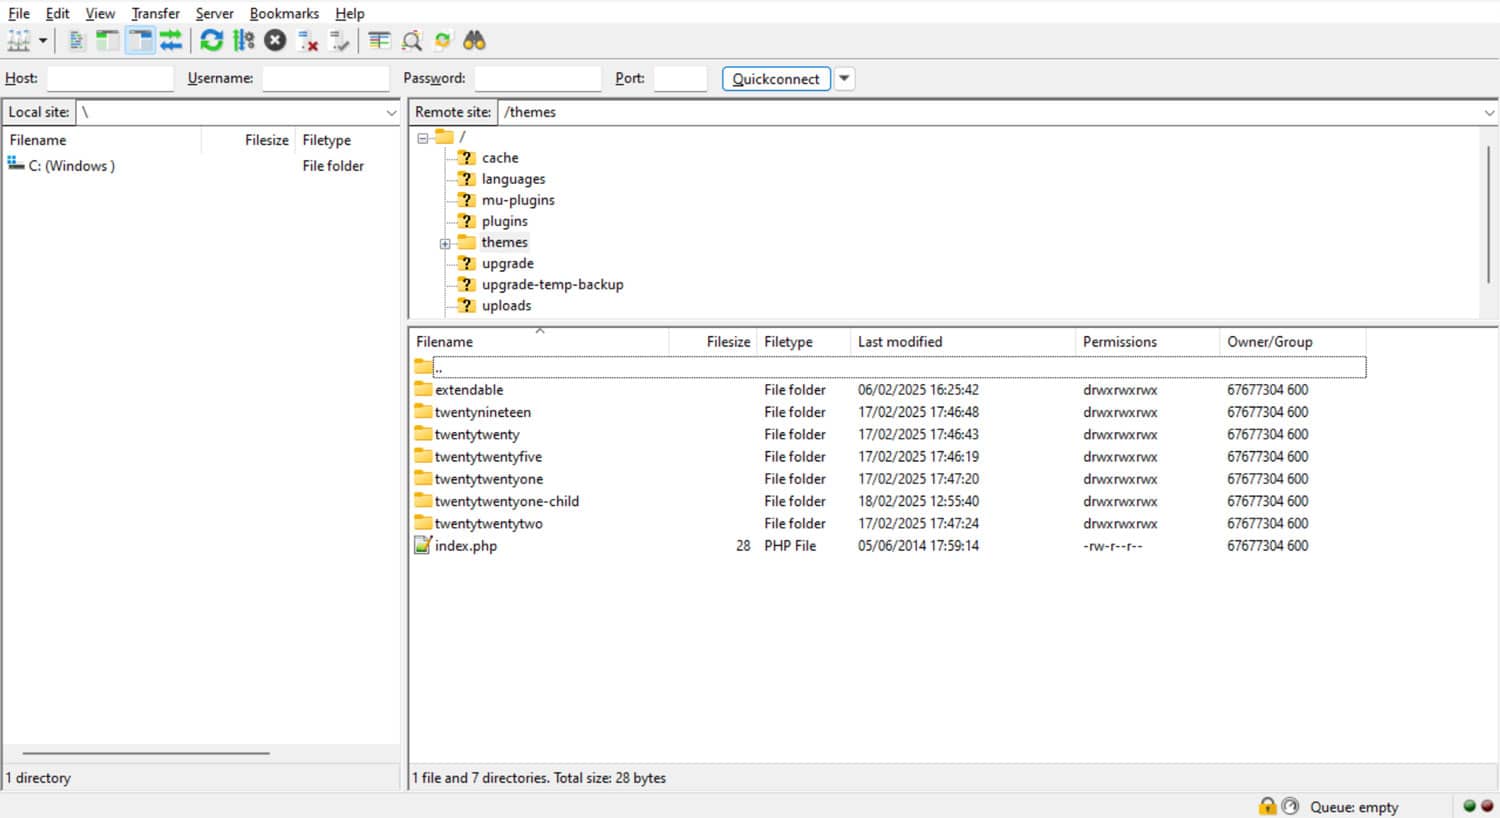
The files belong in your WordPress theme or child theme folder. Access it inside wp-content/themes and create a new folder, e.g. named “fonts”. Then, upload your font files into it.
4. Load Your Font Files With CSS
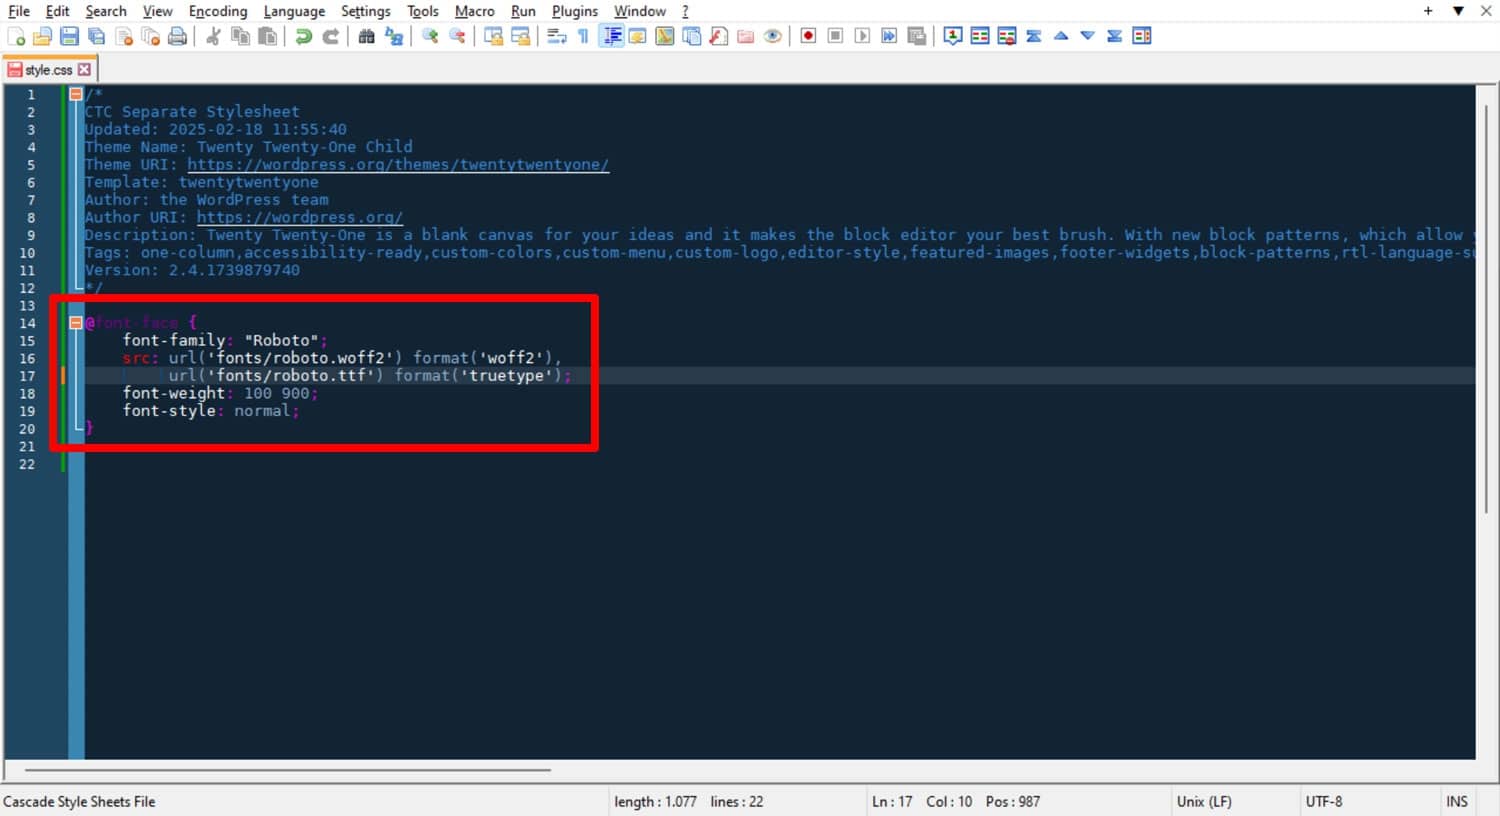
To be able to use the fonts on your website, you need to load the files first. This happens using the @font-face CSS rule. Here’s what it looks like:
@font-face {

font-family: "Roboto";

src: url('fonts/roboto.woff2') format('woff2'),

     	       url('fonts/roboto.ttf') format('truetype');

font-weight: 100 900;

font-style: normal;

}
Place this in your (child) theme’s style.css file or another place where you can add CSS to your site, such as the WordPress Customizer.
A few caveats:
- The example uses relative file paths. This works if you place the code in your theme’s or child theme’s style.css because it’s in the same location as your fonts directory. If you put the CSS somewhere else, like the WordPress Customizer, you might have to use absolute paths, like url(https://yoursite.com/wp-content/themes/yourtheme/fonts/roboto.woff2’) instead.
- font-weight and font-style tell the browser the thickness and style of the font (normal, italic) so it can use them correctly. You find this information in Google Fonts.
If you are using a static font, be sure to load all required variations (and only those). Each needs a separate CSS rule, like so:
/* Roboto Regular */

@font-face {

font-family: "Roboto";

src: url('fonts/roboto-regular.woff2') format('woff2'),

     	url('fonts/roboto-regular.ttf') format('truetype');

font-weight: 400;

font-style: normal;

}


/* Roboto Bold Italic */

@font-face {

font-family: "Roboto";

src: url('fonts/roboto-bold-italic.woff2') format('woff2'),

     	url('fonts/roboto-bold-italic.ttf') format('truetype');

font-weight: 700;

font-style: italic;

}
5. Apply Font
Once your font is available on your site, you can start using it. For example, here’s how to change the font of all headings:
h1, h2, h3, h4, h5, h6 {

font-family: "Roboto", -apple-system, BlinkMacSystemFont, "Segoe UI", Arial, sans-serif;

} 
Note that you’re declaring not just one font but several. The others are fallback fonts that are available on pretty much every operating system.
If, for some reason, your self-hosted Google Font doesn’t load, the browser will use the fallbacks instead. That way, your website will still somewhat look like what you intended it to instead of the browser using a random font that completely destroys the look. Use a fallback font generator to find good alternatives.
6. (Optionally) Disable Google Fonts in Your Theme
The final step is to check that Google Fonts are no longer loaded remotely. This is especially important from a legal standpoint.
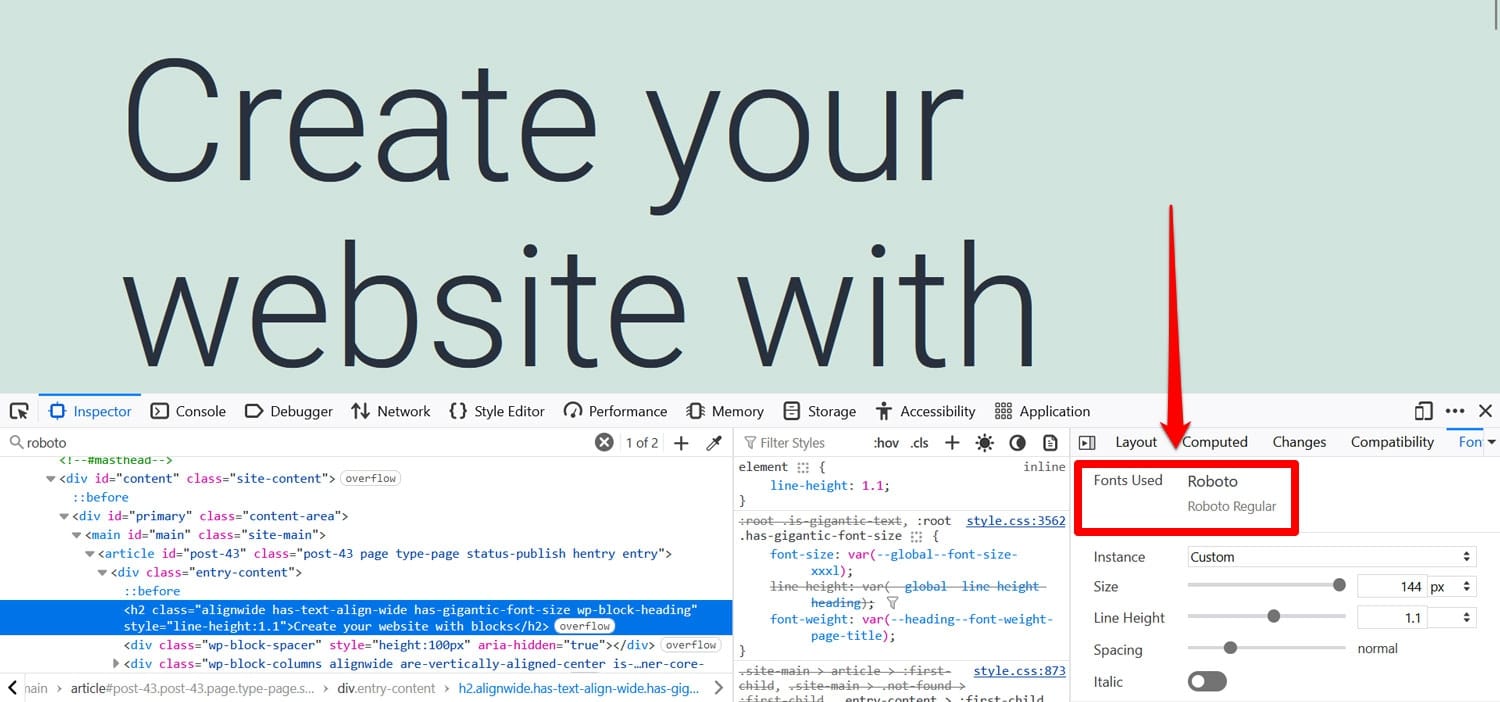
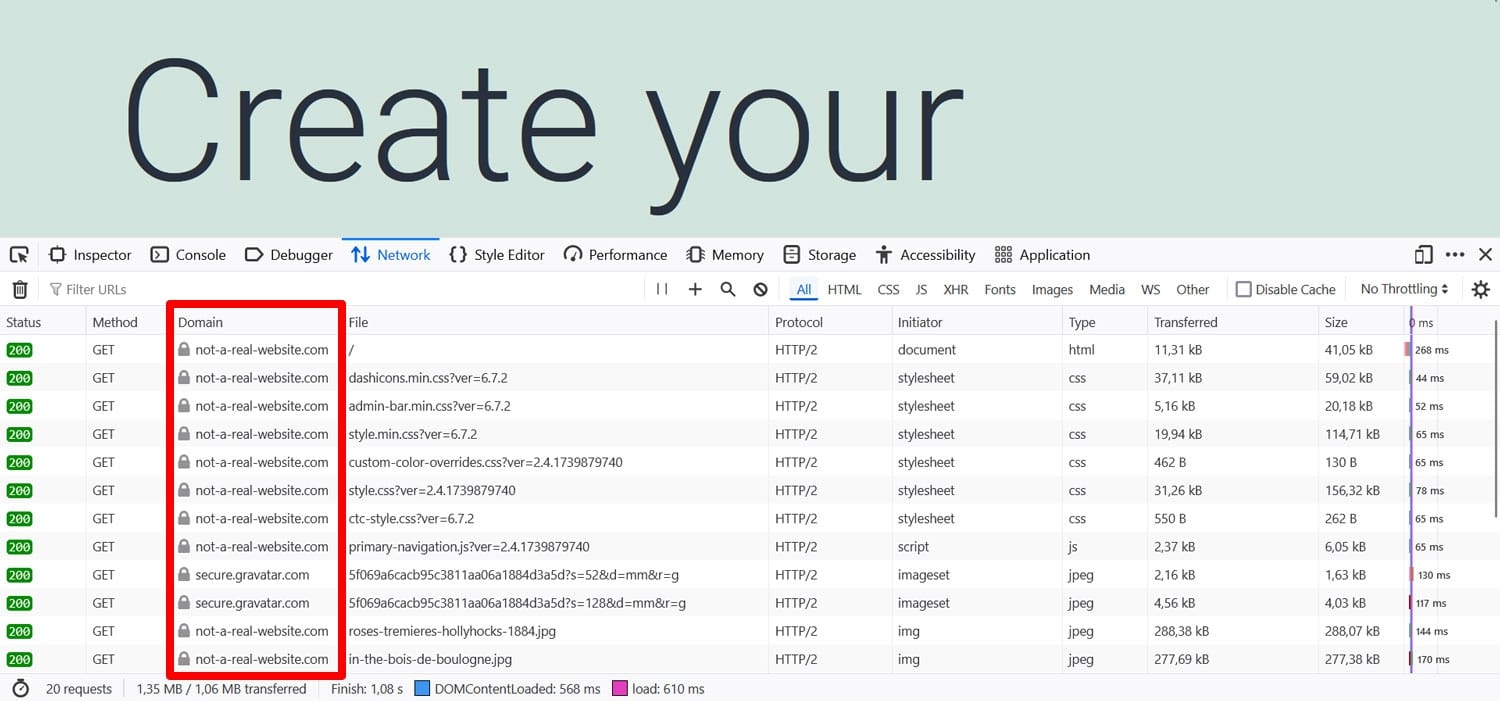
Open your developer tools again and go to the Network tab. Here, search for “https://fonts.googleapis.com”. If you can’t find any mention of it, all is well.
Alternatively, use this Google Fonts checker.

Should you still have remote-hosted fonts on your site, you need to disable them. How that works depends on the way they made it to your website in the first place.
If your theme is the one loading Google Fonts, it might have settings to disable them. If it doesn’t, there is the Disable and Remove Google Fonts plugin.
Should neither of those work for you, unfortunately, you have to manually track down how your website loads Google Fonts and remove it.
Hosting Google Fonts Locally With Native WordPress Options
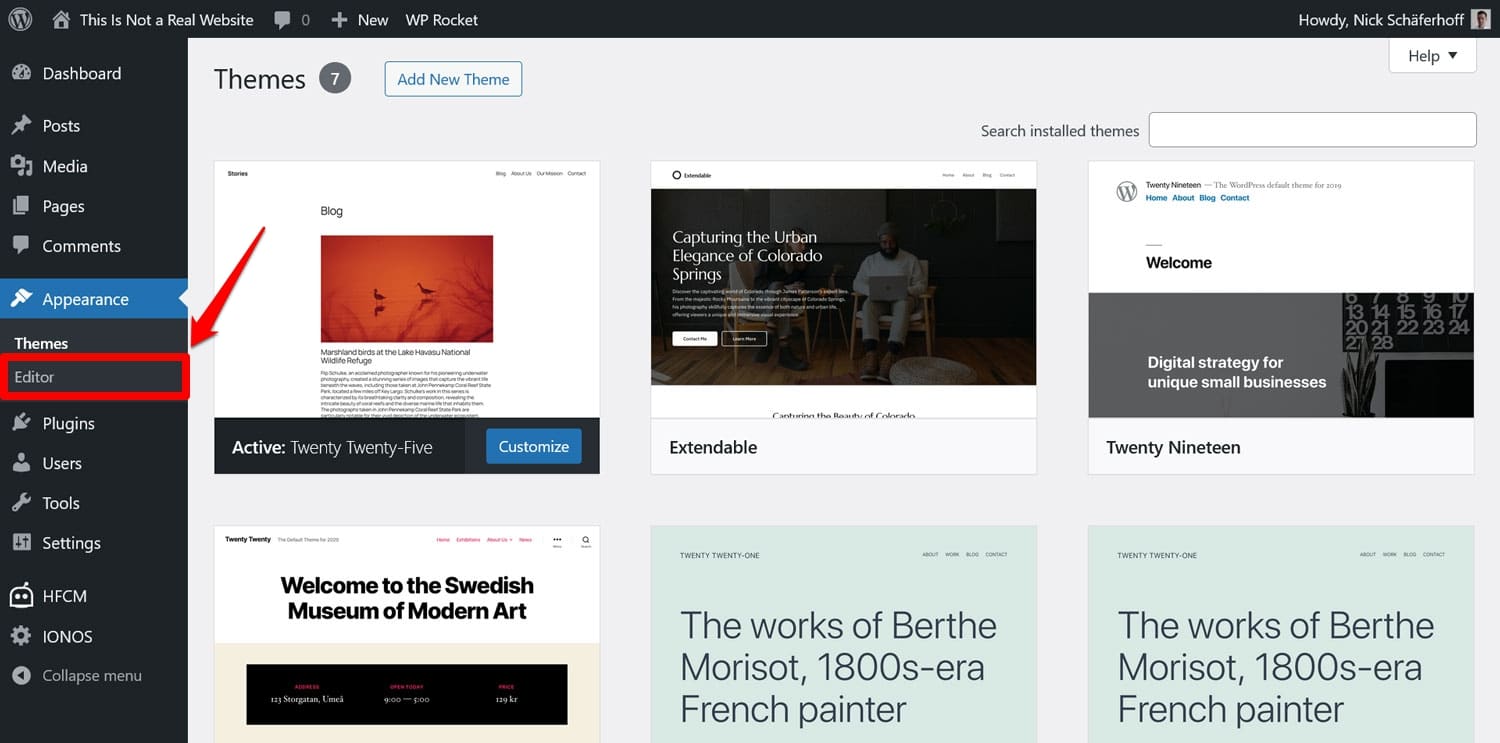
Since WordPress 6.5, the CMS has native functionality to host Google Fonts locally as part of the Site Editor. That means, you can only use it with a block theme.
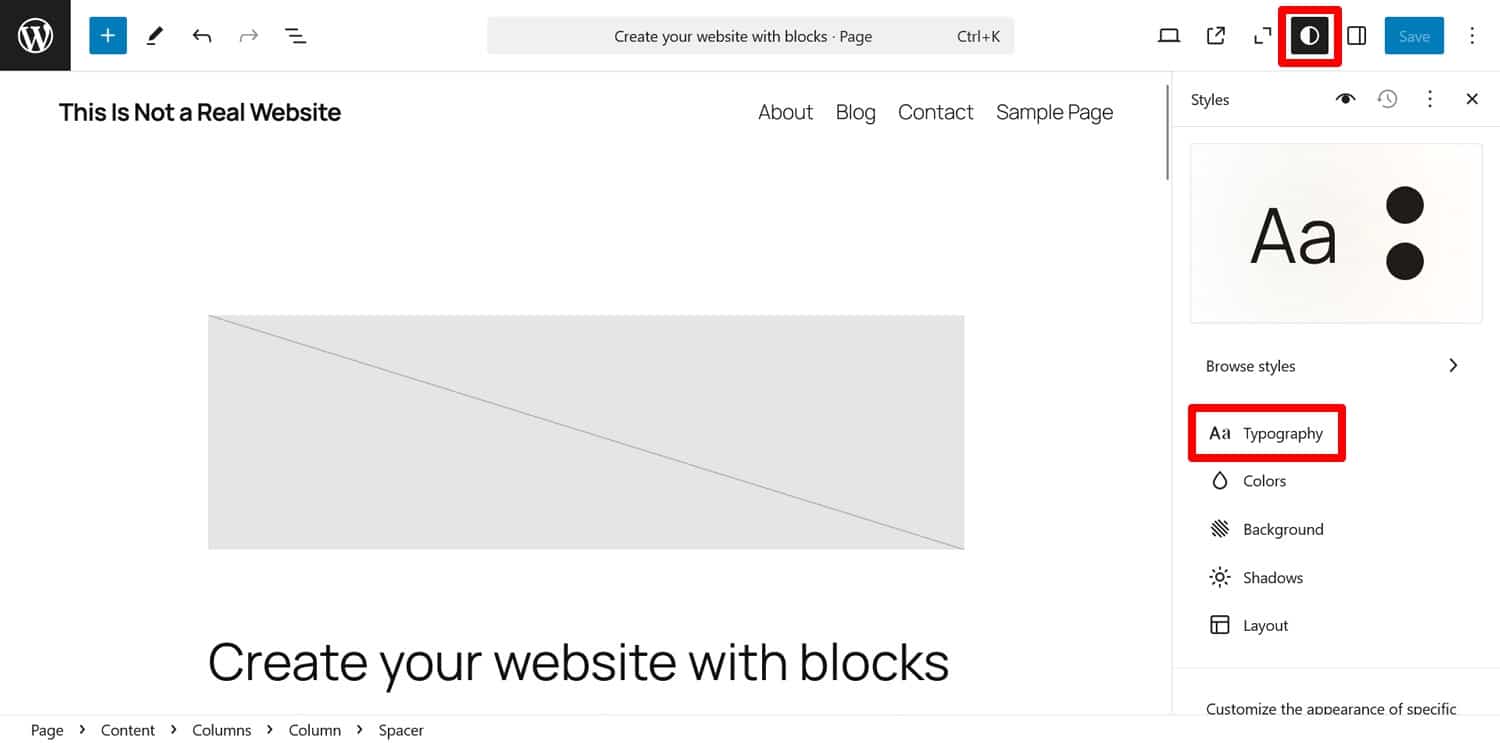
As a first step, go to Appearance > Editor in the WordPress dashboard.
Open the Styles menu in the upper right corner (it looks like a half-white, half-black circle). Here, click on Typography.
The following screen has a lot of options for customizing text on your website. To add and subtract typefaces, click on Manage fonts (the little icon next to Fonts).
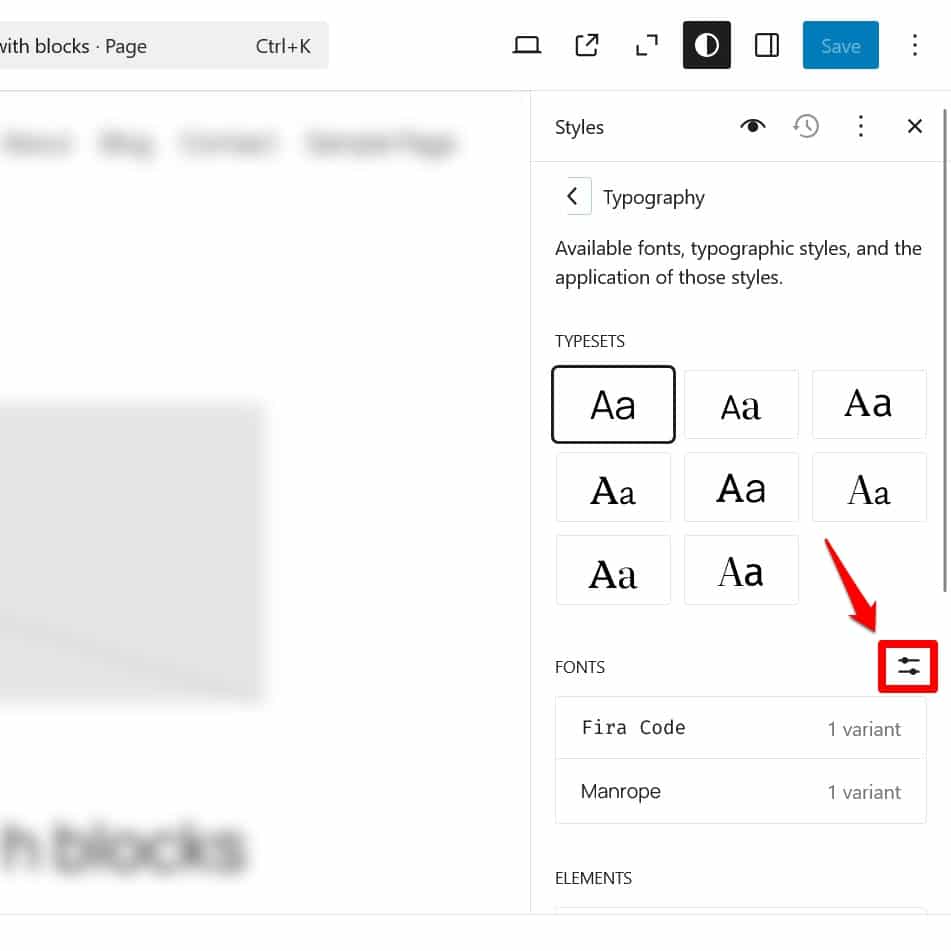
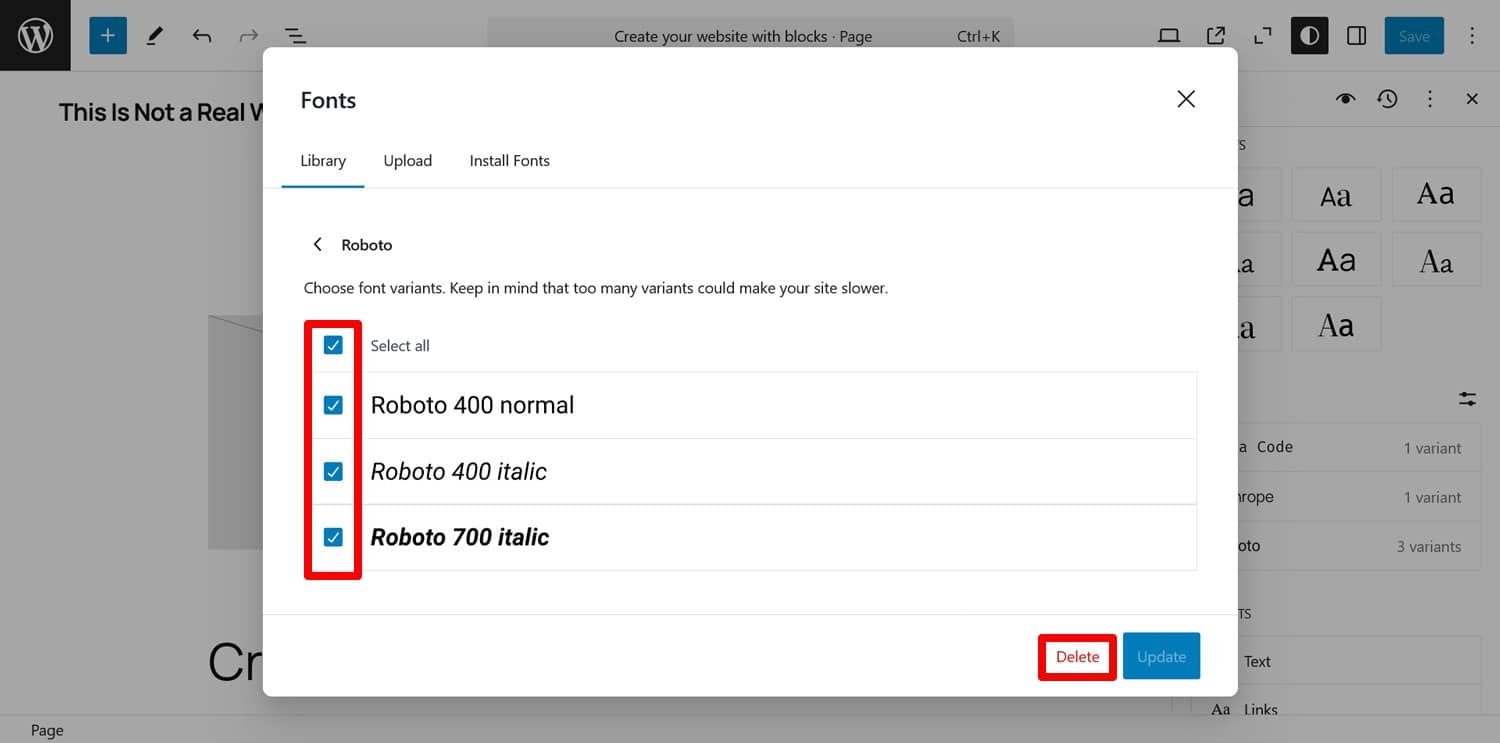
Here, you’ll find a detailed list of fonts installed on your site, including their variants.
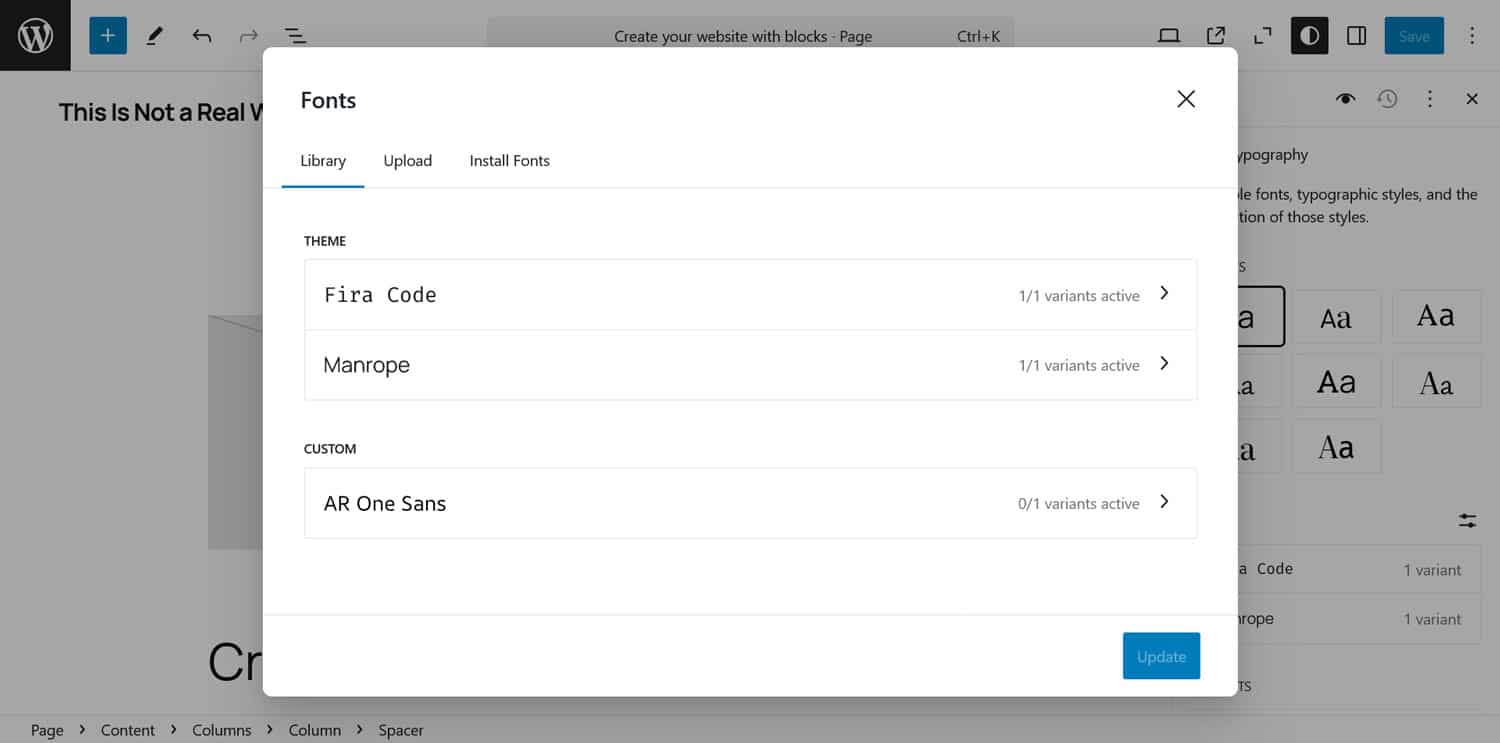
To add more, click on the Install Fonts tab and allow the connection to Google.
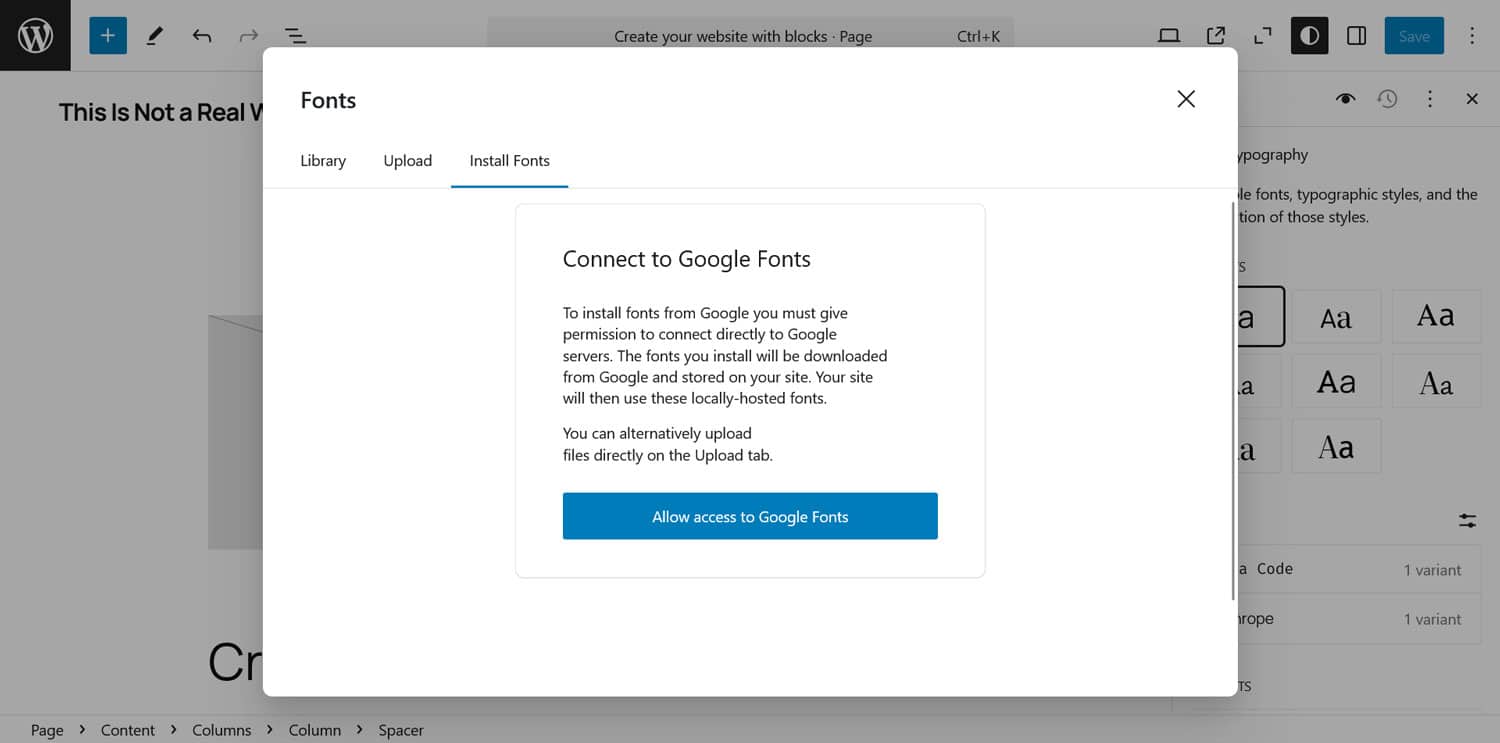
This opens up the full list of available fonts.
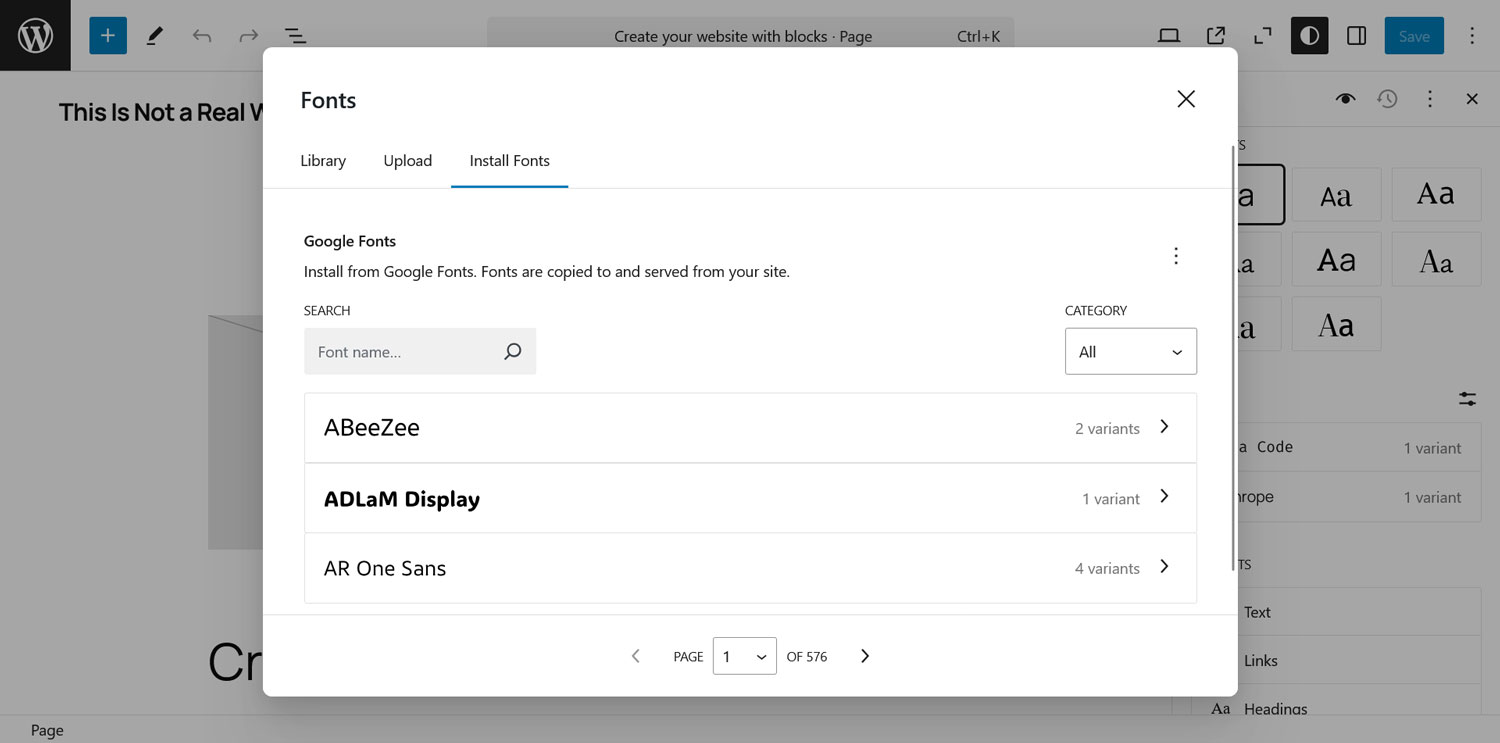
Search by name or use the drop-down under Category to find one you want to install on your site. Click it when you do. In the next screen, select the variants to install by checking the boxes, then click Install.
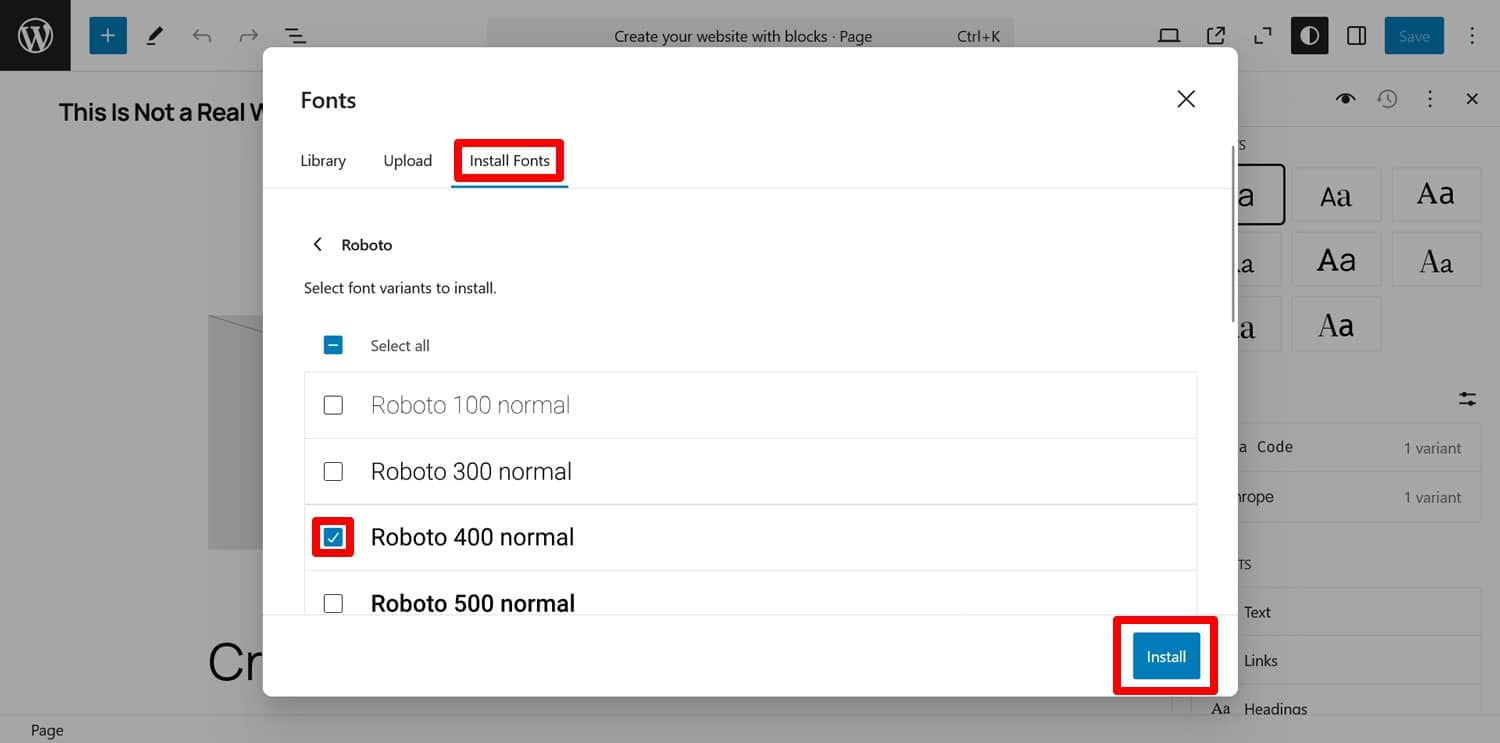
That’s it. The font will show up in your library from now on and you can assign it in the editor. WordPress automatically serves the font files locally.
If you want to disable and/or delete any fonts, you find options for that when you click on any of your installed typefaces.
Using a Plugin to Self-host Google Fonts
If you’re not using a block theme, if you don’t know how your website loads Google Fonts, and if you don’t have developer chops, your best bet for self-hosting is using a plugin. There are several options out there and since version 3.18, WP Rocket is among them. The best part: it only takes one click.
How does it work?
Simple. If you have fonts from Google fonts on your website, all you need to do is install WP Rocket, go to Settings > WP Rocket > Media, and check the box where it says Self-host Google Fonts.
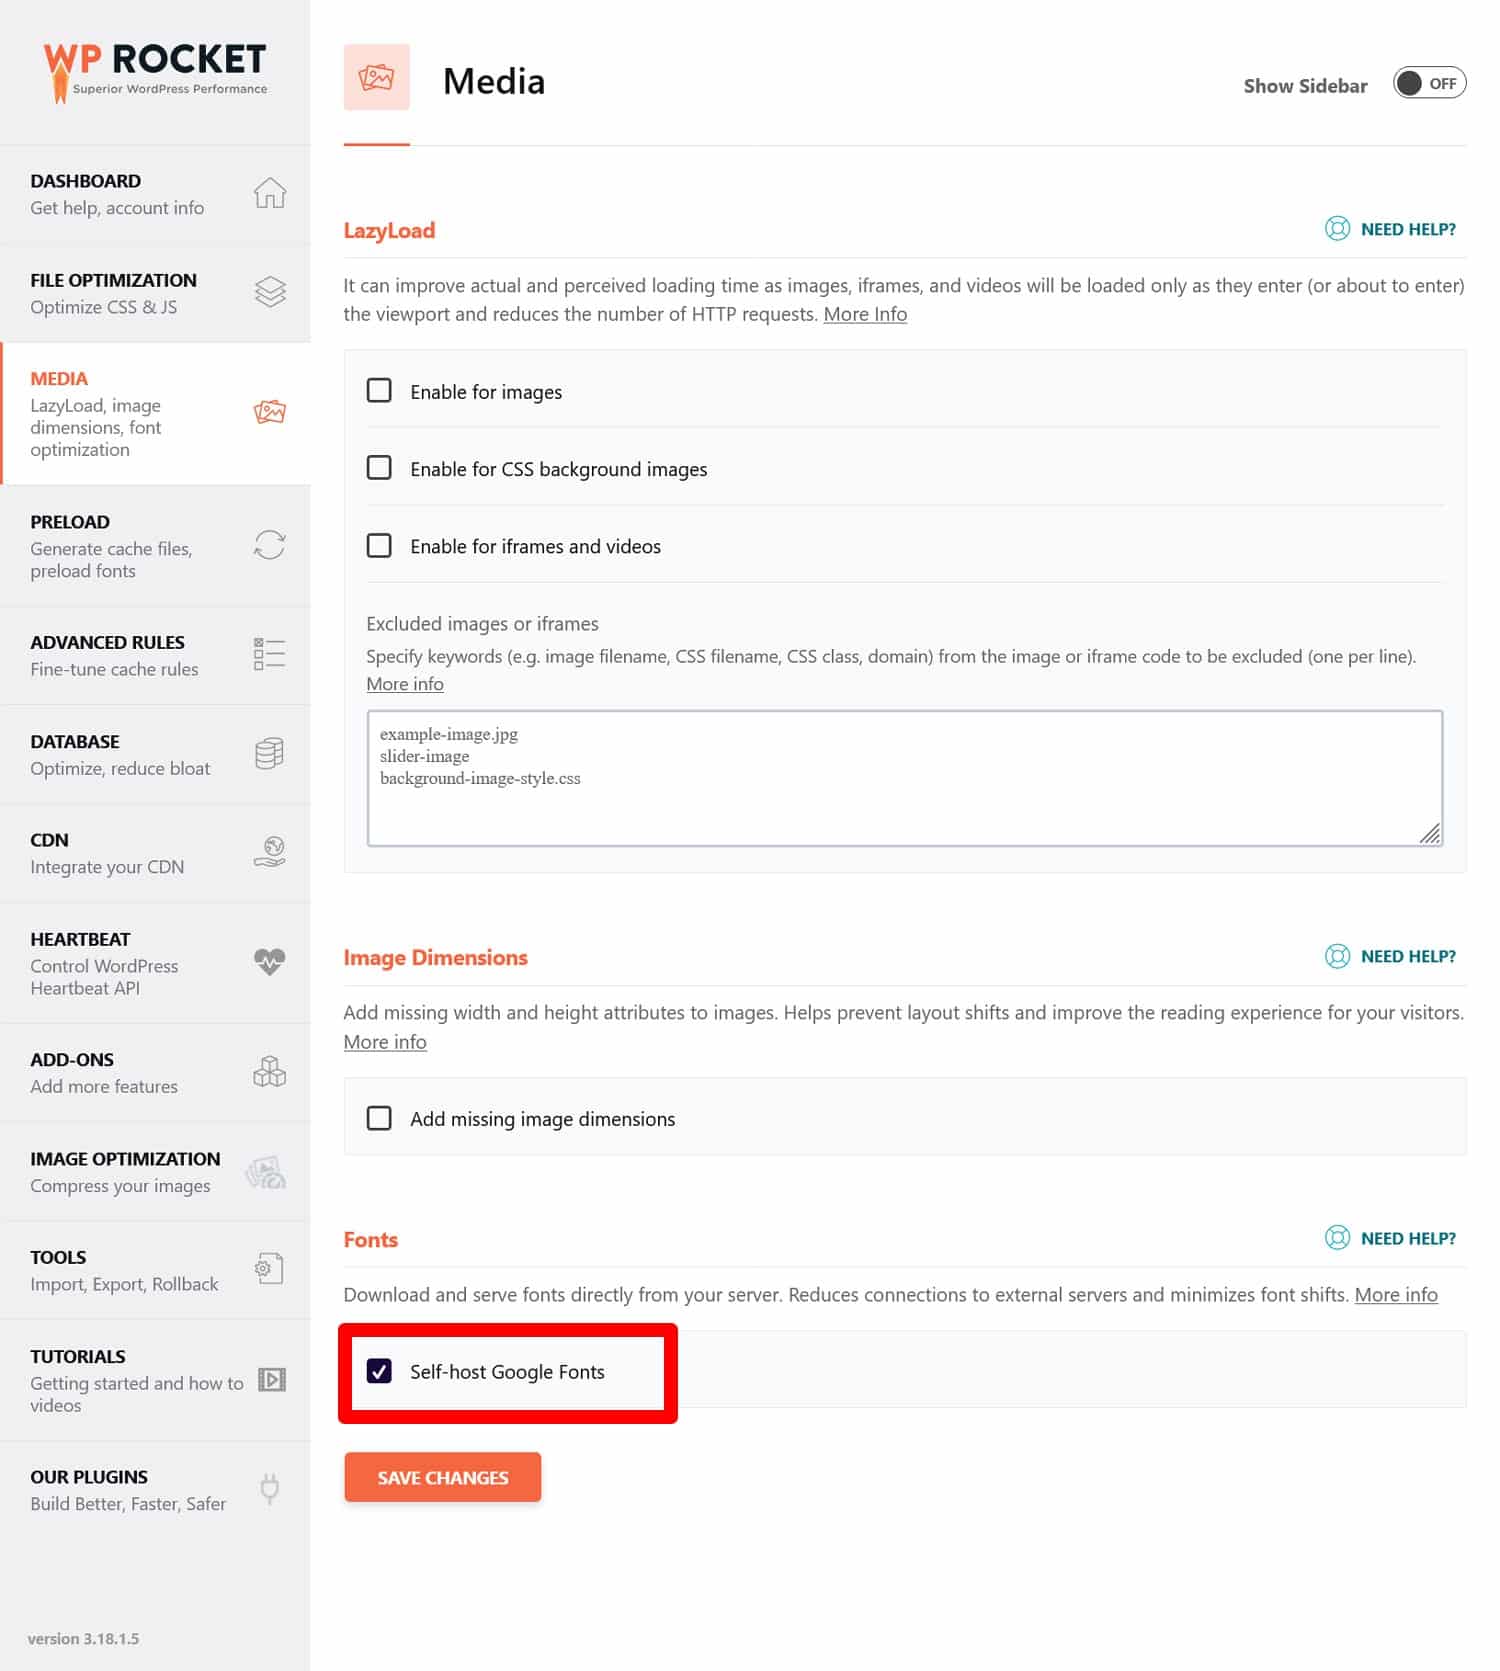
Save and the rest is taken care of for you. Your Google Fonts will automatically be downloaded to your own server and any connections to Google severed. You can immediately take advantage of the performance, user experience, and privacy benefits of self-hosting.
Easy, right?
In addition to that, WP Rocket adds many other features to your WordPress site to improve its performance, including:
- Lazy loading for images and videos
- Deferring render-blocking resources
- Preloading cache, links, external files, and fonts
- Database optimization
Configuring these options is just as easy as self-hosting Google Fonts and WP Rocket implements many more performance improvements in the background. Among them are browser and server caching (with a separate cache for mobile devices), GZIP compression, minifying CSS and JavaScript files, and optimization for images above the fold (to improve LCP).
In fact, the plugin implements 80% of performance best practices upon activation. As a result, your website gets faster immediately without any action required on your end.
Site Performance Case Study: Google Fonts vs Self-Hosted
Finally, let’s put the potential of self-hosting Google Fonts to improve website performance to the test. For this purpose, we set up a testing site with some dummy content and embedded a few Google Fonts font families.

We also installed WP Rocket but didn’t activate any performance improvements apart from what the plugin does automatically. Then, we ran performance tests with PageSpeed Insights before and after activating the option for self-hosting Google Fonts.
Here are the results for mobile devices with remote-hosted fonts:

| Mobile Performance score | 72 |
| First Contentful Paint | 2.5s |
| Largest Contentful Paint | 5.8s |
| Speed Index | 5.0s |
Now let’s see what happens after hosting Google fonts locally:
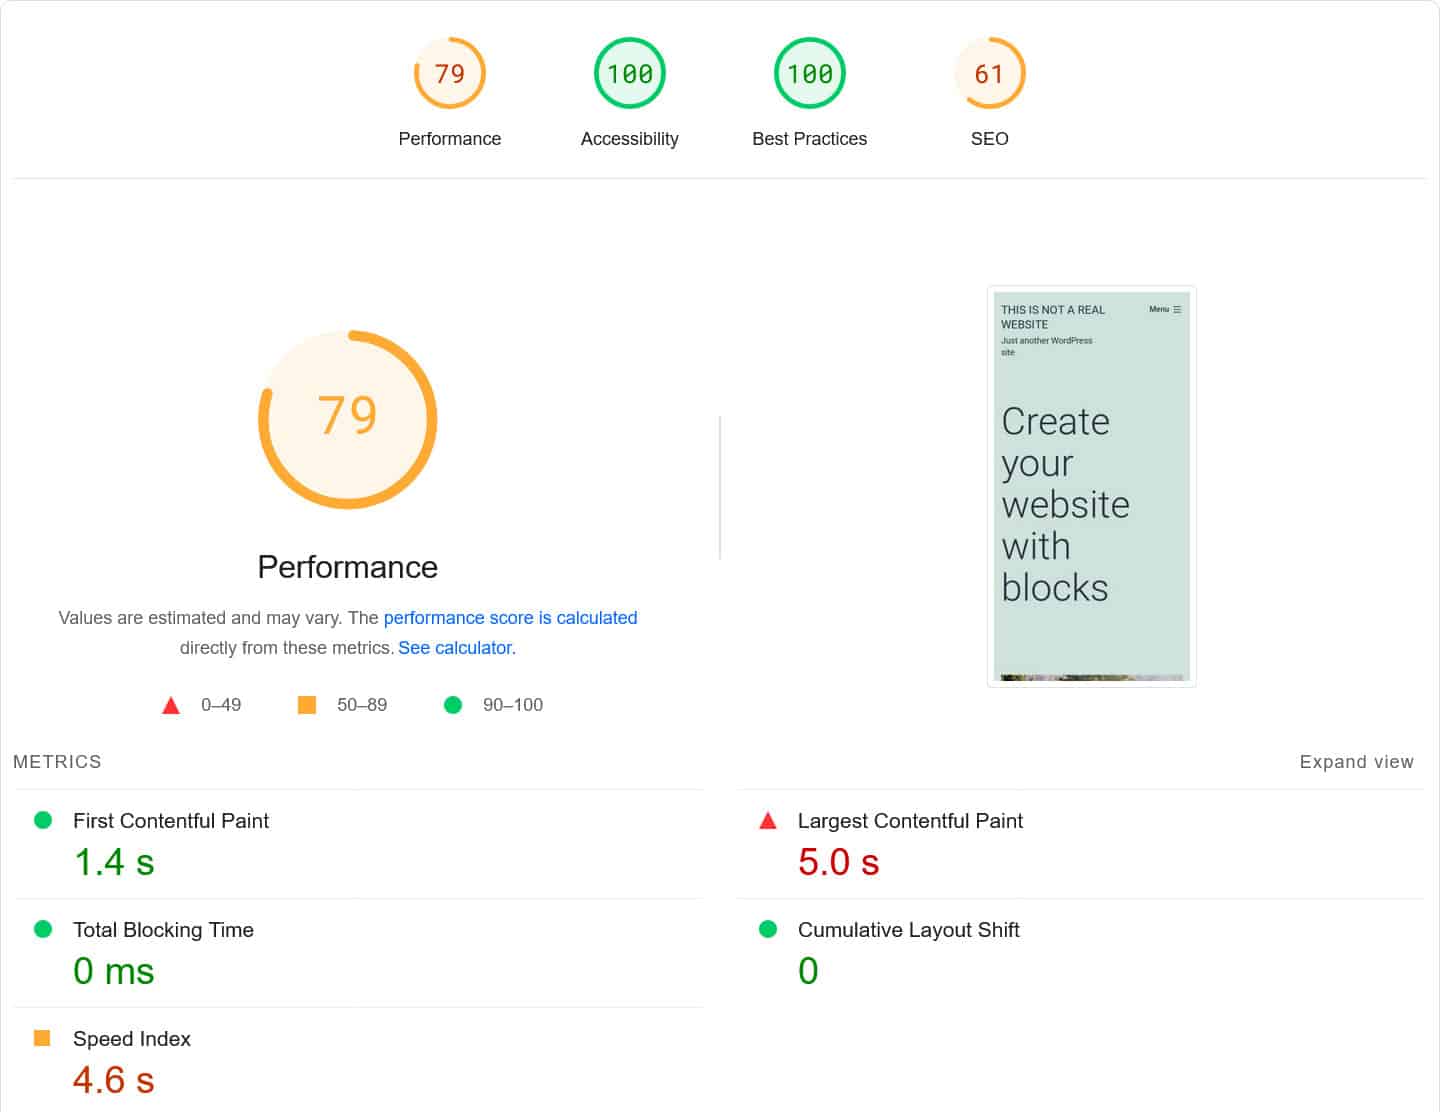
| Mobile Performance score | 79 |
| First Contentful Paint | 1.4s |
| Largest Contentful Paint | 5.0s |
| Speed Index | 4.6s |
While the changes aren’t huge, they are noticeable. All speed markers improve and the First Contentful Paint score actually goes from yellow to green. Not bad for simply checking a box, is it?
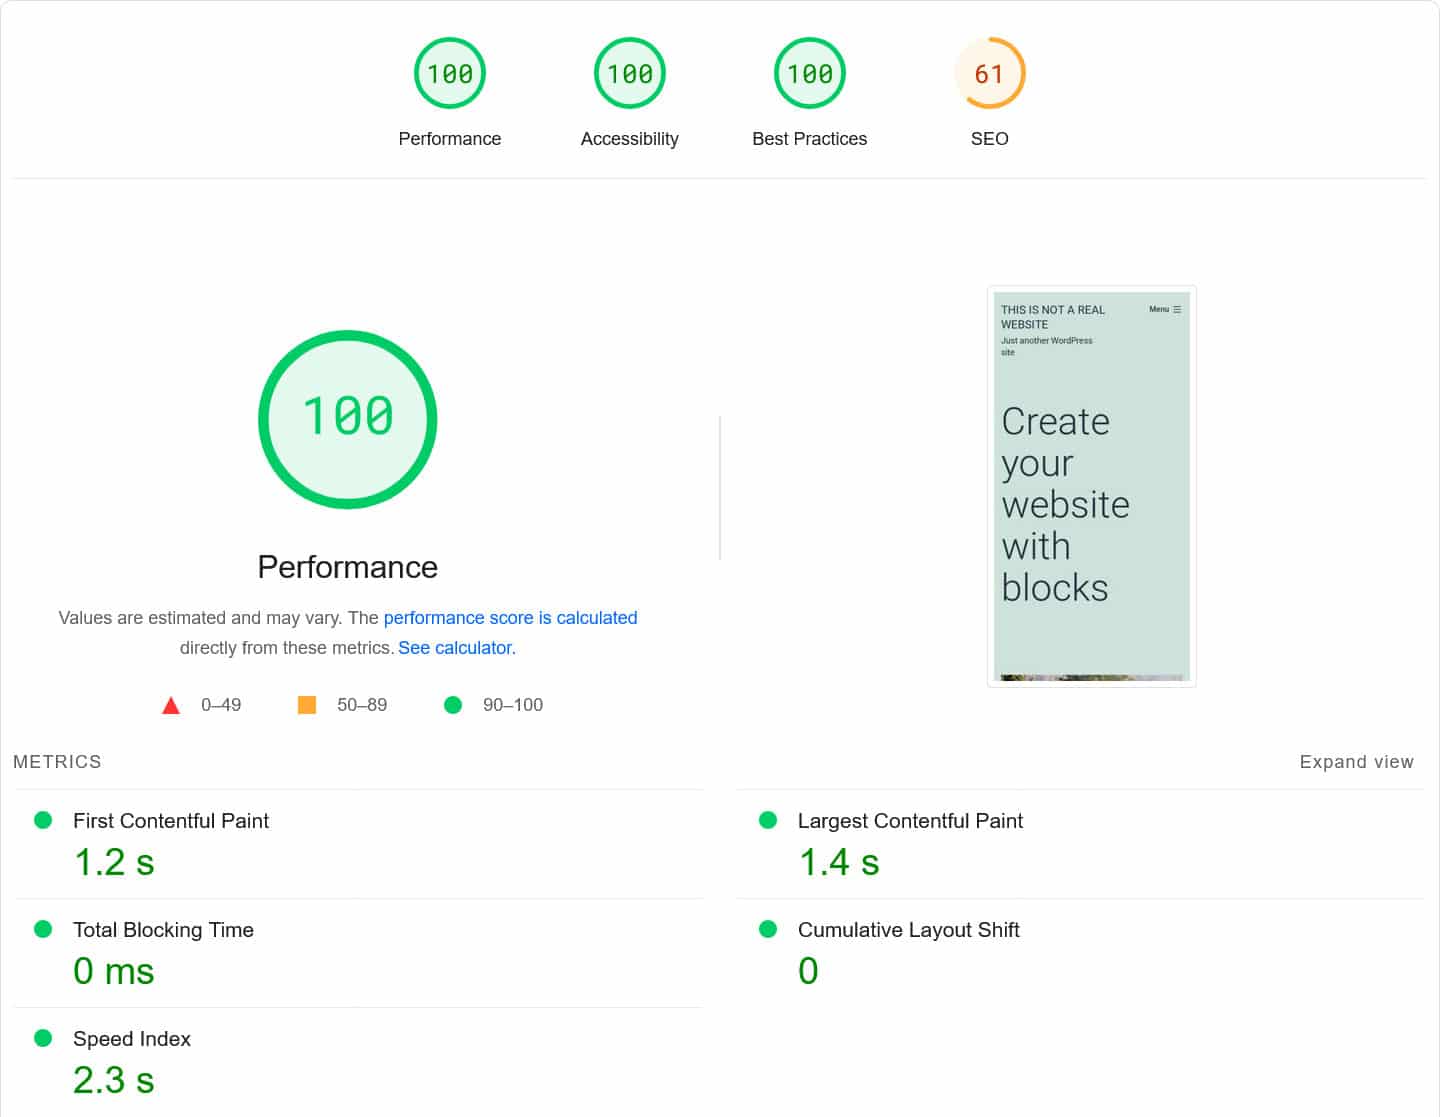
Below is what happens when you switch on a few more speed improvements in WP Rocket, like file removing unused CSS, deferring JavaScript, and lazy loading for images. All of that, too, is as easy as checking a few boxes. Just food for thought.
Self-Hosting Google Fonts: Is It Worth It?
Fonts are an important part of website design. Google Fonts has had a tremendous impact on how modern websites look by making high-quality custom typography available to everyone and easy to implement.
Its performance is also great. The speed differences between hosting Google Fonts locally and remotely aren’t huge, though they are measurable. But self-hosting fonts comes with additional benefits, especially in terms of adhering to privacy laws.
Plus, unless you set up local font hosting manually, it takes just a few clicks to implement. If you want to go the easiest route and also benefit from many other ways to make your website faster, choose WP Rocket for the job!


