Table of Contents
Are you getting the “avoid enormous network payload” warning on your Google Page Speed Insights (PSI) report? Then you need to fix the size of the pages on your WordPress site! Large network payloads are highly correlated with long load times, so anything toward improving the speed of your website will contribute to fixing this issue.
In this article, we explain what an enormous network payload is and what triggers the issue on PSI. We also go over 8 techniques to implement to fix the “avoid enormous network payload” warning easily.
Watch our video first, and then keep reading the article!
What Avoid Enormous Network Payloads Means
The “avoid enormous network payloads” warning means that your page size is too large than the size recommended by Google. Heavy pages are much slower to render the content because there’s much more data to download.
What Triggers The Warning
The “avoid enormous network payloads” is triggered when the total page size is above 1,600 KiB. To pass this PSI audit, you will need to reduce the page size and aim to keep your total byte size below 1.6 MB.
The median network payload around the world is between 1,700 and 1,900 KiB. To help surface the highest payloads, Lighthouse flags any network’s total network requests that exceed 5,000 KiB.
How To Identify The Issue
Use Lighthouse (PageSpeed Insights or GTMetrix) to identify files causing enormous network payloads. PSI flags which file type (image, CSS, JS) needs your attention and where the file is being served from.
What’s The Impact On Performance?
An enormous network payload impacts the performance of your WordPress site on four levels:
- The loading time – the higher the network payload, the larger the page is, and the longer it takes to download the resources and render the page.
- The Largest Contentful Paint grade – The Largest Contentful Paint is a Core Web Vitals triggered when the biggest element within the viewport is displayed. An enormous network payload will increase the time it takes to display the largest content to the user, resulting in a poor user experience.
- The global Lighthouse performance on PageSpeed Insights (PSI) score – Lighthouse flags any types of content that could be optimized. You need to reduce your page size to get a high-performance score and be in the green scoring area of PSI. Any efforts toward this KPI will reduce the network payload and ensure that your PSI grade stays in the green zone ( >90/100).
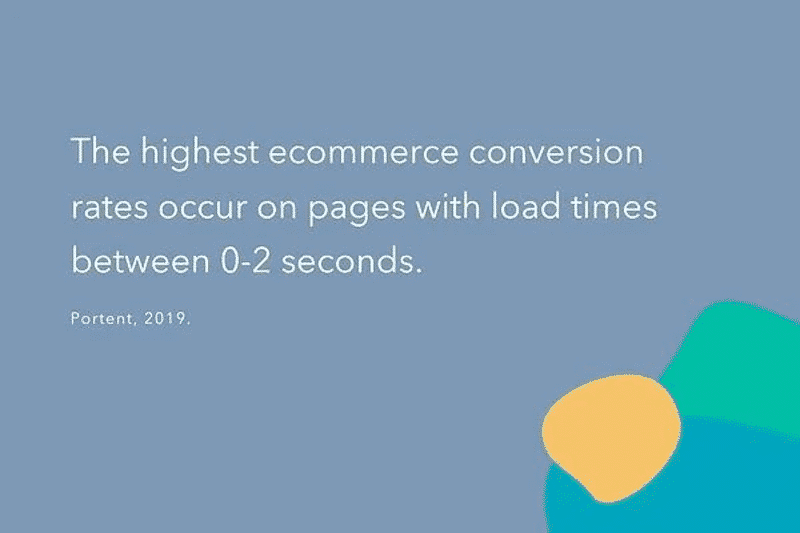
- The conversions and the user experience on mobile. Heavy network payloads can impact conversions and make visitors consume more mobile data. Large page size is due to heavy page resources (such as unoptimized images), which results in a frustrated user waiting for the page to be rendered. Conversions occur the most on pages with load times between 0 and 2 seconds.
How to Avoid Enormous Network Payloads on WordPress
You need to reduce your webpage size to avoid enormous network payloads on WordPress. Enormous network payloads and heavy pages are often caused by unoptimized videos, images, third-party code, or cluttered CSS and JS files.
Here are 8 easy ways to keep payload size down and fix the PSI warning:
- Implement Browser Caching and GZIP Compression
- Remove Unused CSS
- Delay JS Execution and Remove Unused JS
- Minify JS and CSS
- Lazy Loading
- Optimize Images and Convert Them to WebP
- Use Fewer fonts and Optimize Fonts
- Remove Unnecessary Content, Widgets, and Plugins
For each technique, we are going to mention the best online tools or plugins to use. Let’s go over each fix.
1. Implement Browser Caching and GZIP Compression
Using an efficient browser caching policy will help to reduce the enormous network payloads. There are two headers related to caching: Expires and Cache-Control. This is how browsers like Chrome decide how long they should keep the resources before refreshing them again.
Manually:
- You can add the following piece of code if you want to add Cache-Controls headers in Nginx:
location ~* \.(js|css|png|jpg|jpeg|gif|svg|ico)$ {
 expires 20d;
 add_header Cache-Control "public, no-transform"; }

If you are using an Apache Server, put this code in the .htaccess file directly:
<filesMatch ".(ico|pdf|flv|jpg|jpeg|png|gif|svg|js|css|swf)$">
        Header set Cache-Control "max-age=84600, public"
</filesMatch>
With online tools:
- Check with your hosting provider – as an example WP Engine has their own built-in caching solution.
With WordPress plugins:
- WP Rocket – is one of the most powerful caching plugins for WordPress that gives your website a little speed boost. WP Rocket automatically implements browser caching using the popular method “Expires headers”. It also applies GZIP compression.
- Other plugins – we put together a list of the best cache plugins so you can compare them easily.
Important: no matter which plugin you choose, set up all the dashboard settings to see how each feature impacts PSI scores and load times.
2. Remove Unused CSS
You should prevent unused CSS from loading on your website. Using a page builder like Elementor or Divi tends to add a lot of “useless” code, resulting in a heavier page and a higher network payload.
With online tools:
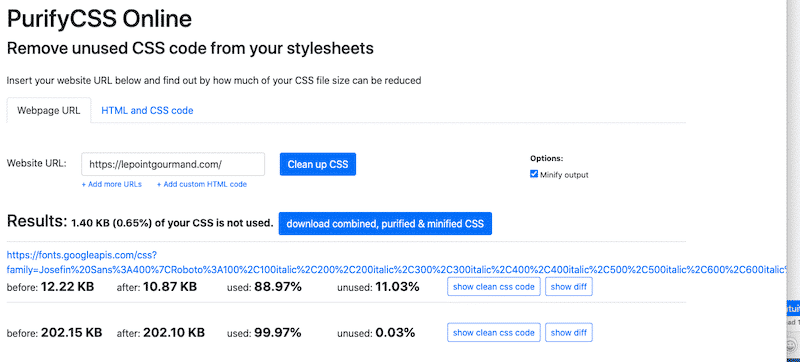
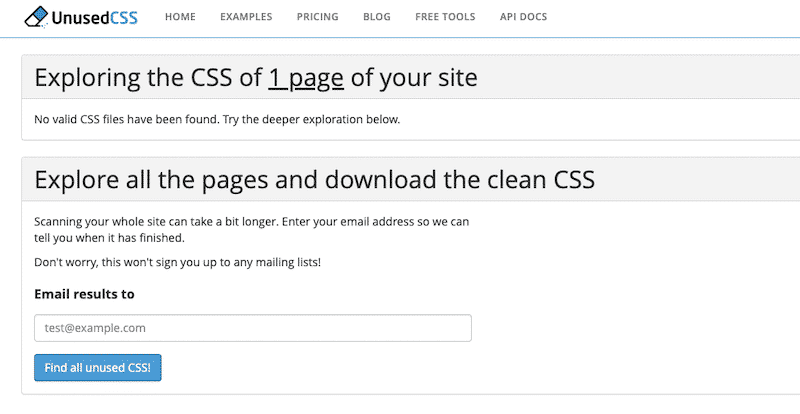
- PurifyCSS online – a tool that determines the CSS that can be safely removed. It generates a clean CSS file that you can add to WordPress.
- Unused CSS.com – it generates a clean CSS file that you can re-upload to WordPress.
| Note: the rest of the process has to be manual. Finding unused code is easy but uploading a new file that only displays the critical CSS can be difficult. |
With WordPress plugins:
- WP Rocket – helps you remove Unused CSS in just one click.
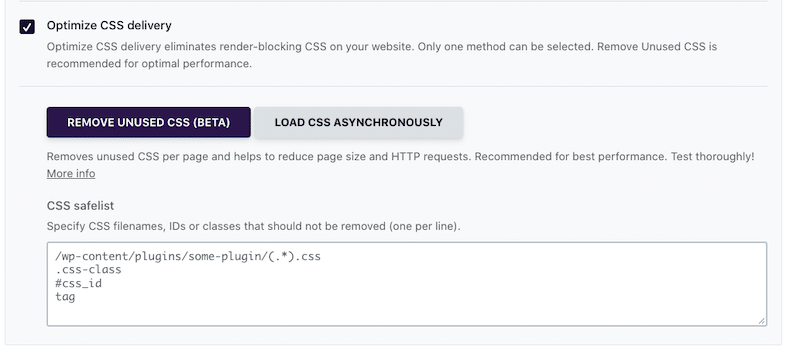
- Both Asset CleanUp Pro and Perfmatters can also trim the unused CSS.
3. Delay JS Execution and Remove Unused JS
You can avoid enormous network payloads by prioritizing the JavaScript that needs to be loaded first. In other words, you’ll remove unused JS. The JS files should not be loaded until the first user interaction (e.g., scrolling, clicking a button).
Reducing the number of elements on your pages will reduce page size and network payloads.
Manually:
To delay a JS function call you can use the setTimeout() function:
setTimeout(functionname, milliseconds, arg1, arg2, arg3...)
If you are not too familiar with JavaScript, then a WordPress plugin may be the easiest path.
With WordPress plugins:
- If you’re looking for a free plugin to delay JavaScript files, you can use Flying Script or WP Meteor.
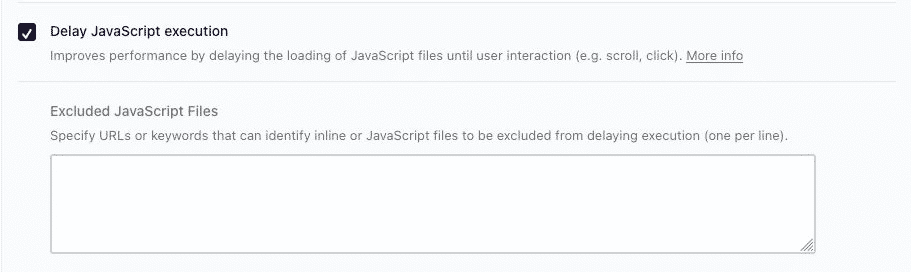
- Another way is to use WP Rocket. The plugin allows you to delay the JavaScript execution in a few clicks from the File optimization tab.
- Asset CleanUp Pro and Perfmatters can load the JavaScript files only when needed.
4. Minify JS and CSS
Minification is the process of removing all unnecessary characters from the CSS or JS source without changing its functionality. It is a well-known code optimization technique that contributes to keeping the network payload size down.
Manually, using development and servers tools:
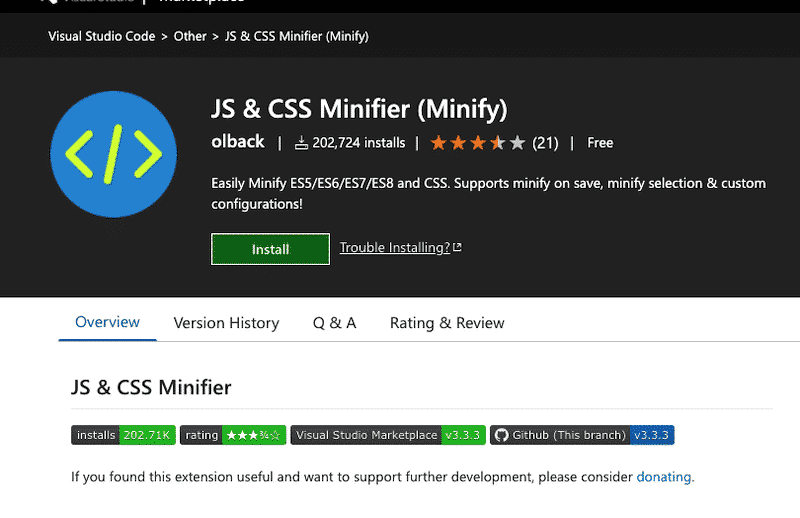
- Visual Studio, XCode, and Netbeans are all integrated development environments) that help minify JS and CSS manually. Most IDEs and code editors have extensions to allow minification, such as the one below for Visual Studio Code:
- UglifyJS – NodeJS has plenty of CLI libraries to minify the code, and UglifyJS is part of them.
With online tools:
Note that most of the online tools have the same process:
Step 1. Paste in your CSS/JS source code or upload the source code file
Step 2. Click a button to minify or compress the CSS/JS code
Step 3. Copy the minified code output or download the minified code file
Step 4. Reupload everything into WordPress.
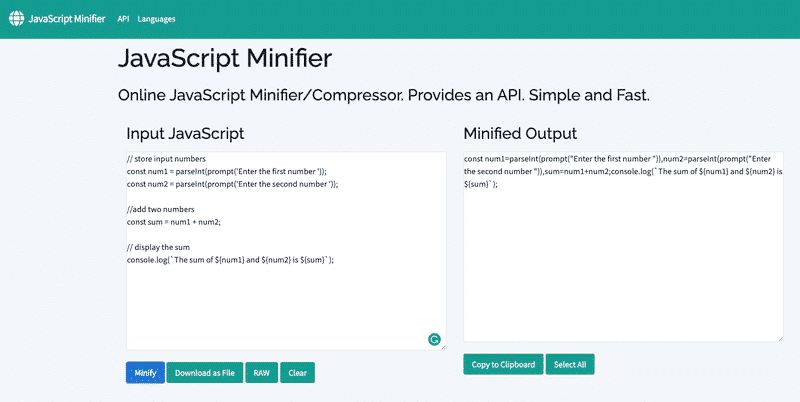
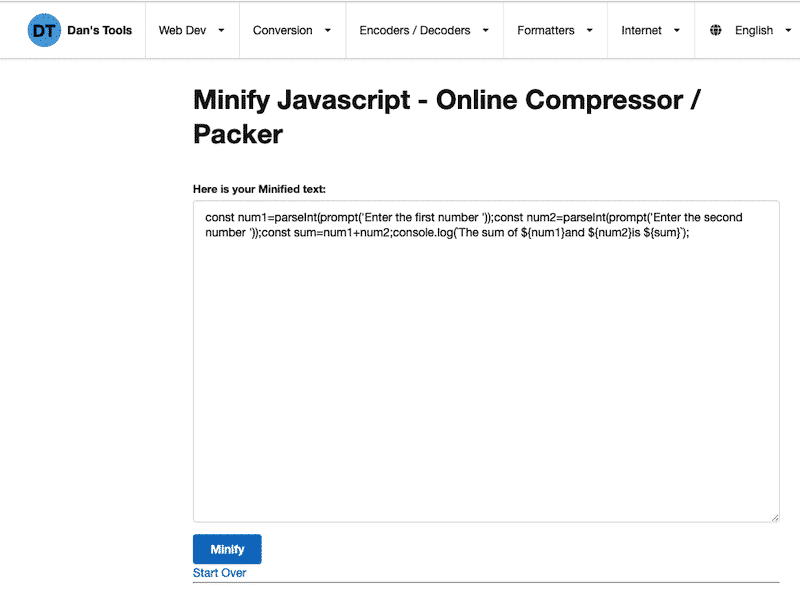
- Toptal (previously known as JS/CSS Minifier) – a user-friendly tool with an API that allows you to minify your CSS and JS code:
- CleanCSS.com – an intuitive online resource to compress and minify both CSS and JS.
With WordPress plugins:
- WP Rocket – one of the best WordPress plugins that minify multiple files of CSS and JS.
| Minifying CSS with WP Rocket | Minifying JS with WP Rocket |
 |  |
- Asset Clean-up – minifies CSS and JS files.
- Autoptimize – a free plugin that can minify and compress scripts and styles.
5. Lazy Loading
With WordPress plugins:
- WP Rocket comes with its feature to lazy load images: LazyLoad.
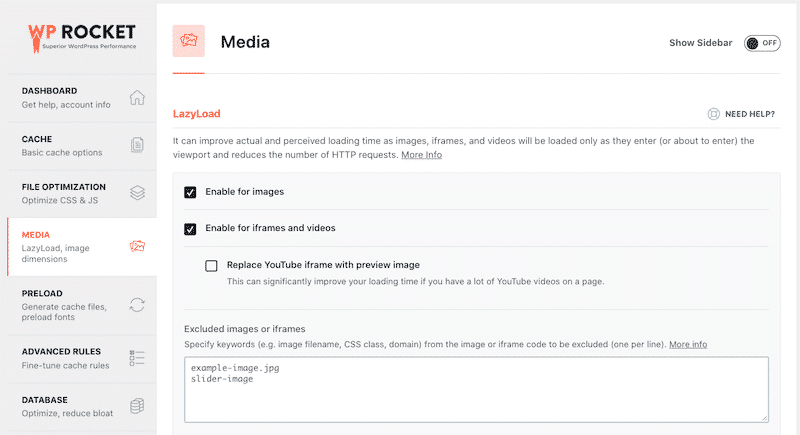
- LazyLoad by WP Rocket – a free plugin dedicated to lazy loading your images.
- Other plugins – we wrote a dedicated article with all the best Lazy loading plugins for WordPress.
6. Optimize Images and Convert Them to WebP
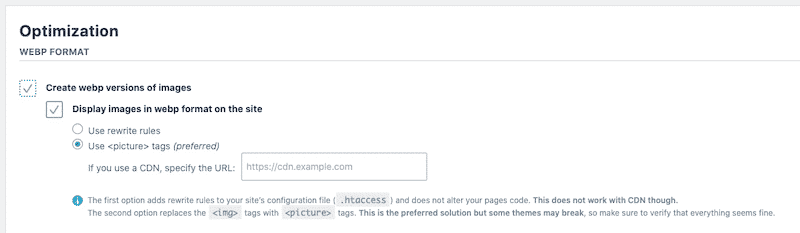
Heavy images are often the main culprit to an enormous network payload. By optimizing and serving them in WebP will make the web page much lighter. Image optimization includes resizing according to the screen (responsive images fitting their container), compressing, and converting all the images on the page to the most efficient format.
Online image compression services:
- Photopea – a free online tool that can open and edit a Photoshop file
Regarding the following three online tools, the process is pretty much the same. You’ll upload a heavy file and press a button to compress it. Then you can re-upload it to the WordPress library.
- TinyPNG and Compressor.io – WebP, PNG, and JPEG compression in a few clicks
WordPress plugins for image optimization and WebP conversion:
- Imagify – a freemium advanced image optimization plugin that also includes WebP conversion.
- Other plugins: you can find a useful list of the four best WebP plugins for WordPress and the best image compression plugins on Imagify’s blog.
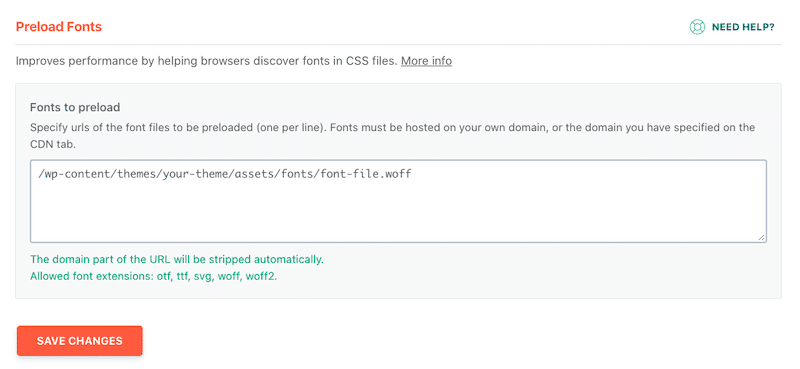
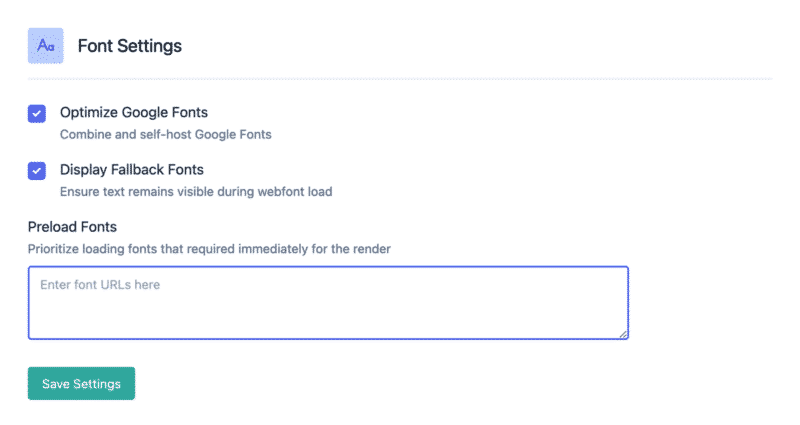
7. Use Fewer Fonts and Optimize Them
PageSpeed Insights recommends using fewer fonts if you want to avoid an enormous network payload. To optimize your fonts and make them load faster, make sure that you follow the best practices below:
Manually:
- Don’t use a large panel of font families, weights, icons, and emojis.
- Host fonts locally
- Use browser resource and other <link> tags (preload, preconnect, prefetch)
- Add the font-display: swap to the request to ensure text remains visible during Webfont load.
With WordPress plugins:
If you prefer, you can use a WordPress plugin like WP Rocket to optimize your fonts and apply all the best practices mentioned above. WP Rocket automatically applied the font-display: swap attribute.
FlyingPress is another plugin to optimize fonts and apply the font-display:swap attribute to your site.
8. Remove Unnecessary Content, Widgets, and Plugins
Removing unnecessary widgets and plugins will help reduce the page’s size and, therefore, the network payloads. You can reduce the number of sliders, galleries, and social widgets. For example, you can replace embedded content like Tweets or Facebook comments with screenshots.
- Query Monitor and WP Hive are useful plugins for identifying the heavy resources causing a slow WordPress site.
Avoid Enormous Network Payloads with WP Rocket
WP Rocket is one of the best performance plugins in the WordPress ecosystem that will fix the “Avoid enormous network payloads” warning. Amongst other speed optimizations, you’ll significantly reduce the web page size and clean up your code — and without installing multiple tools.
Let’s go over the impact of WP Rocket on a WordPress site. We will look into the performance score and the audits of PageSpeed Insights, with a focus on the “Avoid enormous network payloads” warning.
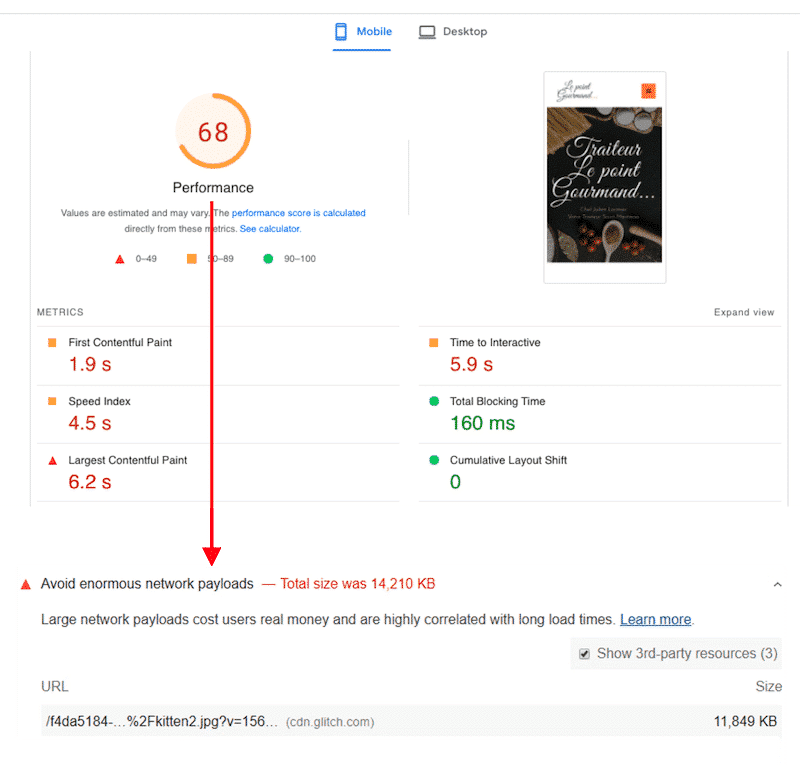
Scenario #1: my web page performance without WP Rocket
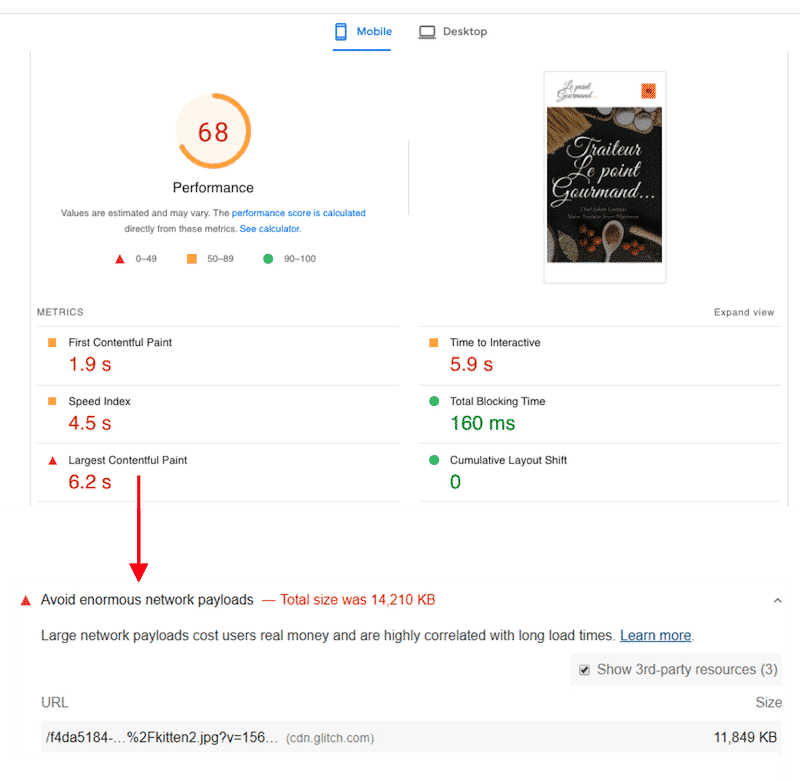
Without WP Rocket, my performance grade on mobile is 68/100, and my LCP (Core Web Vital) metric is in the red with a score of 6.2 s.
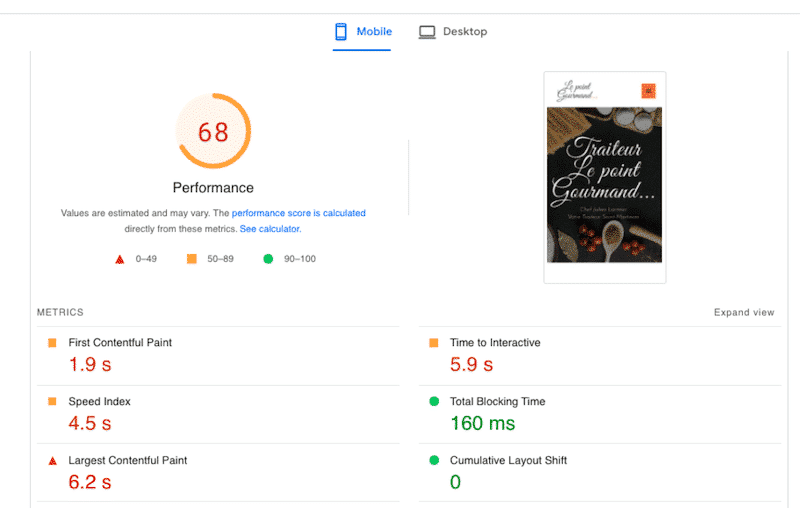
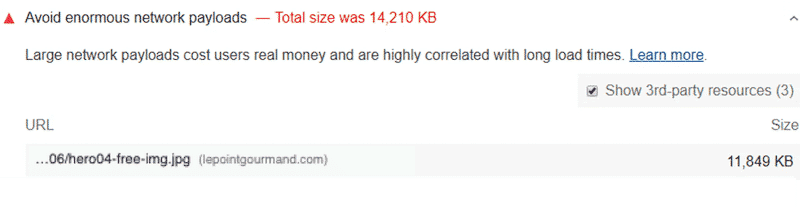
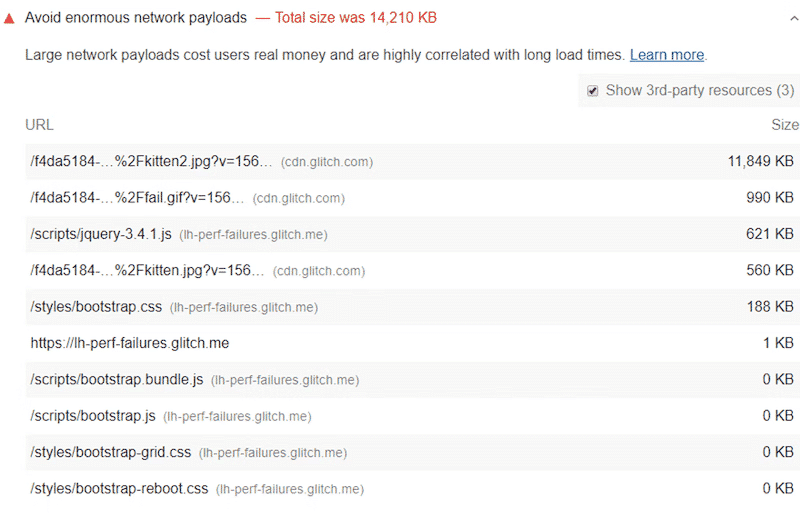
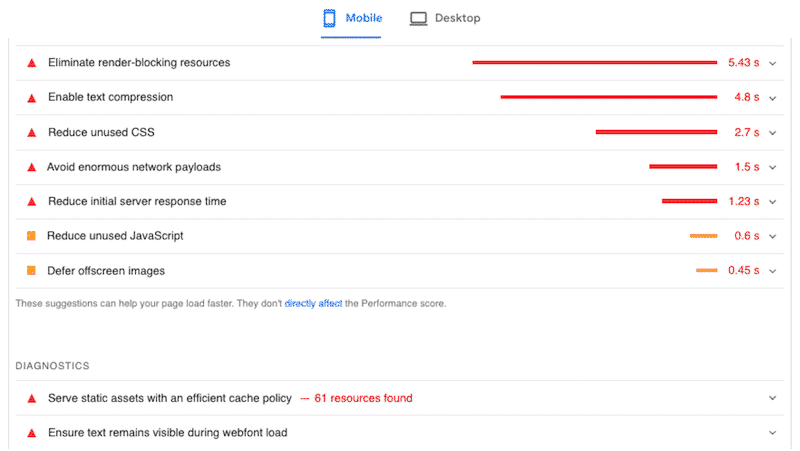
On top of that, I can see that the “Avoid enormous network payloads” warning is triggered with a total size of 14,210K:

Finally, PSI also flags other performance issues related to CSS, JS, caching, fonts optimization and lazy loading. Those are the metrics we presented in the previous section to fix the warning of the enormous network payloads.
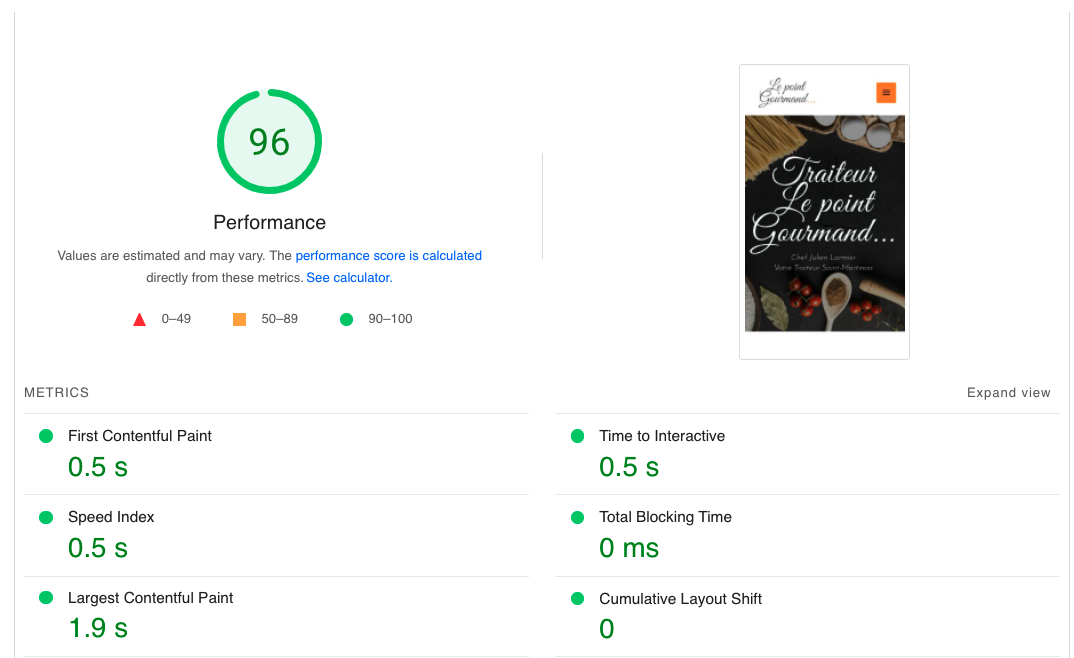
Scenario #2: my web page performance optimized with WP Rocket 🚀
Once we activated WP Rocket and enabled a few performance options, we got a 96/100 score. Plus, the Largest Contentful Paint is 1.9 s – it’s now green.
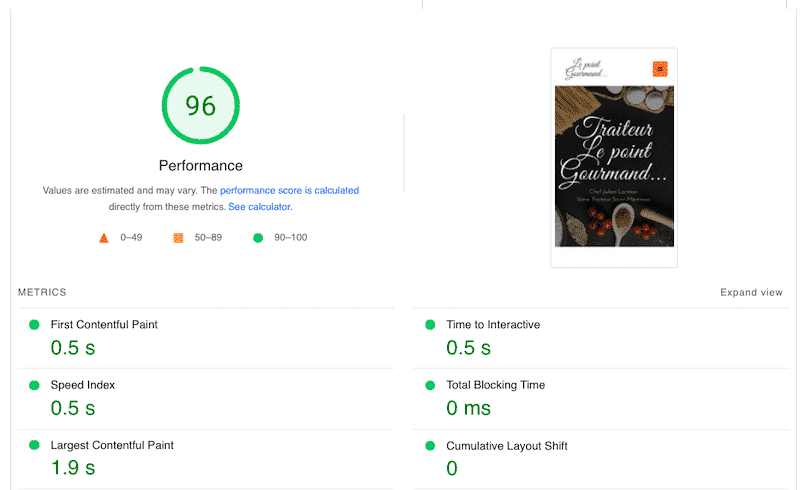
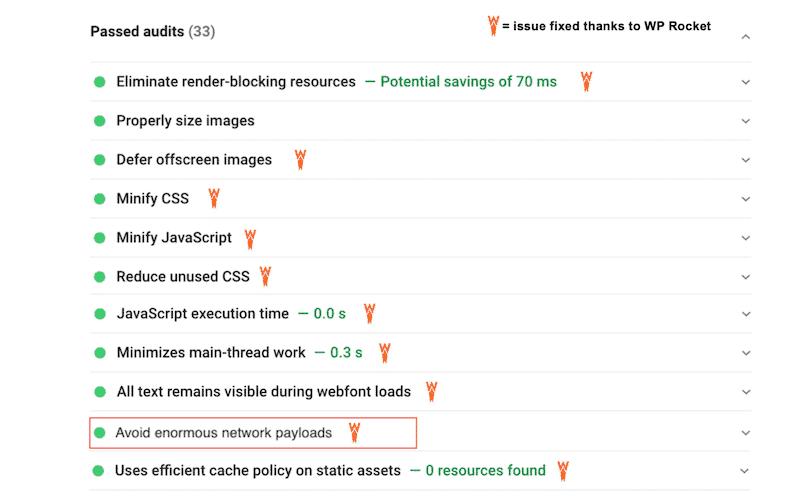
Most of my previous performance issues moved to the passed audit section, including the “avoid enormous network payloads” warning:
Want to follow my performance optimization path and avoid the enormous network payloads?
Here are the WP Rocket features I used to get a 96/100 score on mobile:
- Upon activation, WP Rocket cached my content and applied GZIP automatically.
- I activated the cache option for mobile devices.
- I deferred the JS code and delayed its execution.
- I optimized our CSS delivery by minifying/combining our CSS files and removing unused CSS.
- I applied the lazy load scripts on my images, passing PSI’s audit.
- I preloaded my fonts, and WP Rocket applied automatically font-display: swap attribute, so my font could remain visible during the loading time of my page (and avoid FOIT).
Wrapping Up
🚀 Thanks to WP Rocket, we improved our Lighthouse performance score and got a 96/100 score on mobile. Our Core Web Vitals (including LCP) are in the green zone. It goes without saying that we also we fixed the “Avoid Enormous Network Payloads” warning.
| Without WP Rocket (performance) | 🚀 With WP Rocket (performance) |
 |  |
| Without WP Rocket (warnings section) | 🚀 With WP Rocket (passed audit section) |
 |  |
Give WP Rocket a try if you are looking to improve your site performance with one single tool. You have nothing to worry about: we’ve got you covered with our 14-day money-back guarantee if you are not satisfied.