
How to Improve Time to Interactive (TTI) on WordPress
Table of Contents
Update: Time to Interactive has been removed in Lighthouse 10, and it’s no longer included as a performance metric.
Wondering what’s Time to Interactive and how it affects the speed of your WordPress site? Then keep reading because we all want a website that is fast and easy to interact with. Nothing is more frustrating than clicking somewhere on the page and getting no results from our action, right?
To make sure that your website provides an outstanding user experience, there are a few metrics you should take care of, and TTI is one of them. As a user-centric metric, Time to Interactive holds up 10% of the global performance score computed by Lighthouse. It may not be the most influential metric for the final score, but the frustration experienced by the user may lead them to exit your page, or even worse: exit your website!
We will explain what Time to Interactive is, why it’s important, which tools can measure it, and what affects its score. We’ll also share some technical tips to fix a bad Time to Interactive grade (TTI longer than 3,8 seconds). Finally, we will show you how to improve your overall performance score and ensure that your website does not look broken.
What Does Time to Interactive (TTI) Mean in Lighthouse?
Time To Interactive measures how quickly visitors are able to fully interact with your page.
It’s a meaningful lab metric for assessing load responsiveness that directly affects how users perceive performance and interaction.
The TTI metric measures when the page starts loading to when its main sub-resources have loaded and it is capable of responding to a user action quickly.
In short, TTI measures how fast a page can execute any JavaScript code for components to respond quickly to any user action. It helps to identify which page looks interactive.
Let me explain with an example.
A user can see a call-to-action button on the screen. He tries to click on it, but nothing happens: the element is not clickable. Frustrating, right? The TTI metric helps you to identify those pages that look interactive but actually, they are not.
TTI goes hand in hand with Total Blocking Time because together, they provide insights into your page’s responsiveness to a user’s action.
| 📖 A page is considered fully interactive when: – The page displays useful content, which is measured by the First Contentful Paint – Event handlers are registered for the most visible page elements – The page responds to user interactions within 3,8 seconds. |
Lighthouse is an open-source and automated tool that helps developers in improving the quality of web pages. It creates audits for speed, performance, accessibility, UX, and search engine optimization (SEO). To provide a great user experience, sites should strive to have a score between 90 and 100.
| 🚀 If you need help to perform your website’s audit, we recommend you to follow our complete guide that explains how to improve your Lighthouse performance score. |
In short, a fast TTI helps ensure that the page is usable.
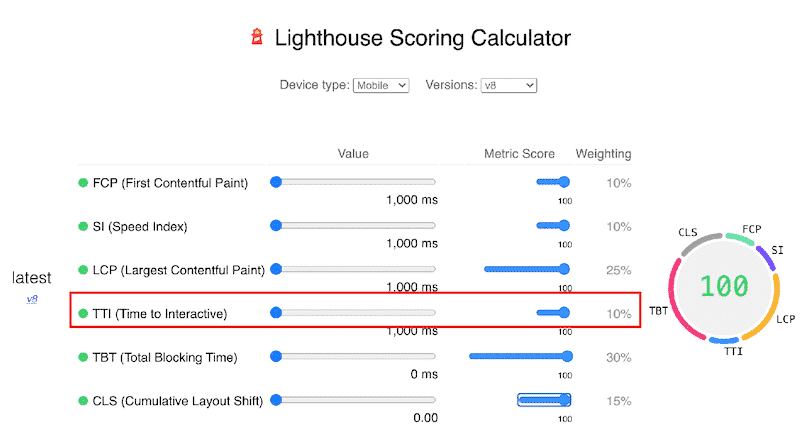
Lighthouse v8 combines six metrics to generate your final performance score, including the Core Web Vitals, the Speed Index, the Time to Interactive, and the Total Blocking Time:
| Metric | Weight | What’s a good score? (green) |
| First Contentful Paint | 10% | 0-2 s |
| Speed Index | 10% | 0-3,4 s |
| Largest Contentful Paint | 25% | 0-2,5 s |
| Time to Interactive | 10% | 0-3,8 s (Web.dev says that the score can be acceptable up to 5 s) |
| Total Blocking Time | 30% | < 200 ms |
| Cumulative Layout Shift | 15% | 0 – 0,1 |
How to Measure Time to Interactive
To define your TTI score, you need to measure the time from when the page starts loading to when it has visually rendered its initial scripts, and it’s capable of reliably responding to user input quickly.
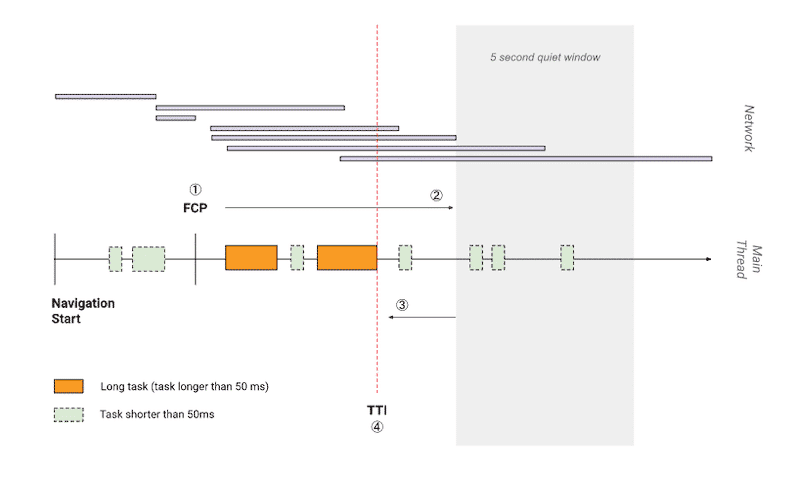
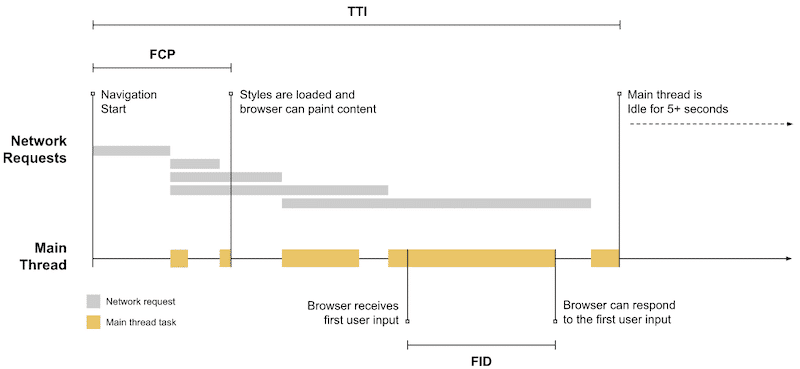
Lighthouse follows four steps to measure the TTI:
- Start at First Contentful Paint (when the first text and image elements are rendered to the screen.)
- Search forward in time for a quiet window of at least five seconds (quiet window = no long tasks and no more than two in-flight network GET requests)
- Search backwards for the last long task before the quiet window, stopping at FCP if no long tasks are found.
- TTI is the end time of the last long task before the quiet window (if no long tasks are found, it’s the same value as FCP).
You can visualize the four steps thanks to the diagram below:
Which tools to measure TTI automatically?
You can use two different tools to measure TTI and your performance using the Lighthouse technology.
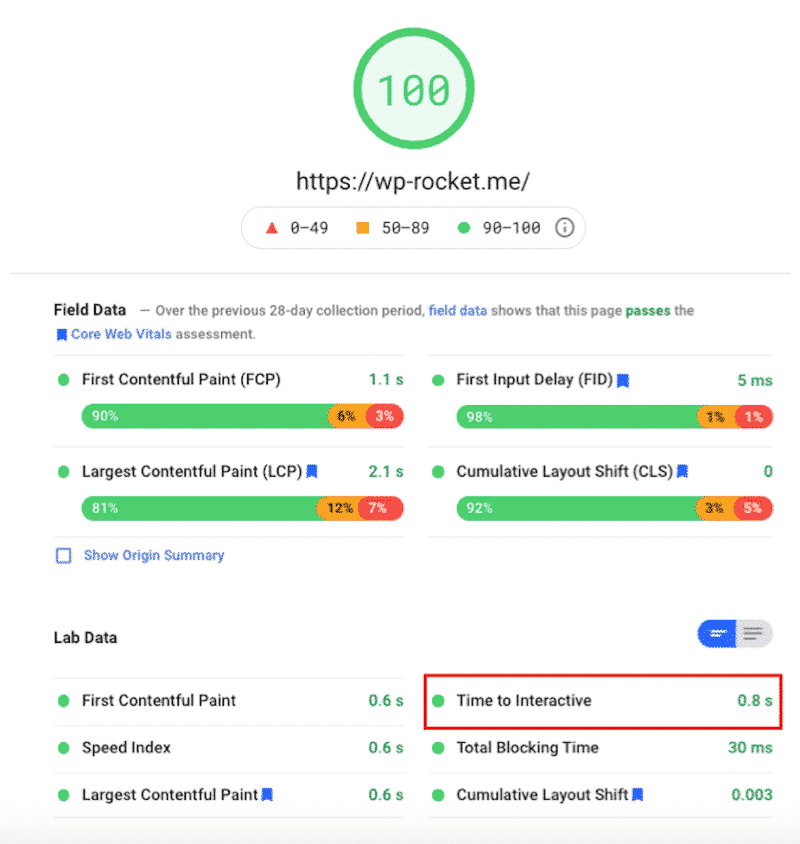
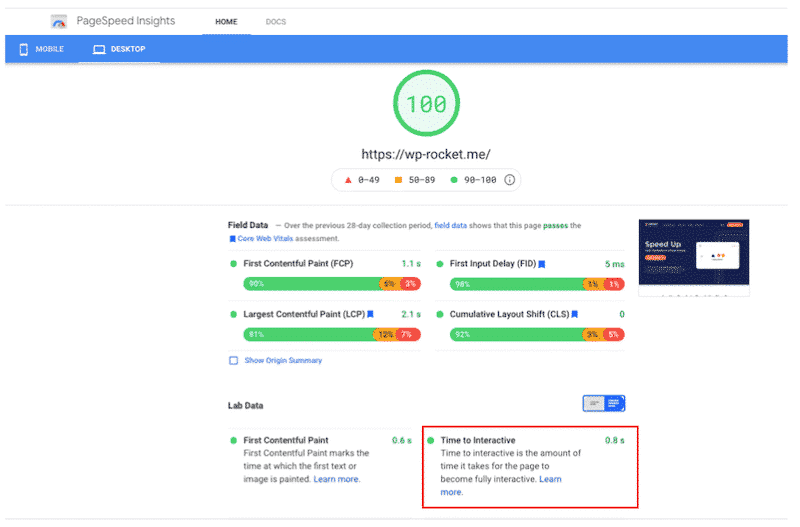
- Using Google PageSpeed Insight (PSI) to measure the TTI metric:
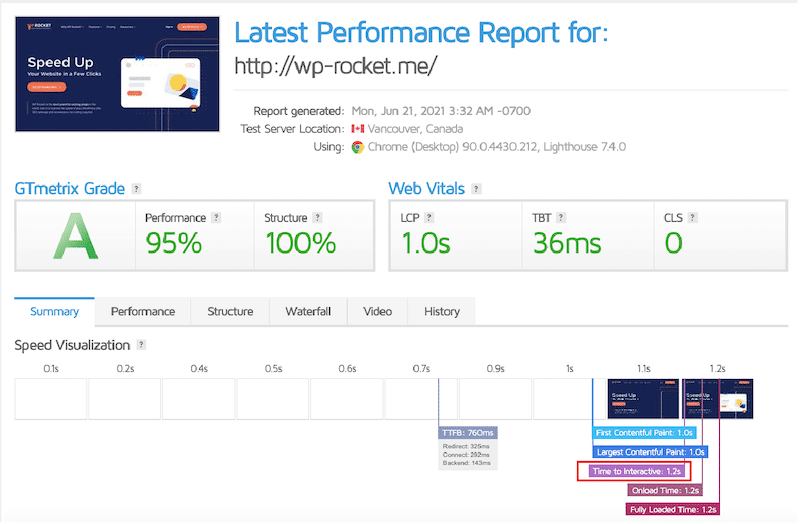
- Using GTmetrix to get the TTI grade:
Both tools provide a TTI score, but as you can see, the numbers — in the green zone — are slightly different:
- TTI score (PSI): 0,8 s
- TTI score (GT Metrix): 1,2 s
This is mainly due to various factors, including Lighthouse testing methodology, location of the tests, etc.
| 🚀 Running a performance audit is not always easy. Check our complete guide about testing WordPress site performance and measuring speed results. It will help you identify the tools you need and what are the acceptable thresholds for each metric. |
What’s a Good Time to Interactive (TTI) Score?
You should always strive to have a Time to Interactive of less than 3,8 seconds to ensure a good user experience. Your TTI score is a comparison of the TTI time of your page and the TTI times of high-ranking sites when loaded on mobile or desktop.
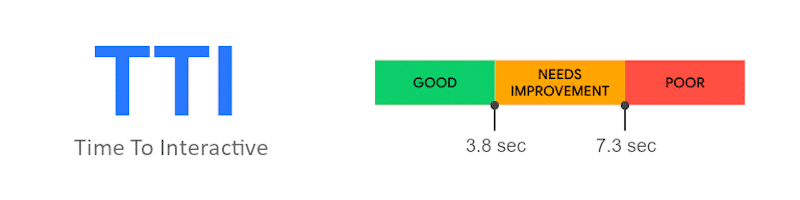
Time to Interactive Scoring is classified as the following:
- Green: 0-3.8 (good)
- Orange: 3.8-7.3 (needs improvement)
- Red: 7.3 (Poor)
Time to Interactive is often compared to the First Input Delay (FID) metric. In the next part, we will explain why.
Is First Input Delay (FID) the Same as Time to Interactive (TTI)?
FID and TTI both measure the level of interactivity of your web page. However, besides this common ground, we also find a few differences:
- TTI measures how long it takes a page to be ready to respond to user input, while FID measures how responsive your page is when real users try to interact with it.
- TTI can be calculated with lab data (without real-world users), but the First Input Delay (FID) is a field-only metric that requires real-user data. The FID calculation cannot be done within a lab environment. This form of data can only be collected from actual users.
- First Input Delay tracks user input that happens before the page is fully interactive. First Input Delay allows you to capture those early, critical interactions:
- FID – that requires real-world users to be computed – is a Core Web Vitals metric that measures what happens when someone interacts with the page, as shown below:
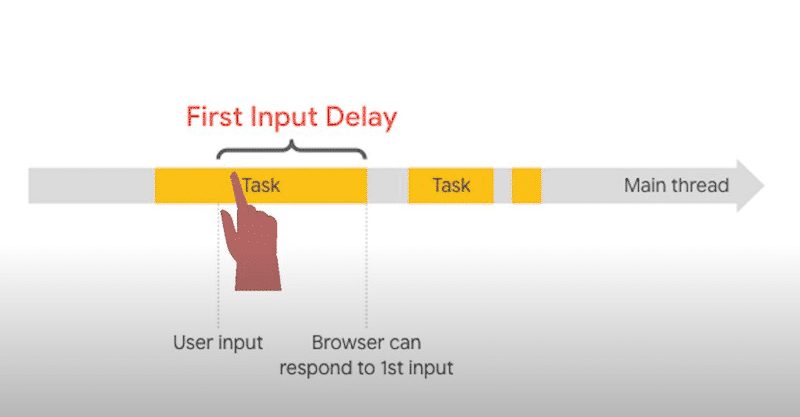
| To sum up: Both TTI and FID measure interactivity. The metrics capture the user’s first impression of a site’s interactivity and responsiveness. TTI can be calculated without real-world users, whereas FID can’t. |
What’s the Impact of Time to Interactive on Performance?
As seen previously, a high TTI can create a frustrating user experience: the user thinks that the site is fully ready, but when he tries to click somewhere, nothing happens.
Let’s see a real-life example for TTI (in orange below). As you can see, it marks a page as fully interactive if the main thread has been free of long tasks for about 4-5 seconds:
Tools like PageSpeed Insights don’t really like this, and they will not hesitate to penalize your website by lowering your performance grade.
TTI weight on the Lighthouse score
In the Lighthouse v8 Performance score, TTI’s weight has been reduced from 15% to 10%.
Why such a change? Web.dev explains that it directly responds to users’ feedback and “inconsistencies in metric optimizations leading to improvements in user experience”.
Web.dev says: “TTI is still a useful signal for when a page is fully interactive, however with TBT as a complement–variability is reduced. With this scoring change, we hope developers are more effectively encouraged to optimize for user interactivity.”
TTI measures how long it takes your page to be ready for interaction: how long the main JS thread is blocked and how soon it would have the capacity to deal with a user’s action.
It’s an important lab metric because it defines if your page is usable or not.
Before giving you actionable recommendations to keep your TTI under 3.8 s, we need to define what causes a bad TTI score.
What Affects Time to Interactive?
Let’s see what can cause a high Time to Interactive score with the help of the diagnostics section from Google PageSpeed Insights. We generally have four issues contributing to a bad TTI grade, namely:
- JavaScript code and unused JS
- JavaScript Execution time
- Main thread work
- Third-party code
Thanks to the “opportunities” and “diagnostics” sections in your Lighthouse report, you can use some tips to improve your overall performance grade.
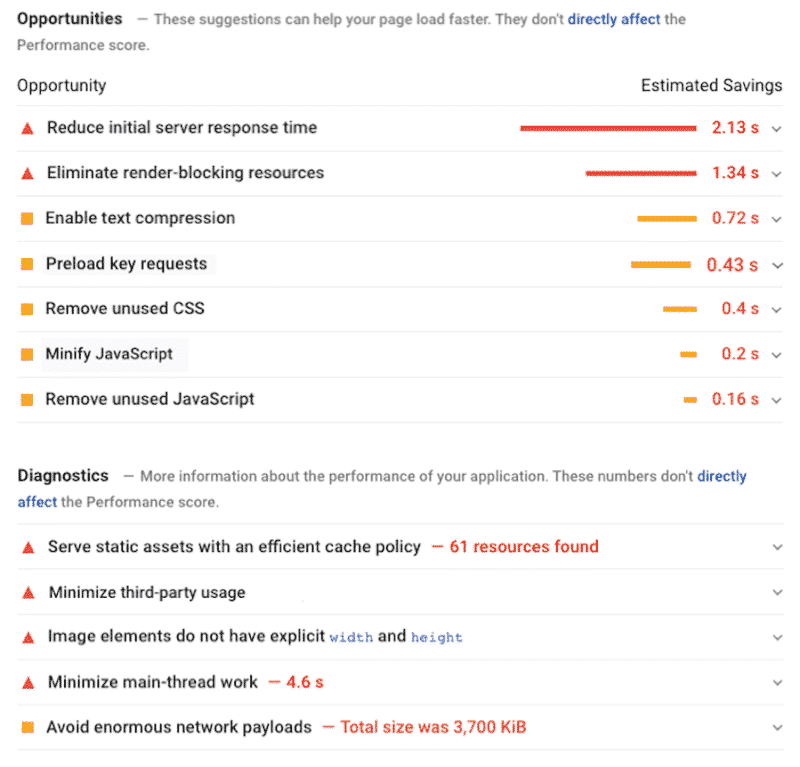
The report shows how much impact each error has on your estimated savings; resolving them will drastically improve your TTI and user experience.
We’ve listed a few recommendations from PSI in case you need to improve your TTI score:
- Eliminate render-blocking resources
- Minimize main thread work
- Reduce JavaScript execution time
- Remove unused JS
- Reduce the impact of third party code
- Avoid chaining critical requests
- Preload key requests
- Keep request counts low and transfer sizes small
- Reduce server response times
| 💡 Spoiler alert: you can optimize your TTI score using the WP Rocket plugin! |
How to Improve TTI on Your WordPress Site
You can reduce your Time to Interactive score by optimizing your JS files (including third-party code.) Any sort of good measures going towards JS execution will most likely improve TTI. Always focus on the order and loading preferences of your resources and the number and size of requests.
There are eight performance optimizations we recommend you implement if you want to fix Time to Interactive and improve the overall speed of your WordPress site.
- Defer JS
- Delay JS and Reduce Unused JS
- Minify JS and CSS
- Optimize CSS Delivery and Reduce Unused CSS
- Reduce TTFB
- Prefetch DNS Requests
- Preload Fonts
- Improve TTI on Mobile
1. Defer JS
Deferring the JS files means that they will be loaded only after the browser has displayed the most important content. The goal is to make your page load faster by prioritizing the content you want to show first. You will reduce the amount of time spent in parsing, compiling, and running JS files, which will help in improving TTI.
Examples of non-essential JS that can generally be deferred: Social sharing, cookie consents, etc.
🚨 Issues identified by Lighthouse: “Eliminate render-blocking resources”, “Reduce unused JavaScript” and “Avoid chaining critical requests” issues.
✅ A manual solution:
- Use of the Defer Attribute: When trying to defer JS you can use boolean attributes “defer” for the script tag in HTML:
<script src=”library.js” defer></script>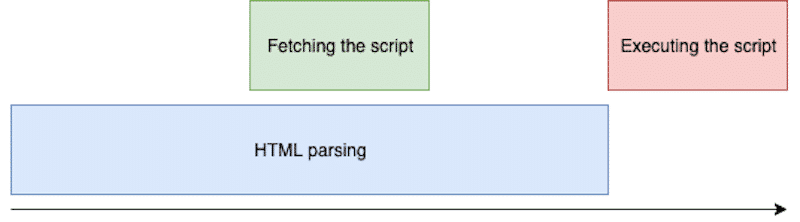
✅ WordPress plugins solution:
- Asset CleanUp: this free plugin scans and detects the content to be loaded on the page in priority. All you have to do is select the CSS or JS code that should not be rendered first.
Note: the plugin author recommends using Asset CleanUp with a cache plugin like WP Rocket to get the best performance results - Async JS: Async JavaScript gives you full control of which scripts to add a ‘defer’ attribute to help increase the performance of your WordPress website.
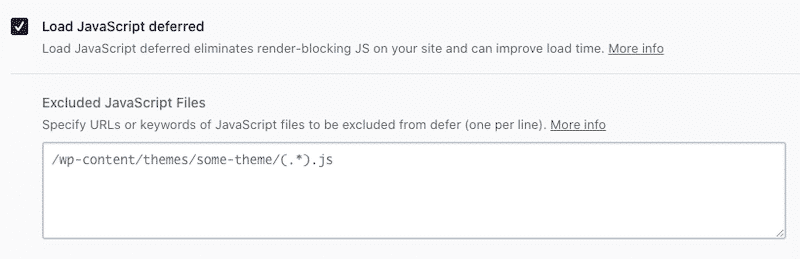
- WP Rocket has an option to defer parsing of JavaScript and defer the JS WordPress files as shown below:
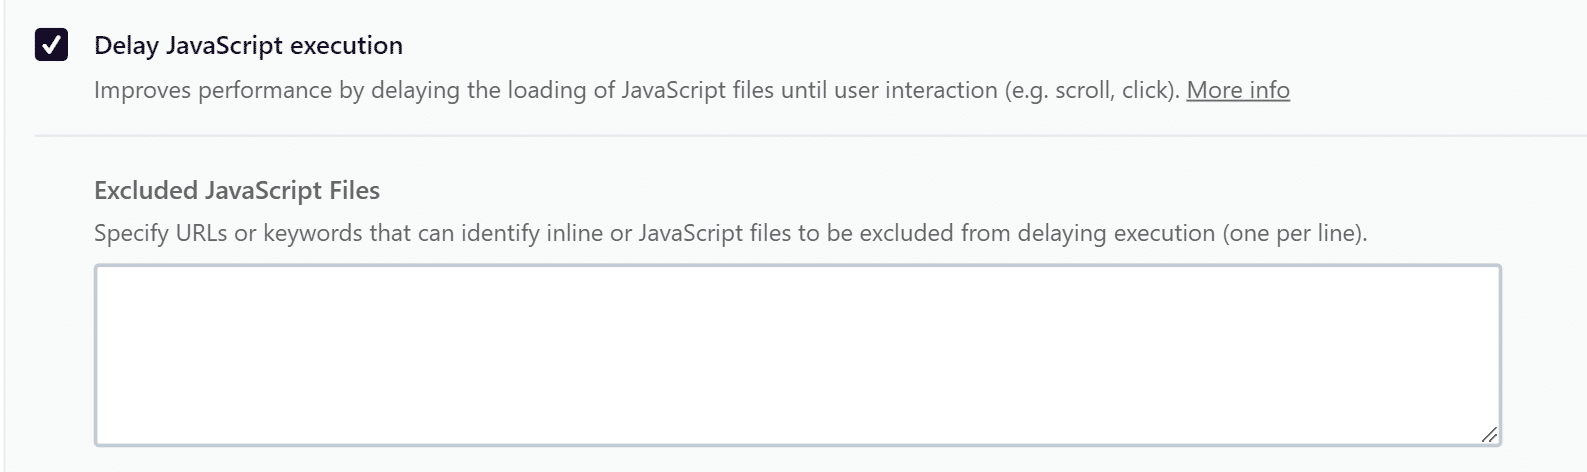
2. Delay JS and Reduce Unused JS
By delaying JS execution and removing or reducing unused JS, you’ll improve performance and your TTI score. The main idea is to delay the loading of all JS files until a user interaction happens, such as clicking on a button or scrolling to the end of the page. A good starting point is to check your GTmetrix Waterfall chart to see where JavaScript is being loaded. You can get the same diagnosis using PSI. Once you run the audit, you’ll be able to determine if the “bad” JS is coming from your code or a third-party app.
🚨 Issues identified by Lighthouse: “Avoid chaining critical requests” and “Reduce unused JavaScript”.
✅ Manual solutions:
- The manual way of creating a delay in JS is to use the setTimeout()method function. This will call a function after the time you’ll specify in ms. You can use those very helpful code snippets to delay any JS functions.
- Manually deleting unused JS can be dangerous for your website. If you remove one more space or one more bracket, things can become pretty ugly. If you are not an advanced developer, I would not recommend doing such a thing manually.
✅ Use a WordPress plugin:
- Flying Scripts: a plugin to delay JS and give more resources to critical JS files. It helps to prioritize.
- Plugin Organizer: changes the order that your plugins are loaded (it helps you prioritize the content to be rendered first.)
- WP Meteor: a plugin to postpone JS scripts and greatly improved the perceived speed by visitors (very important for the user experience).
- Gonzales: allows to conditionally disable CSS, JS, and even plugins depending on the page you visit.
- Asset CleanUp (please refer to the section above).
- Perfmatters: it lets you disable plugins everywhere except on pages and posts.

- WP Rocket cache plugin: the all-in-one solution. You can easily delay JavaScript files and remove (or reduce) unused JS in one single click.
3. Minify JS and CSS
Minifying your code means removing any clutter and useless punctuation: new lines, spaces, etc. Those elements can help you or your developer reading the code, but they may also be responsible for slowing down your site.
Eliminating this “useless” code from your script will free up time for the main thread to focus on many important tasks. Again, it’s about making space and time for the most relevant content to be rendered first. The Coverage tab in Chrome DevTools can help you find unused JavaScript and CSS code:
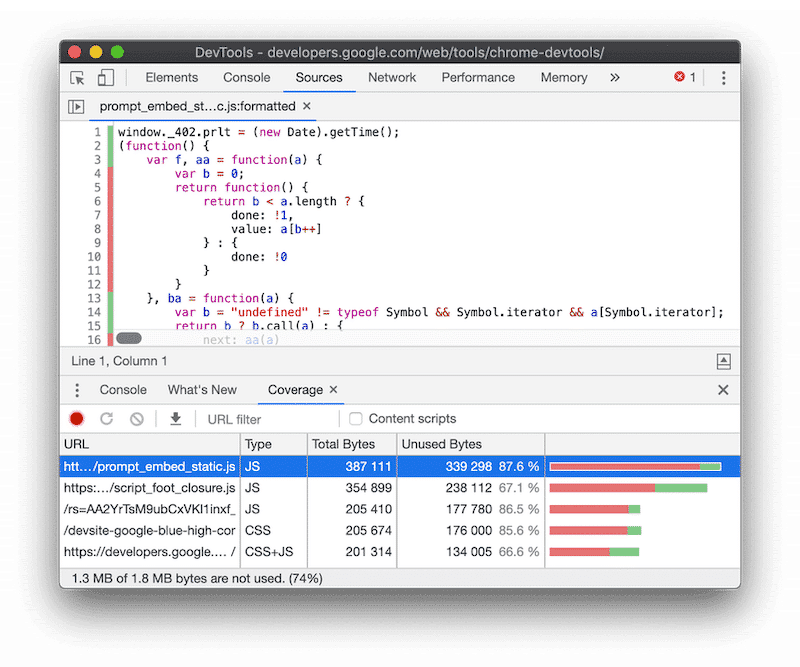
🚨 Issues identified by Lighthouse: “Reduce JavaScript Execution Time”, “Minimize main thread work”, ”Minify JS”, and “Minify CSS”.
✅ Manual solutions:
- Importance: do a backup of your site, or do not edit your JS or CSS files directly in a production server.
- Use a text editor like Sublime Text or Visual Studio Code.
- Open the file containing your code and remove the comments, white space, new lines, and indentations. Don’t forget to shorten ID, class, or variable names as much as possible and optimize your conditional statement.
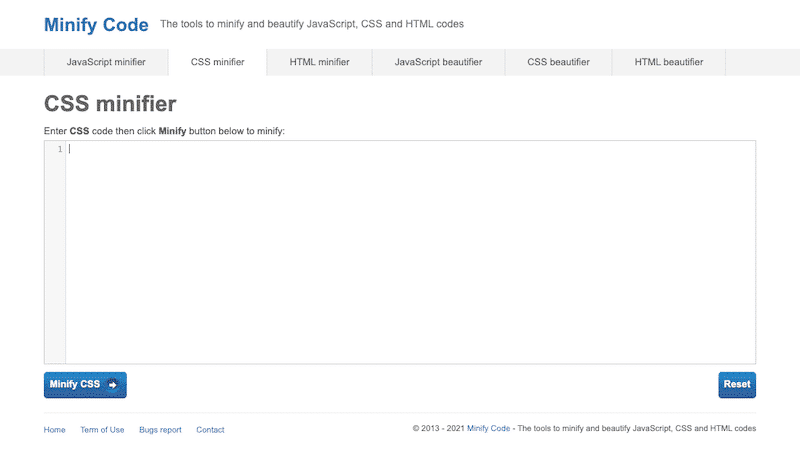
✅ Using a web tool:
- Go to minifycode.com and click the CSS/JS minifier tab.
- Paste the CSS/JS code into the input box and click the Minify CSS/JS button.
✅ Use a WordPress plugin to minify your CSS and JS:
- Closure Compiler by Google (JS)
- UglifyJs (JS)
- Autoptimize plugin (CSS and JS)
- YUI Compressor Tool (CSS and JS)
- WP Super Minify (CSS and JS)
- CSS Nano (CSS)
- CSSO (CSS)
- UNCSS (CSS)
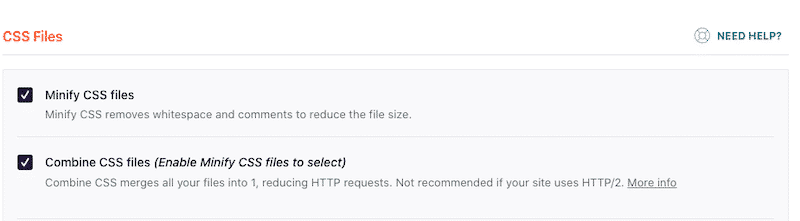
- WP Rocket allows you to minify both your JS and CSS files in a couple of clicks.

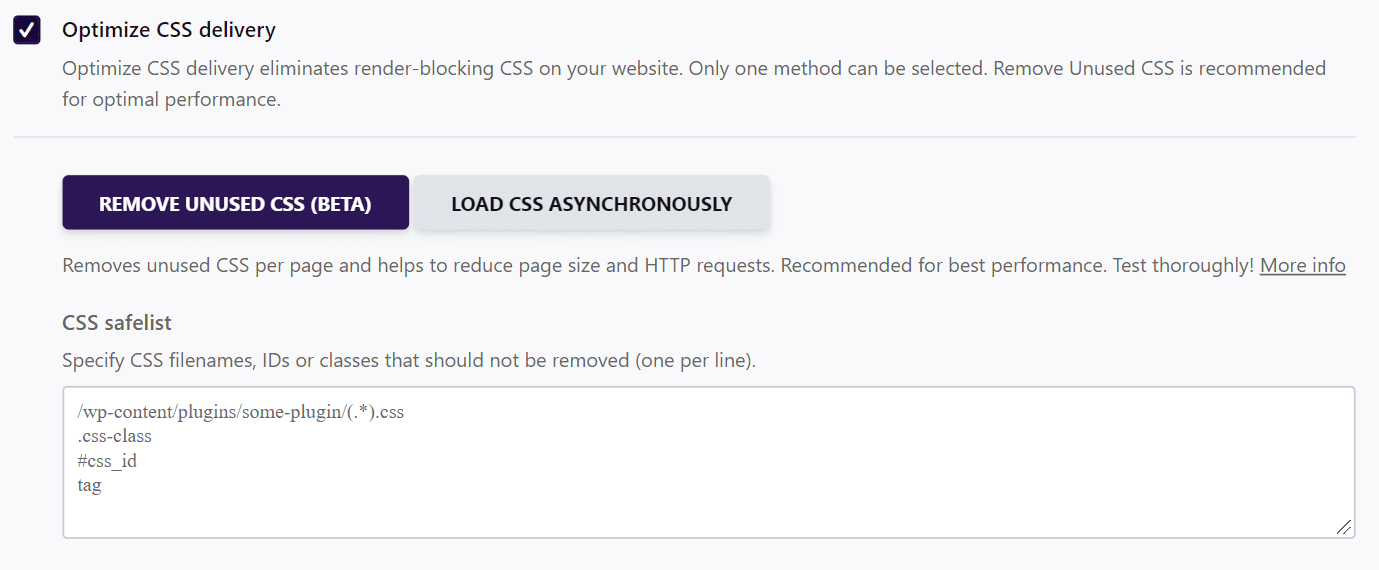
4. Optimize CSS Delivery and Reduce Unused CSS
Before the browser can render the content, it must process all the style and layout information for the current page. In other words, the browser must deliver the CSS, but this action could block the main thread from handling other important tasks and processes. Therefore, to maintain good performance, it’s essential to perform two tasks:
- Optimize the way your CSS is delivered
- Remove all the unused CSS
🚨 Issues identified by Lighthouse: “Minimize main thread work”, and ”Reduce unused CSS”.
✅ Manual solutions to optimize CSS delivery:
- Combine, compress and inline your CSS scripts.
- Prioritize the CSS rules: above-the-fold content comes first!
- Avoid using STYLE tags in the HTML body.
✅ Manual solutions to remove or reduce unused CSS:
- You will need some technical knowledge to perform this action and be careful not to break your page. If you want to remove unused CSS completely, use a tool like PurifyCSS to find out how much your CSS files can be reduced. The downside is that once the CSS to delete is identified, you have to remove it manually from the page.
✅ WordPress plugins to optimize CSS delivery and remove unused CSS:
- Speed Up – Optimize CSS delivery loads the stylesheet asynchronously, and improve your page load times.
- Autoptimize includes options to inline and defer CSS and optimize CSS
- Asset CleanUp helps to reduce unused CSS
- The WP Rocket cache plugin allows you to optimize your CSS delivery by removing (or reducing) the unused CSS in a few clicks directly from the “File Optimization menu”:
5. Reduce Server Response Time and Time to First Byte (TTFB)
If you want your TTI score to remain low, your server needs to be fast. To reduce your server response time, you can use the methods below:
- Opt for a fast and efficient hosting provider
- Use a CDN Service (having a fast CDN around the world will provide a faster content delivery)
- Use advanced caching
- Use GZIP compression
- Optimize your database
- Use the latest version of PHP
🚨 Issue identified by Lighthouse: “Reduce initial server response time”.
✅ Use an advanced cache plugin and a CDN:
✅ Enable GZIP compression
- Use the GZIP Compression Plugin.
- WP Rocket enables the GZIP feature automatically.
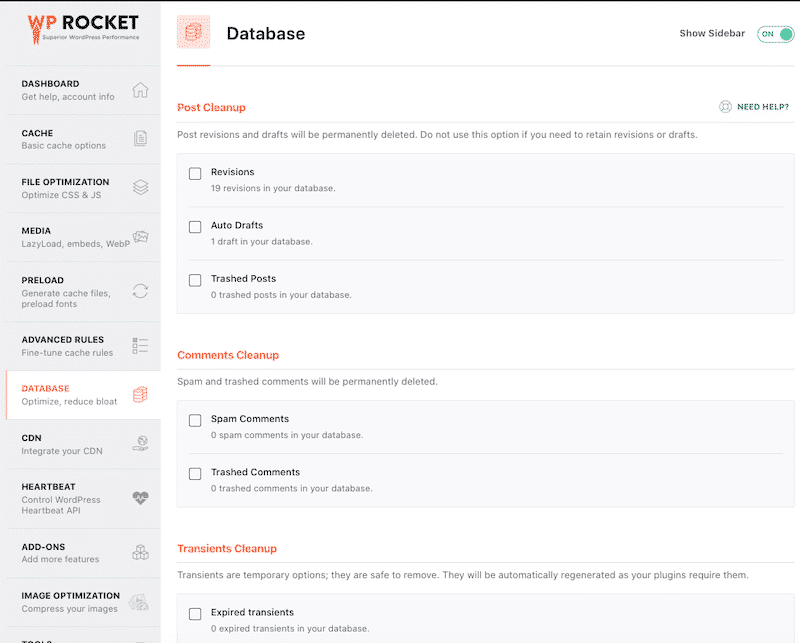
✅ Optimize your database
- Use WP Rocket to clean up your database without breaking things.
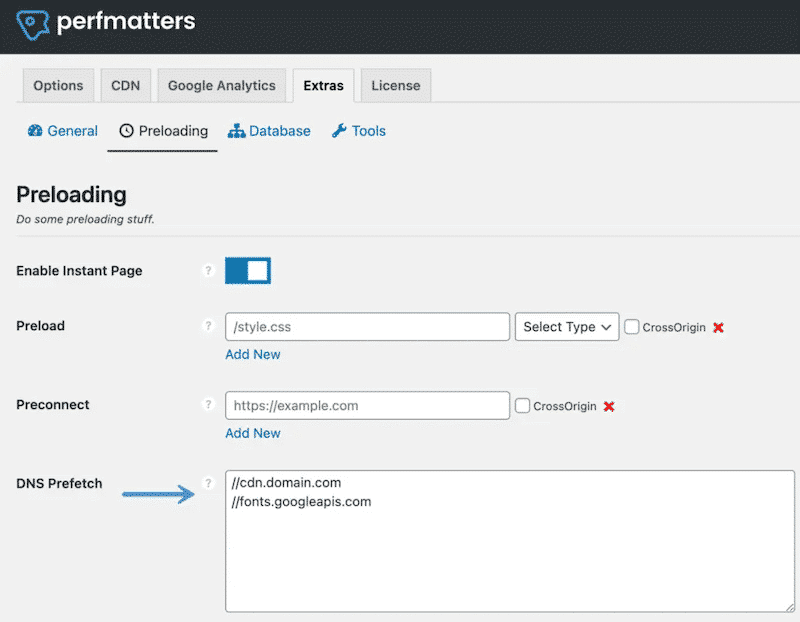
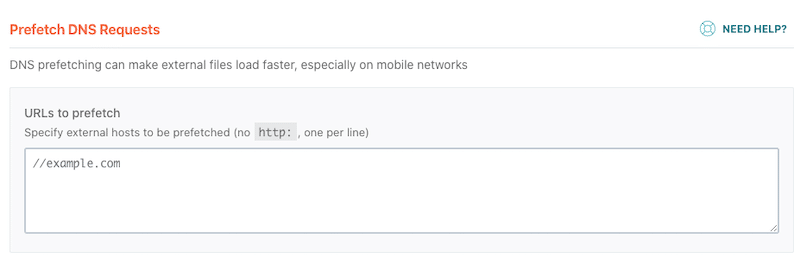
6. Prefetch DNS Requests
If you have a third-party code on your site, like a video hosted on Vimeo or some Google Fonts, you should prefetch the DNS request. It will make your website faster, ss it minimizes the loading time and resources from another website. The main idea is to use Preconnect to make early connections to third-party scripts instead of waiting until they request it.
🚨 Issues identified by Lighthouse: “Reduce initial server response time”, “Minify third-party usage” and “Preconnect to required origins”.
✅ Manual solution:
- Use “rel=dns-prefetch” in the header section. You can manually specify the domain for the browser to prefetch:
<link rel=”dns-prefetch” href=”//yourdomain.com”>
✅ Use a WordPress plugin:
- Perfmatters plugin has the DNS prefetch option:
- WP Rocket plugin also has a “Prefetch DNS Requests” section in its WordPress dashboard:
7. Preload Fonts
Thanks to font preloading, you can “force” a visitor’s browser to load the important fonts early on.
A custom font is a crucial part of your branding, so it’s very important to display it on your website. However, there are some best practices for web font preloading to avoid performance issues. Here are three pieces of advice you may want to consider:
- Use the correct font format (woff and woff2).
- Preload fonts (as explained in the section below).
- Use the correct font-face declaration (the correct font family).
🚨 Issue identified by Lighthouse: “Preload key requests”.
✅ Manual solution:
- Tell the browser to preload the font using the appropriate rel=”preload” tag and attributes:
Example:
<link rel=”preload” as=”font” href=”/fonts/custom-font.woff” type=”font/woff2″ crossorigin=”anonymous”>
Where to put the tag?
You need to insert this link tag between the head tags on your HTML for each CSS, script, and font file loaded on the site.
✅ Using a WordPress plugin:
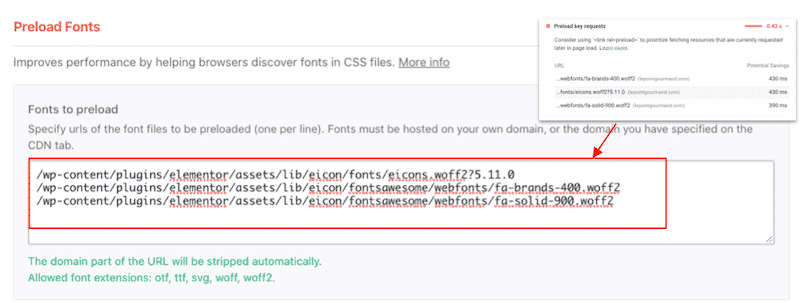
- Use WP Rocket to preload fonts. Go to the “Preload tab”, scroll to the “Preload Fonts” and simply specify the URLs of the font files you want to preload:

8. Focus on Time to Interactive on Mobile
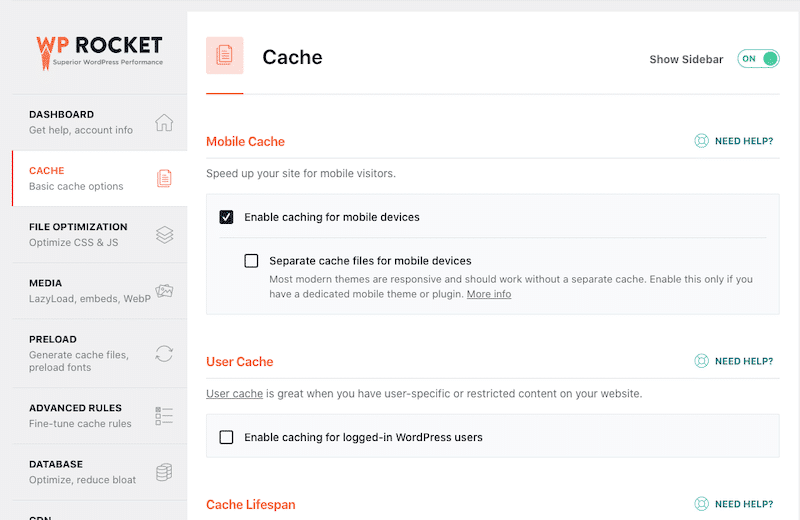
How to improve Time to Interactive on mobile? First, focus on tackling any JavaScript issue. Then, apply all the performance recommendations listed above. Just remember: the more scripts there are, the longer the TTI will be, and this can also vary from one device to another.
Let’s take the example of a smartphone with a less powerful processor than a computer. A site being loaded on the latter will necessarily suffer the impact of the number of Javascript scripts.
Google’s recommendations are to remove or postpone the scripts that are not necessary for the stability and rendering of the mobile website. So, check your JavaScript, keep the mobile version design simple, and avoid excessive use of heavy elements like a slider.
How to Reduce the TTI Score With WP Rocket
As seen in the previous part, the execution of JavaScript is the most important factor that affects the TTI metric. By delaying and deferring JavaScript using WP Rocket, you’ll improve the speed of your WordPress site.
Let’s dig into the WP Rocket features that improve the TTI grade.
Analyzing the impact of WP Rocket on the TTI score using PSI
To improve your TTI score, we recommend using WP Rocket, the best caching plugin for WordPress.
We’ve performed a speed audit for a French caterer named “Le point Gourmand…” using Google PageSpeed Insights. Let’s have a look at our performance score before and after WP Rocket:
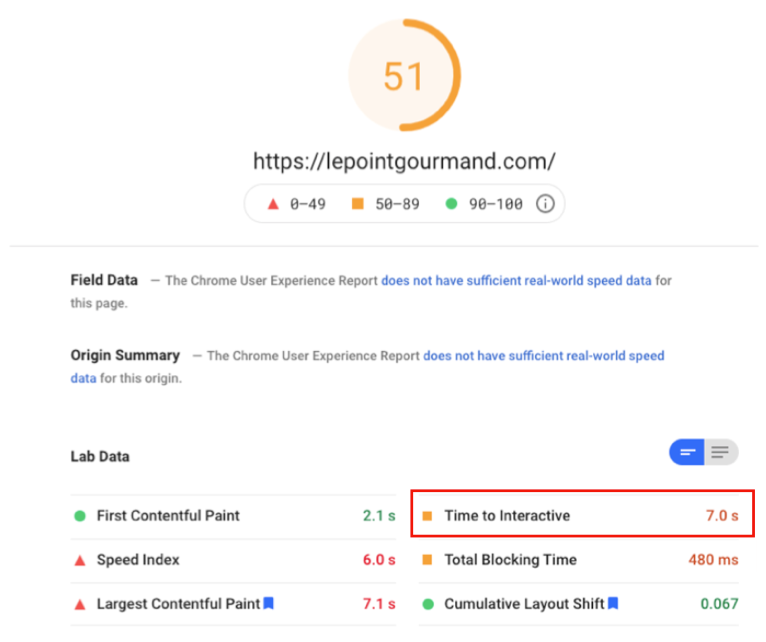
Lighthouse score before WP Rocket: 51/100
- In orange: TTI was 7,0 s, TBT was 480 ms
- In red: Speed Index was 6,0 s and LCP 7,1 s
Lighthouse score after using WP Rocket: 95/100
- In Green: Speed Index, FCP, TBT, CLS, and… TTI!
Do you remember that the diagnostic and opportunities sections were full of red issues before activating WP Rocket? My website was not in very good health, and many JS related issues were found:

Optimizing performance with WP Rocket
After the activation of WP Rocket, I also enabled the following options as we recommended in the previous section:
- Optimization of JS files (Load JS deferred and delay JS execution features)
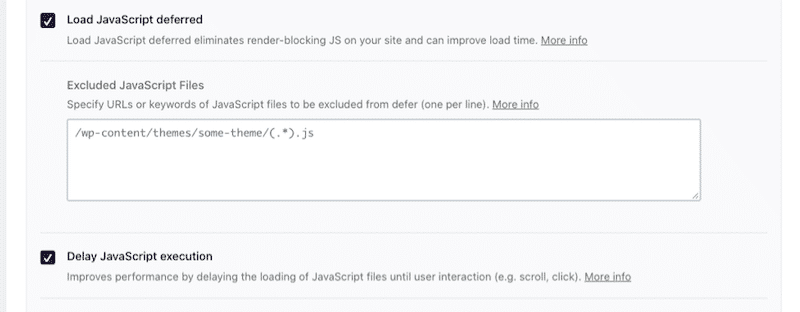
- Optimization of CSS files, from minifying to optimizing the CSS delivery:

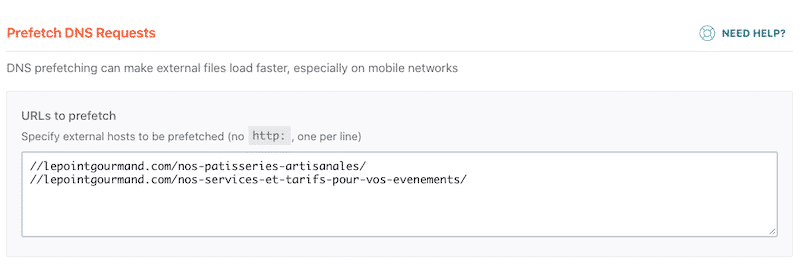
- I’ve also added some URLs to prefetch, and it increased my score again:
- I also used the WP Rocket “Preload fonts” feature:
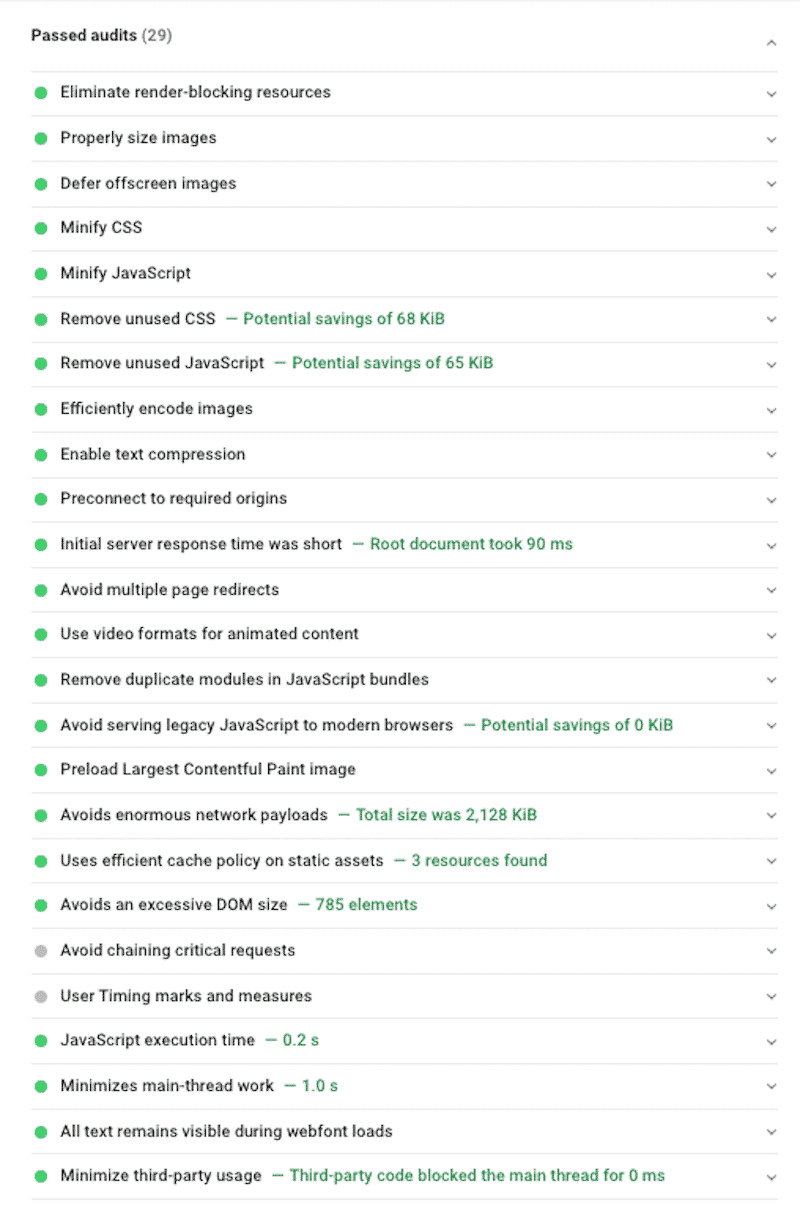
In conclusion, my “Passed audits” list has significantly grown, and some issues like “Minify JS”, “Minimize main-thread works,” “Remove unused JS” or “Eliminate render-blocking resources” are gone thanks to the WP Rocket plugin.
Wrapping Up
Hopefully, this technical guide has helped you to understand how to optimize your TTI score for your WordPress site.
TTI is an important user-centric performance metric as it counts for 10% of the Lighthouse performance grade. Optimizing this metric can help your visitors perceive a noticeable improvement in how fast they can fully interact with the content on your page.
The easiest and most convenient way to get a great TTI score is by installing WP Rocket which applies 80% of web performance best practices automatically after its activation.
Another benefit to using WP Rocket is that it’s an all-in-one solution: you don’t need to have several performance plugins activated for every single recommendation.
Remember that you can always count on our 100% money-back guarantee within 14 days of purchase if you feel like WP Rocket is not for you.
🚀 Make your visitors stay on your website right now!