Table of Contents
Last update on
Learning how to cache a website is essential. Caching is important in website performance, user experience, and SEO. There are several ways of implementing it, and you will learn all about it in this post.
Below, we discuss what caching is, how it works, its benefits, and the different types that exist. After that, we show you three different methods you can use to enable caching for your website and a case study to point out its impact on performance. Finally, we’ll quickly cover how and why to clear a website cache.
What Is Caching?
On the most basic level, caching means storing copies of files in a cache—a temporary storage location—to make them available for quick access. It’s a method used in many areas of software and technology, including browsers, programs, and operating systems.
Ahmed Saeed, Lead Software Engineer at WP Rocket, explains:
Caching is akin to keeping a shortcut in your pocket to avoid a long journey. It ensures that frequently accessed data is close at hand, drastically reducing retrieval times — like saving a shortcut to access data from a nearby location rather than a distant one.
Since websites consist of different types of files, they’re perfectly suitable for caching as well. You can store your site’s HTML, CSS, JavaScript, and image files to allow browsers to access them more quickly and show your website faster.
Some types of content are more suitable for caching than others. For example, static content, meaning site elements that don’t change often, is perfect for it. Your website logo is a good example because you’re unlikely to switch it often.
On the other hand, content that changes frequently is a different story. While you can cache it as well, you have to put rules in place to ensure visitors don’t see an outdated version. More on that soon.
What Are the Types of Caching?
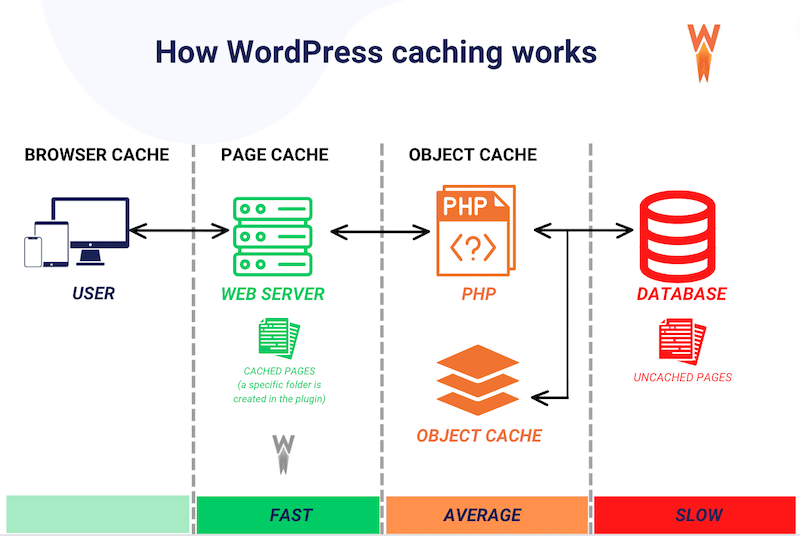
It’s possible to cache a website at different levels of the loading process. There are two main types: server and client-side caching.
Client-side caching relates to anything that happens on the computer or in the browser (i.e. the “client”) of your visitors. Server caching, on the other hand, occurs on the machine that contains your website files.
Browser/Client Caching
When browsers display a website, they must download a lot of data. To shorten the loading time of a repeat visit, they store a lot of the content on the visitor’s hard drive, where it’s faster to access.
Here’s a quote to better understand what we mean when we talk about browser and client requests:
The best and fastest request is a request not made. Prior to dispatching a request, the browser automatically checks its resource cache, performs the necessary validation checks, and returns a local copy of the resources if the specified constraints are satisfied. Similarly, if a local resource is not available in cache, then a network request is made and the response is automatically placed in cache for subsequent access if permitted.
High-Performance Browser Networking, by Ilya Grigorik, page 257
One example of that is DNS caching. It means locally saving the IP address associated with a website so the browser doesn’t have to look it up the next time you want to access the site.
In addition, browsers always check their cache first to see if any required assets—like images and other files—are already in there. That way, they don’t need to contact the server as much.
Ahmed Saeed adds:
It’s important to keep in mind that browser caching not only improves user experience but also reduces server load, making it a win-win for both site owners and visitors.
| 💡 To keep in mind: Browser cache is great. The only downside is that you have no control over it. Browser makers decide their caching policy, not you. |
Server Caching
There are different forms of server caching. They mainly differ in the type and amount of data saved on the server:
- Page caching: This means saving an already-compiled HTML version of a page so it doesn’t have to be created from scratch for every visitor.
- Object caching: Here, the server saves database requests for reuse, such as product searches in an online store.
- Fragment caching: Describes storing specific website elements, typically static resources like images.
- CDN caching: In this case, copies of your website data lie on additional servers in different locations. It allows visitors to download it more quickly from the server closest to them.
| 💡 To keep in mind: Server caching is under your control, making it a great tool to speed up your website. Learn more about WordPress cache. |
How Caching Works
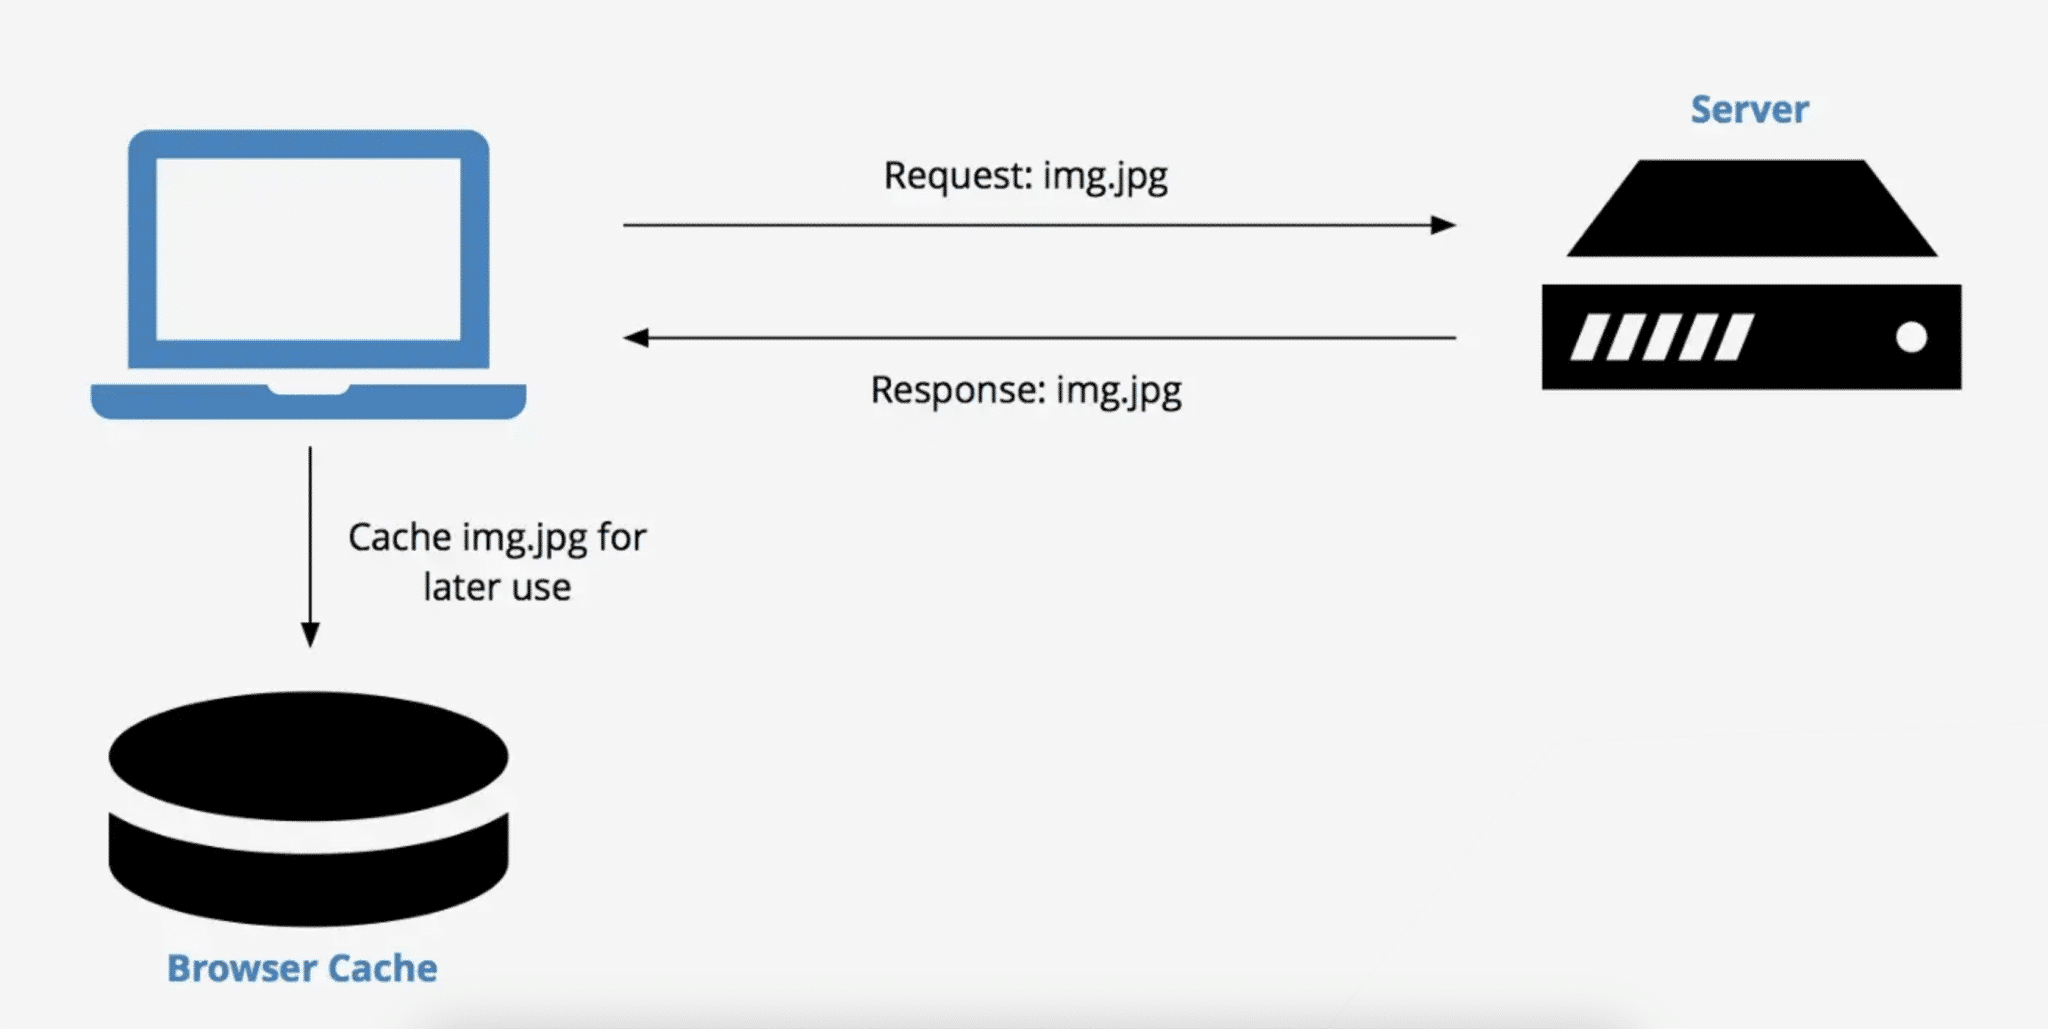
Take a look at the following image:
From the above, it’s already easy to understand how caching works:
- The user types in a URL and the web browser checks if it has the requested page’s data in the cache.
- If it does, it sends a message to the server declaring which file versions it has saved.
- The server verifies whether there are newer versions and, if there are, sends the updated resources. If they have been requested before, the server can transmit them from its own cache without processing them from scratch.
- The web browser displays the requested web page using the existing data from its cache and any data sent over from the server.
Now it’s time to talk about the technology making caching a website possible: caching headers.
Ahmed Saeed puts it simply:
HTTP headers act as the traffic signals of the web, guiding browsers on when to stop, go, or refresh their resources.
Understanding Request and Response Headers
Request and response headers are small pieces of text exchanged by browsers and servers. They include important information and instructions for the data transmitted between them.
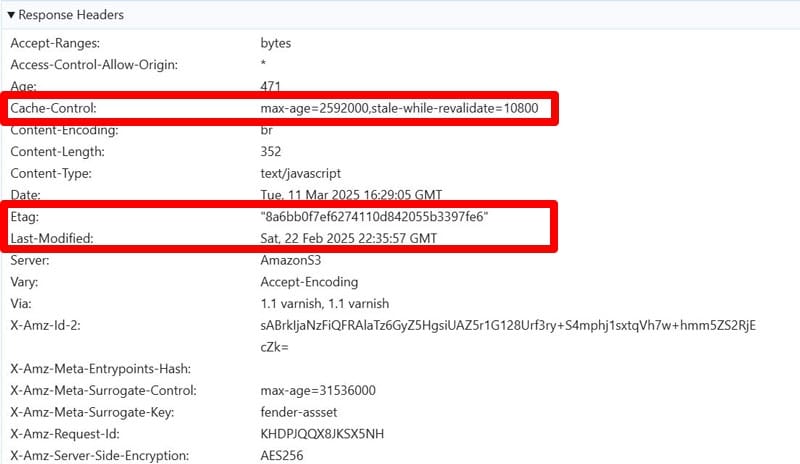
One thing they do is configure caching behavior and several headers exist for this purpose. They include cache-control, expires, last-modified, and etag. Caching headers basically work in two ways:
- Declare whether a website file should be cached at all, for how long, and by whom (browsers and/or servers).
- Mark the age and “version” of a file so browsers only redownload it if there is a newer edition on the server.
All of this helps reduce the number of files and amount of data needing to be transmitted to load a website, helping to speed up the process. And while caching headers can seem a bit technical, they are important to be aware of, especially if you decide to configure caching on your server by hand.
How to Cache a Website: 3 Options to Consider
To cache a website, you have 3 options: enabling it manually by setting up caching headers, using a CDN, and taking advantage of a performance plugin.
1. Enable Caching Manually
Configuring caching by hand is the most complicated approach because it requires you to manually set up caching headers on your server.
Ahmed Saeed explains the reason behind such complexity:
Manual caching setup offers unparalleled control but requires a deep understanding of server configurations and caching policies to avoid pitfalls.
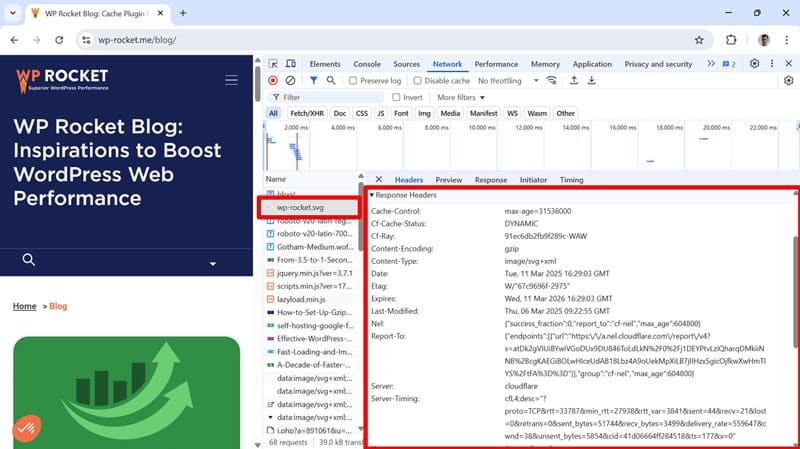
The first step is to check the status quo since your hosting provider or your website software might already have done some of the work for you. For that, open your site in a browser, access the developer tools (Ctrl/Cmd+Shift+i in most browsers), and then go to the Network tab (you may have to reload the page to see something here).
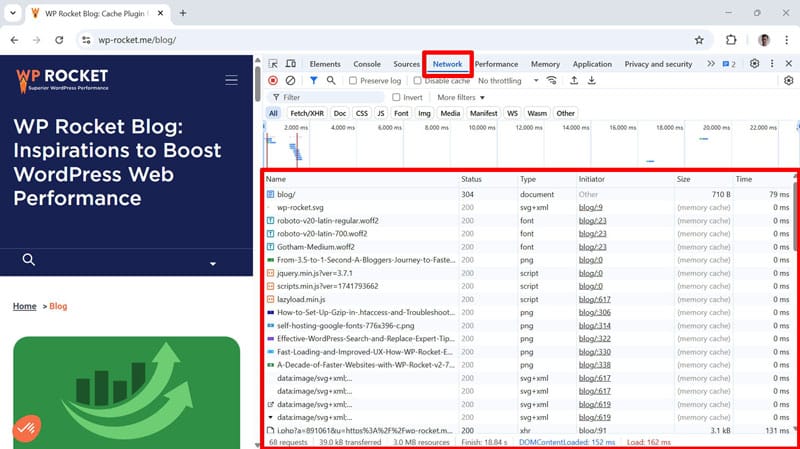
Click on any resource to see its request and response headers.
After that, you need to define your caching strategy. This will look different for each use case. For example, a news website needs shorter caching intervals than a brochure site. The content of news sites changes by the minute while brochures stay largely the same.
Generally, you want to try to balance cache duration and data freshness:
- Cache static assets longer, e.g. media files and downloadable content. For example, you can likely cache your logo and font files for the maximum time of one year.
- Use cache-control: no-store for resources that should never be cached.
- Include a validator such as last-modified or etag to ensure resource freshness without sacrificing the benefits of caching. Some web caches also require an age-controlling header and a validator to work at all.
| 📖 You can find detailed tips in the web.dev article on caching. |
The next step is to implement your chosen settings on your server. How to do that depends on what software your server is running on. Here are instructions for the most common setups:
Alternatively, your hosting provider may also offer caching and the ability to activate it from your hosting panel.
2. Use a CDN
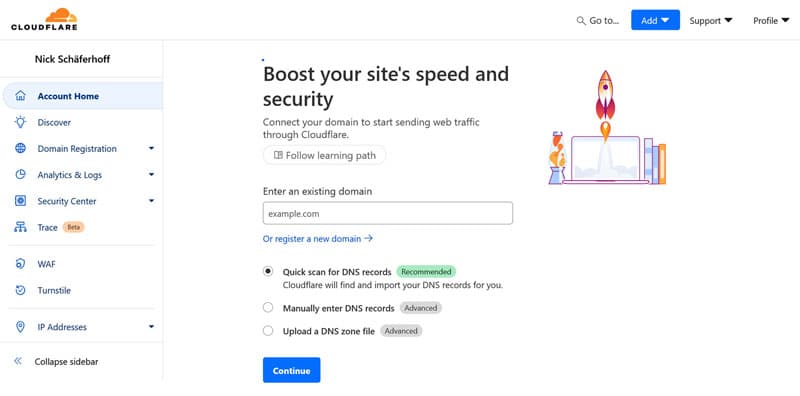
Another way to cache your website is to sign up to a CDN. For that, you first need to choose a CDN provider. We will use Cloudflare as an example here because it’s one of the most popular services.
Start by signing up to your CDN of choice. Go to their website and create an account.

Choose a plan that fits your needs and provide your website address.
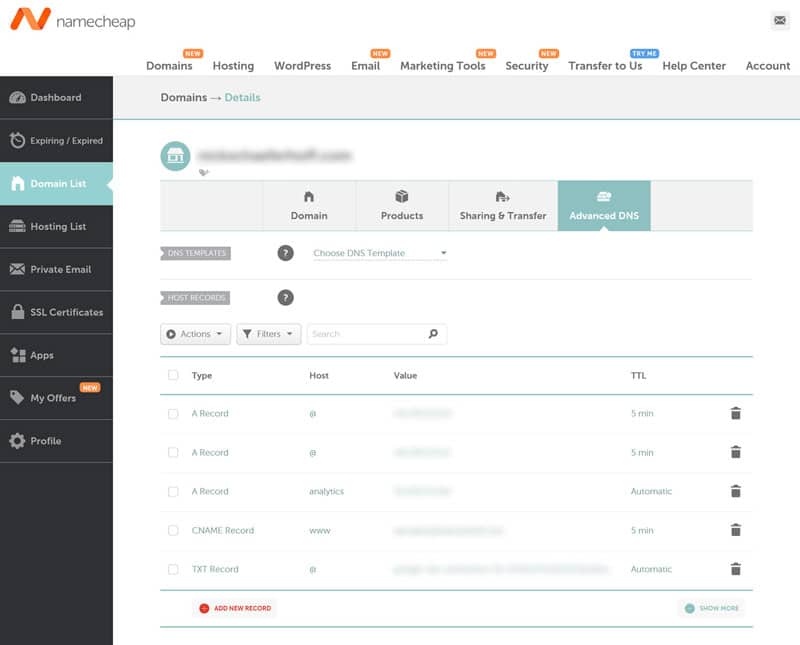
After that, you need to update your DNS settings. The CDN provider will scan your current records and then show you their nameservers.
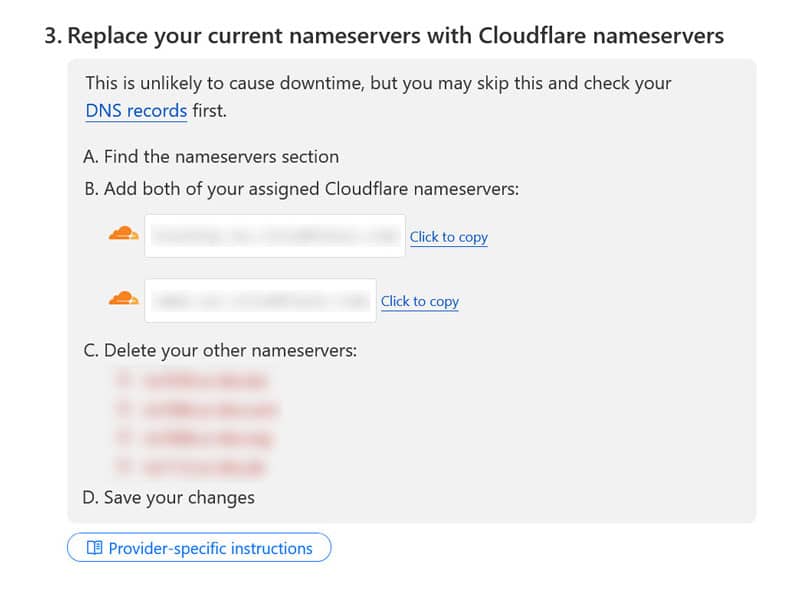
With that in hand, log into your domain registrar (e.g., Namecheap, GoDaddy, or Google Domains), find the DNS settings section and replace the existing nameservers with the ones given to you by your CDN.
Save your modifications, then wait. DNS changes may take a few hours to fully propagate. Once completed, your website will be successfully routed through the CDN. The last step is to make sure that the CDN has caching enabled.
| 💡 Did you know that, besides CDNs, many other options exist to speed up your website? |
3. Use a Performance Plugin
Finally, if you’re using a WordPress website, you can use a performance plugin like WP Rocket. It takes care of everything related to caching automatically, so you don’t have to deal with the technical parts. Plus, all you need to do is install and activate the plugin.
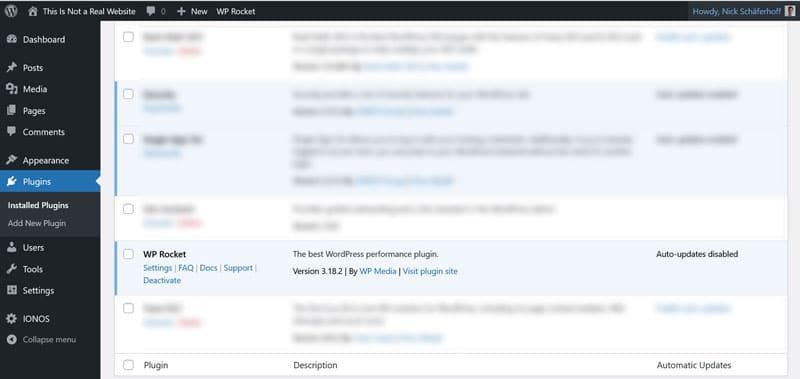
After you do this, caching is immediately active on your site, including a dedicated cache for mobile devices. Under Advanced Rules, you can fine tune your cache further.
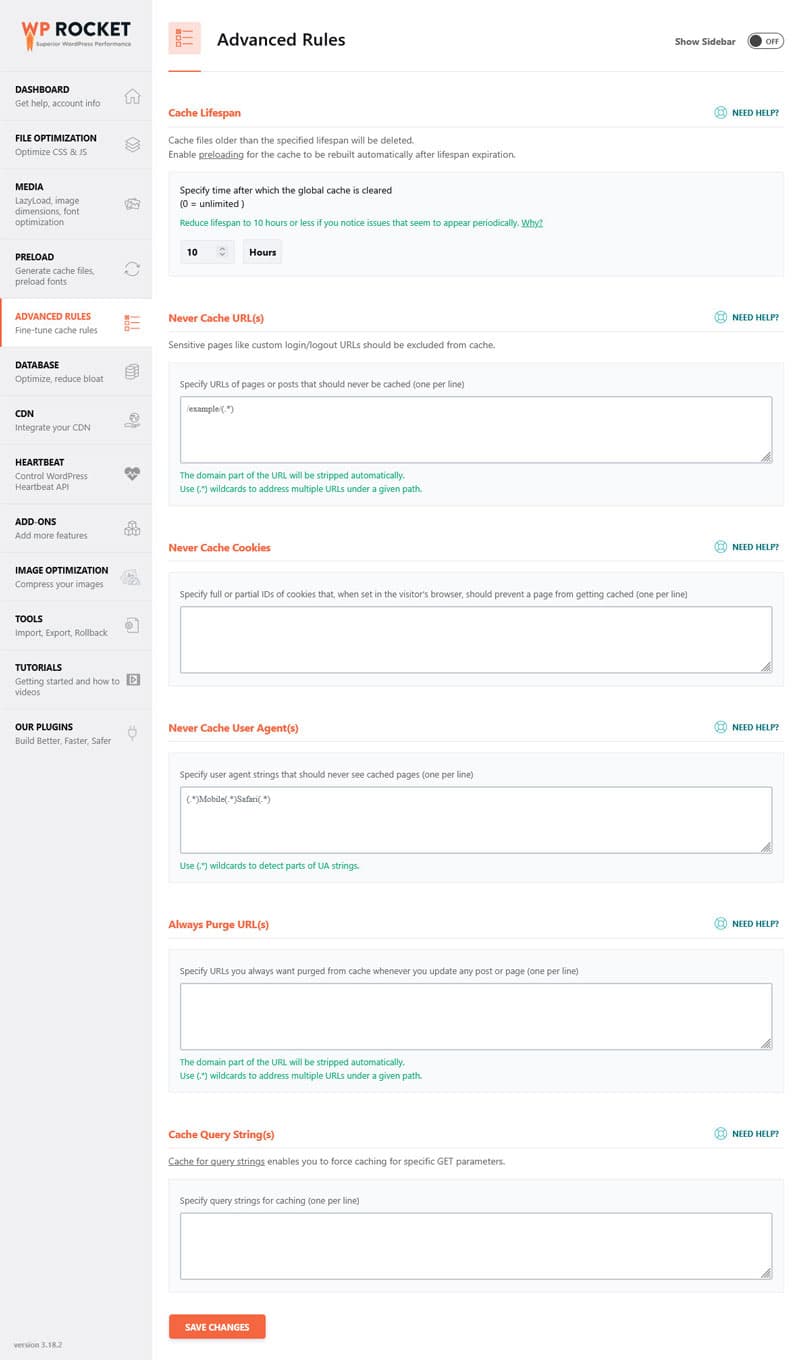
Among other options, you can determine the caching lifespan and define pages, cookies, and user agents for which you don’t want to use caching. You’ll find more info in the documentation.
In addition to caching, WP Rocket offers many more features to speed up your WordPress site, including:
- Lazy loading for images and videos
- Deferring render-blocking resources
- Preloading cache, links, external files, and fonts
- Database optimization
- Ability to easily connect to a CDN, including RocketCDN, that is WP Rocket own CDN.
What’s more, WP Rocket implements many additional performance improvements in the background. Among them are GZIP compression, minifying CSS and JavaScript files, and optimizing images above the fold to improve Largest Contentful Paint.
| 🚀 In fact, 80% of performance best practices spring into action on your site as soon as you activate the plugin. As a result, your website gets faster immediately without having to do anything yourself. |
The Performance Impact of Caching a Website: A Case Study
To examine the effect of caching on improving website speed in real life, we set up a testing site with some dummy content and ran it through PageSpeed Insights before and after activating WP Rocket.

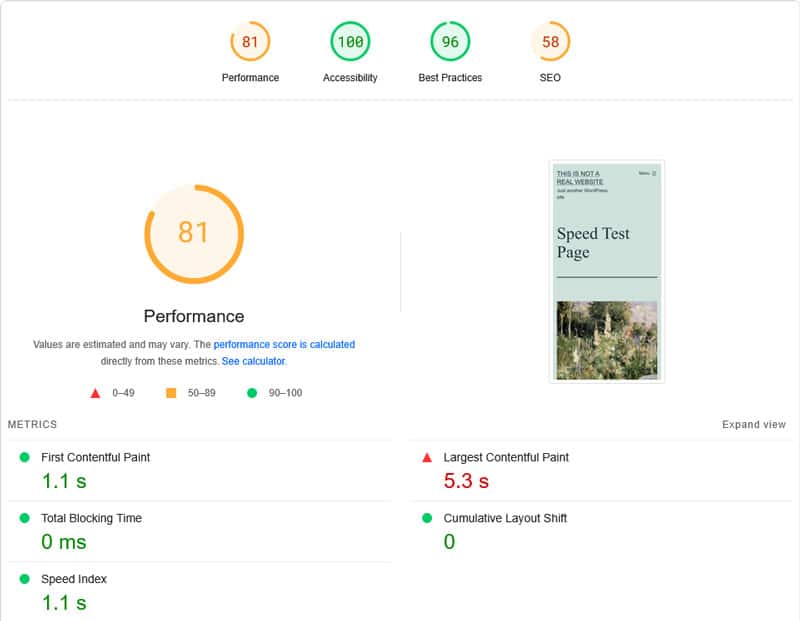
Here are the results for mobile devices without caching:

| Mobile performance score | 78 |
| First Contentful Paint | 1.2s |
| Largest Contentful Paint | 5.3s |
| Speed Index | 4.1s |
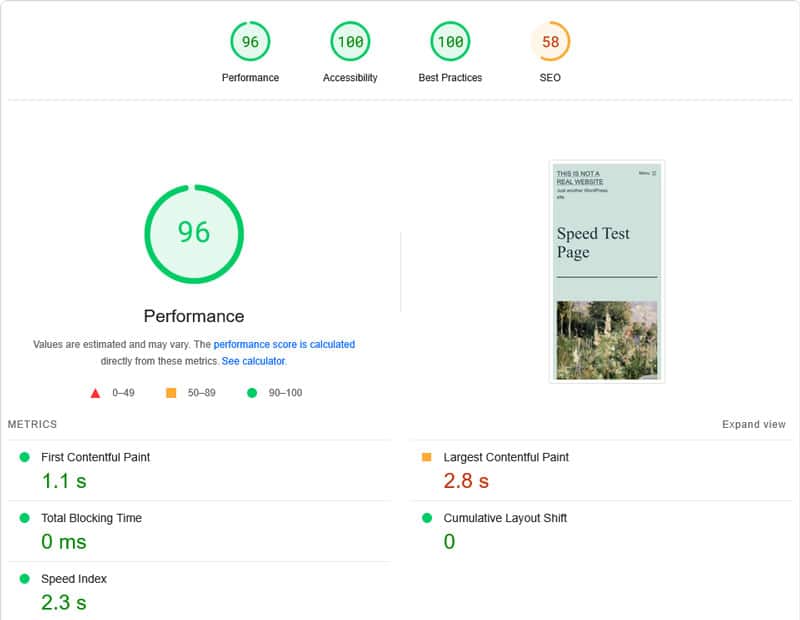
Now let’s see what happens after caching is activated:
| Mobile performance score | 81 |
| First Contentful Paint | 1.1s |
| Largest Contentful Paint | 5.3s |
| Speed Index | 1.1s |
While the effects aren’t huge, they are noticeable. Especially the improvement of the Speed Index value by three seconds is nothing to scoff at.
As we have discussed throughout the article, caching has the most impact on repeat visitors. Since PageSpeed Insights purposely doesn’t take advantage of much of what caching has to offer, it’s no wonder the effects aren’t bigger. It should be more noticeable for repeat visitors to your website.
If you’re wondering, below is what happens when you switch on a few more speed improvements in WP Rocket, like removing unused CSS, deferring JavaScript, lazy loading for images, and preloading. All it takes is checking a few boxes.
How to Clear Website Cache
Clearing your website’s cache can be necessary for troubleshooting issues, adding new features, and ensuring the latest content is visible to visitors. Naturally, since caching happens on different levels, there are also different ways of emptying it.
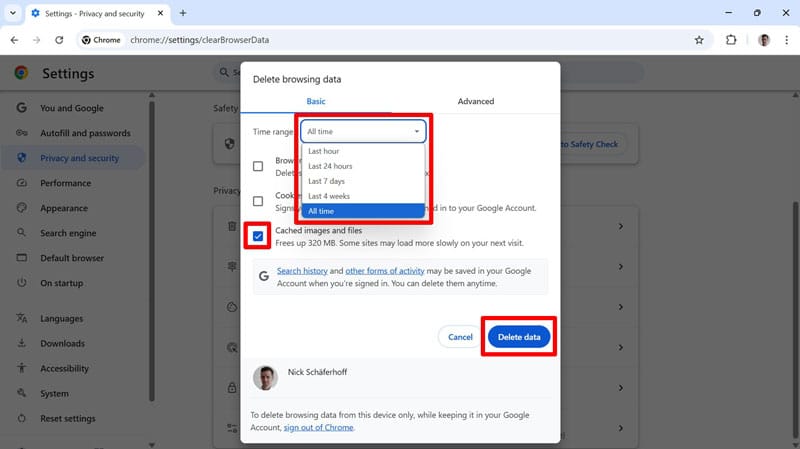
Delete Browser Cache
The exact method for emptying the browser cache depends on which browser you’re using, but all of them have options in their settings. In Chrome, you find it under Privacy and security > Delete browsing data.
Clear Server Cache
If caching has been implemented on your server, your hosting provider most likely has an option to clear it.

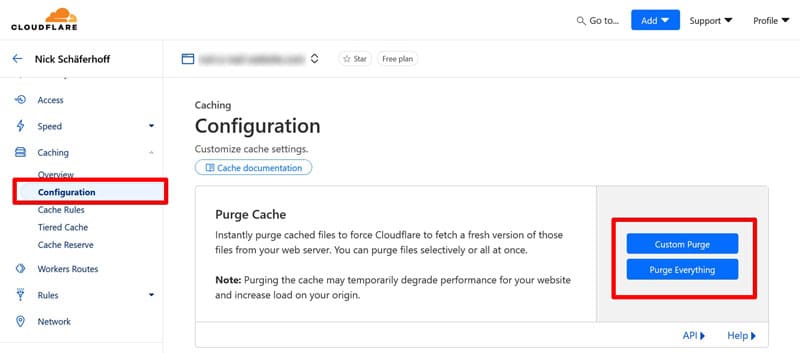
Empty the Cache of Your CDN
Purging your CDN cache naturally happens through your CDN provider. For example, in Cloudflare, the option is available under Caching > Configuration > Purge Cache.
Purge Cache on Your Website
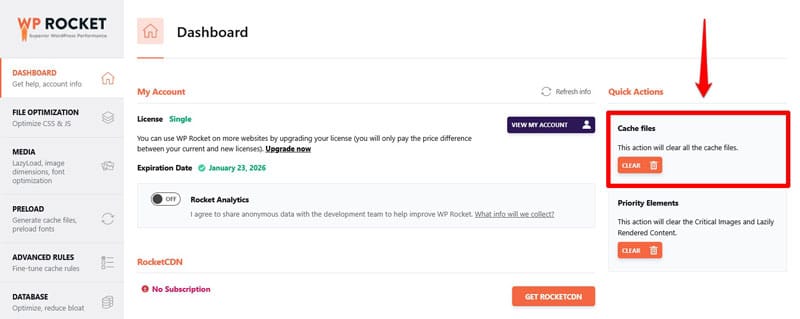
If you’re using a plugin to cache your website, it usually has a button somewhere that allows you to clear the cache. WP Rocket purges the website cache automatically at appropriate times, like when you change its settings, publish new content, modify your website, or when the cache lifespan runs out.
If you want to do it manually, you can find this option directly on your dashboard under Settings > WP Rocket in your WordPress back end.
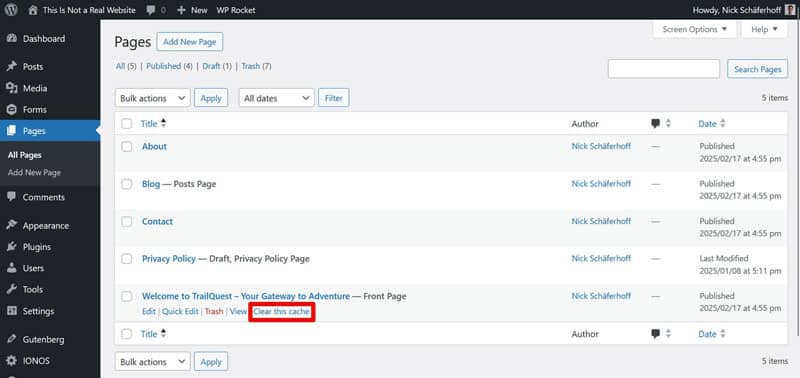
You also have the ability to clear the cache for individual pages either inside the WordPress editor or from the Pages or Posts menu by hovering over the entries there.
How Do You Cache a Website? Now You Know
Caching is one of the most fundamental ways of making your website faster. It’s a simple method to reduce the amount of data needing to be transmitted for visitors to view your website.
Caching is available on different levels of the loading process and can target different website elements, although the principles stay the same.
Use WP Rocket to implement caching on your WordPress site automatically and take advantage of dozens of other performance features and best practices to make your website faster immediately. The plugin comes with a 14-day money-back guarantee, so you can test it completely risk-free.