Table of Contents
If you have recently run a performance report on PageSpeed Insights, Lighthouse may have recommended you to “keep request counts low and transfer size small”:
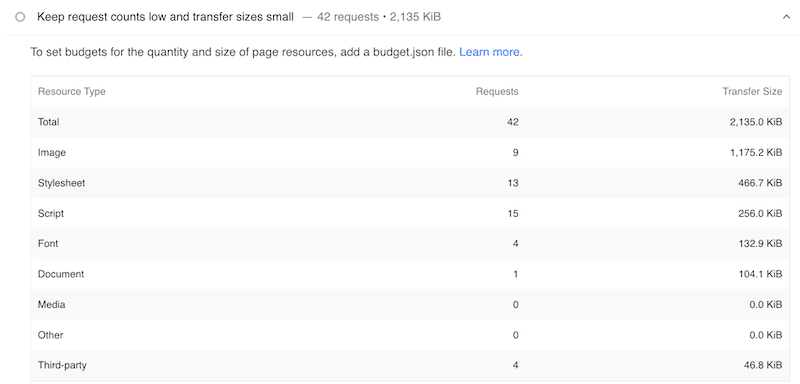
Lighthouse crawls your web page and reports the number of network requests made by each resource such as images, fonts, documents, CSS, etc. The goal is to help you identify the most significant resources using bandwidth to know what may cause bad performance.
In this article, we explain how heavy page resources and large transfer sizes affect the speed of your website. We also share some techniques and plugins you can use to control the request counts and the transfer sizes.
What Keep Request Counts Low and Transfer Sizes Small Means
This PSI audit lists the total number of requests and transfer sizes made by each web page component: scripts, images, fonts, other media, etc.
A “request” refers to the number of files (resources) used to render the web page, and “transfer sizes” refers to the size of these resources.
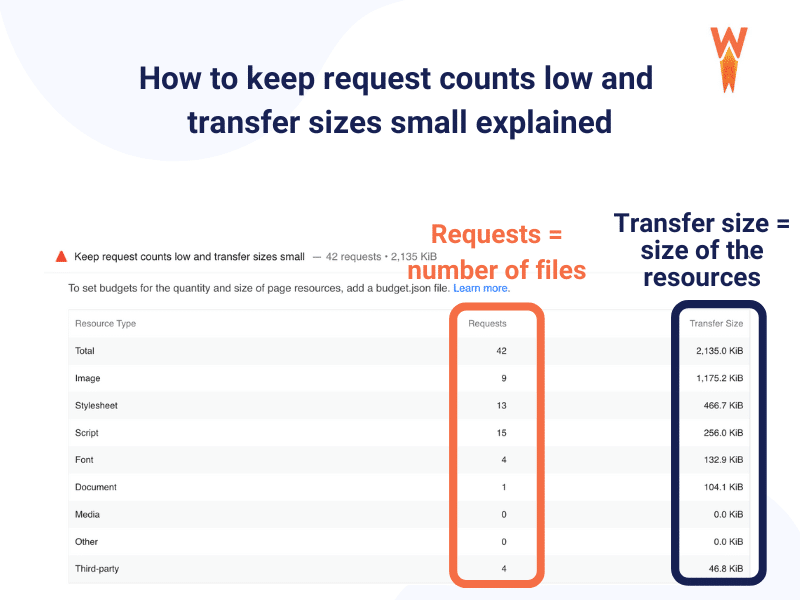
Lighthouse recommends keeping the resources as small as possible and keeping request counts low if you want to ensure a great performance.
Why Request Counts and Transfer Sizes Matter for Performance
Controlling request counts and transfer size are crucial for performance because large files are more likely to harm your site’s speed.
In fact, the larger the transfer size and the higher the request counts, the longer it takes for your page to load all the resources. Some of them may even be render-blocking which may affect the browsing experience for your visitors.
That’s why it makes sense that Google recommends minimizing the number of required requests and decreasing the size of your resources. This audit helps improve the Lighthouse performance score by telling you which requests you should work on first.
What Is Considered As “Good” Transfer Size?
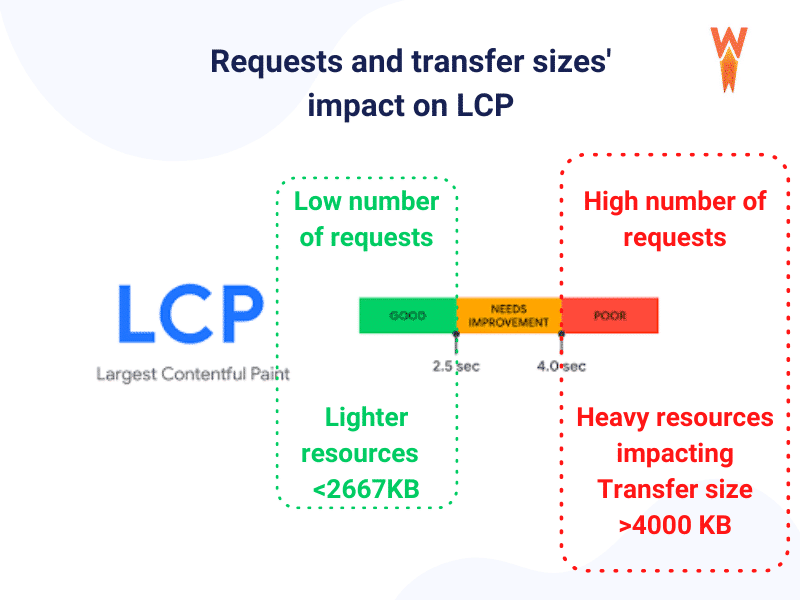
Transfer size is good when it’s right under 2667 KB. Anything more than 4000 kb is considered bad for Lighthouse. To have fast-loading pages even on slower connections, it’s more judicious to keep your request counts low, and transfer sizes small.
What’s the Impact of the Requests and Transfer Sizes on the Core Web Vitals?
Another reason to keep your request counts low and transfer sizes small is to optimize your Largest Contentful Paint (LCP) metric. LCP is one of the Core Web Vitals created by Google, aiming to measure when the page’s main contents have finished loading. The LCP grade will be negatively impacted if your main content is heavy.
How to Keep Request Counts Low and Transfer Sizes Small
There are 4 main optimization techniques to follow if you want to keep requests counts low and transfer size small according to each resource type identified by Lighthouse.
1. Make your code as clean as possible and trim your scripts (CSS and JS)
- Minification and compression of the code.
| Example of non-minified JS | Example of a minified JS |
- Remove unused code.
- Defer and Delay JS Load (keep only the code you need).
You can use the async or defer attribute on scripts that affects performance:
<script async src="script.js"> <script defer src="script.js">
- Reduce JavaScript payloads with tree-shaking (a form of dead code elimination).
2. Use caching and compress your text resources with GZIP
- Text compression with GZIP.
- Caching data also reduces the number of requests on the database, reducing the load.
3. Optimize your images and media
- Optimize your images with the right format (Use WebP instead of JPEG or PNG).
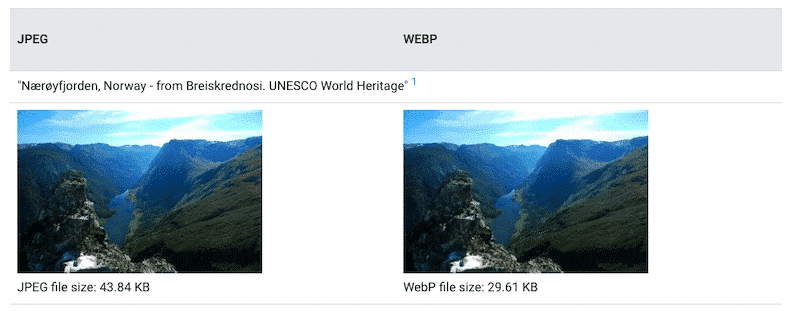
- Use image compression to reduce the file size of your image.
This is how a plugin like Imagify can help you make your image smaller while preserving the quality:
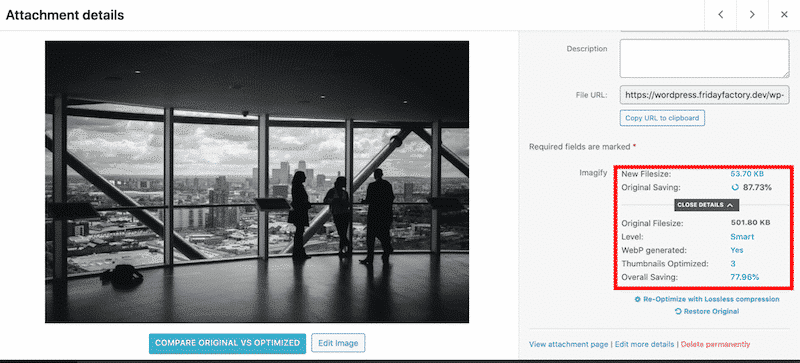
- Use lazy-loading – tell the browser to prioritize the above-the-fold images first. This is how the lazy load script can look like respectively on an image and on an iframe:
<img src="image.jpg" alt="..." loading="lazy"><iframe src="video-player.html" title="..." loading="lazy"></iframe>
- Replace GIF with videos.
4. Optimize your fonts and other third-party resources
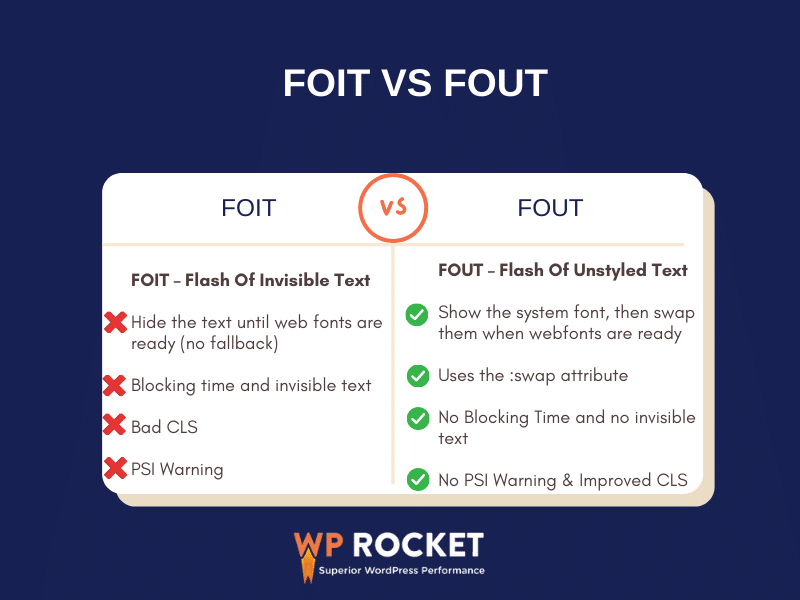
- Inefficient loading of font files can cause invisible text during the page load.
- Control the impact of third-party resources on your page speed.
Now that you know how to optimize requests to be as small as possible, you can apply those techniques manually or using several WordPress plugins.
Keeping Request Counts Low and Transfer Sizes Small Manually
You can apply all the optimization techniques mentioned above and create a performance budget. There are no good or bad metrics. Google recommends that you set your standards. You should start with small steps and set a budget at 20% faster than your current speed. For instance, you could set the following goals for your web page:
- Number of web fonts used: 1 family font max.
- Maximum image sizes: 2000 KB
- Number of external resources you call to max X resources
- The total size of my CSS and JS files: no more than X KB
- What to prioritize: e.g., only above-the-fold content
- Try to deliver under 200 KB of critical-path resources
| You can learn more about creating your first performance budget with Google if you want to implement each optimization step manually. ⚠️We recommend you do this only if you have advanced expertise in tree-shaking, assets management, and code combination. |
If you are not too comfortable with implementing your own guidelines and applying all those advanced optimization techniques manually, you have the option to use several WordPress plugins in your performance journey!
Keeping Request Counts Low and Transfer Sizes Small Manually With a Plugin
The best WordPress plugins to keep request counts low, and transfer sizes small are:
Let’s go over each of them.
1. WP Rocket
A great way to keep request counts low and transfer size small is to use WP Rocket, one of the best caching plugins for WordPress. Not only do the plugin implements caching and GZIP compression upon activation, but it also offers the following performance optimization features:
- Minify CSS:
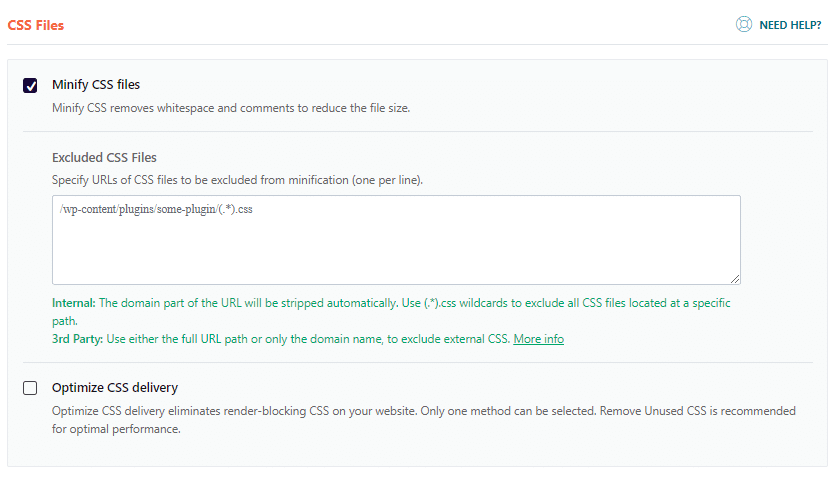
- Optimize CSS delivery by removing unused CSS:
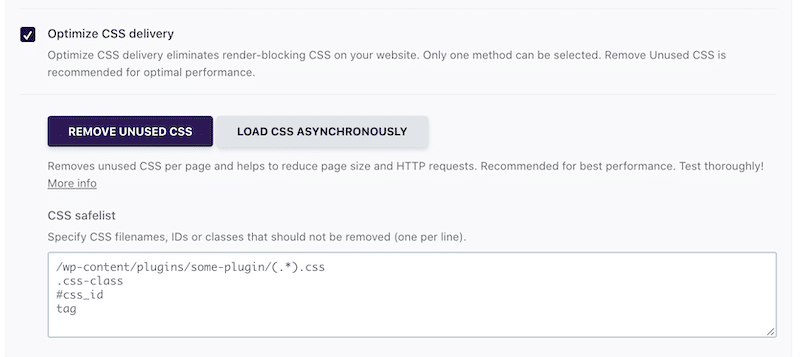
- Minify and combine JavaScript:
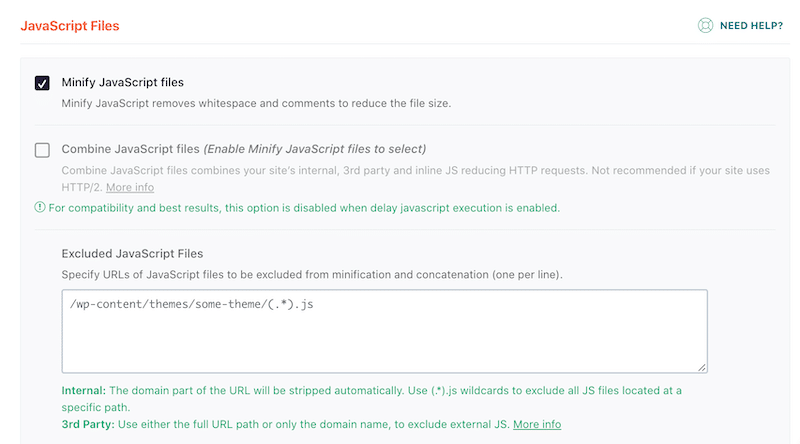
- Defer and Delay JS execution by applying the “defer” attribute:
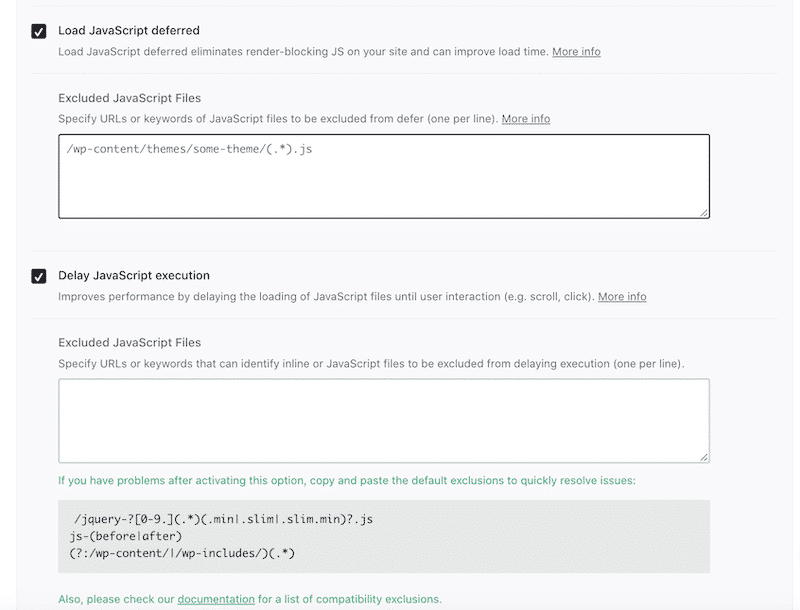
- Google fonts optimization (WP Rocket has this option enabled by default, and you can also preload fonts):
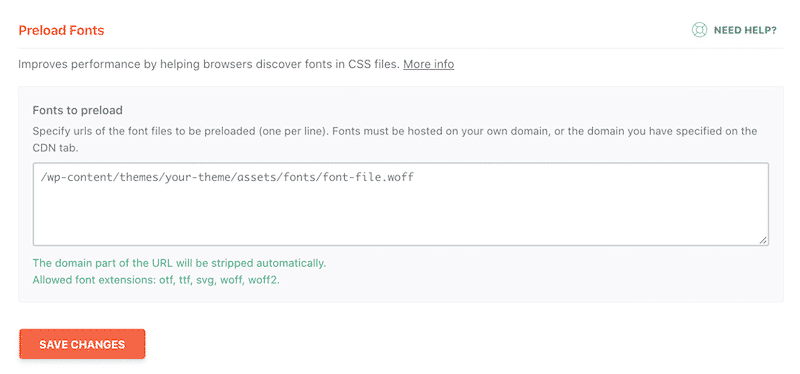
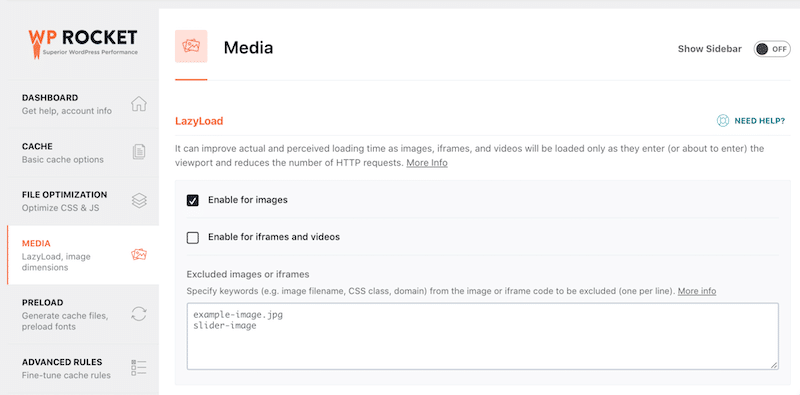
- Implement LazyLoad on images and video:
2. Asset Clean Up
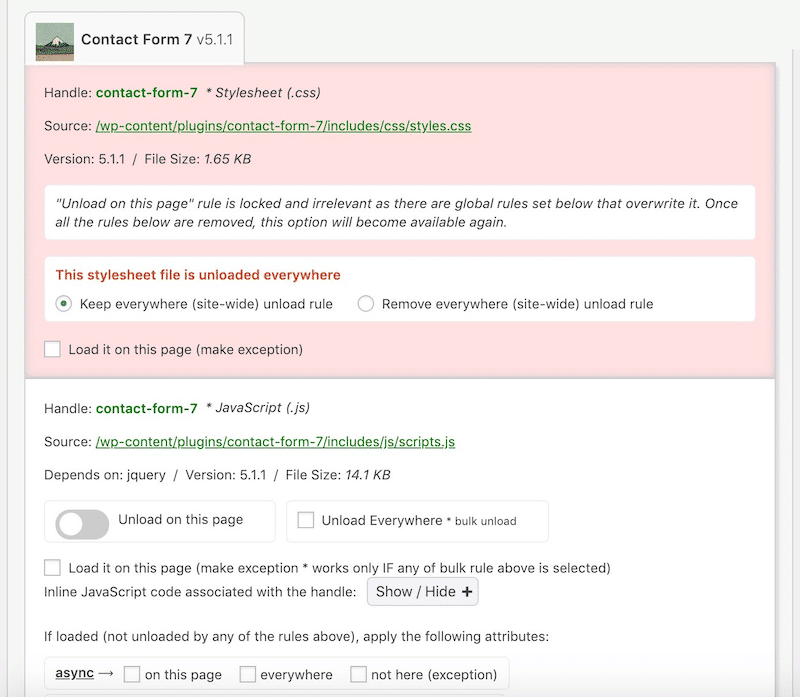
This freemium performance plugin scans your page and detects all loaded assets. You can decide to select the CSS/JS that is not necessary to load a specific page, this way reducing the bloat. For instance, a contact form must only be loaded when a user requests the “contact” page.
💡The developers recommend using Asset Clean Up with a cache plugin like WP Rocket and a high-quality hosting provider.
- Unloading useless CSS/JS on selected pages:
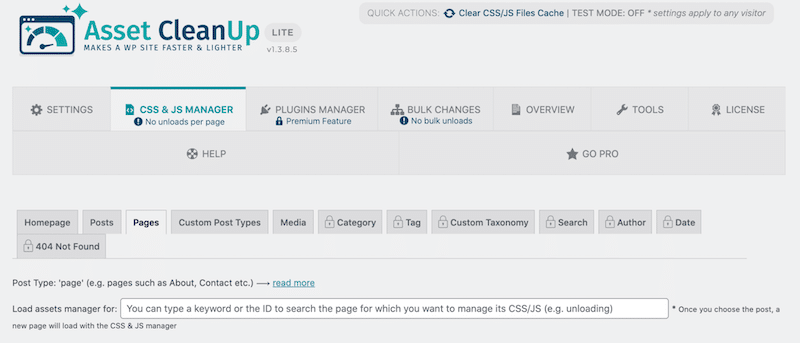
- Choose to load assets manage for any posts and pages:
- Preload CSS/JS, Local Fonts & Google Fonts files.
- Choose to minify CSS and JS files on each page:

- Defer combined JS files by applying “defer” attribute.

3. Gonzales
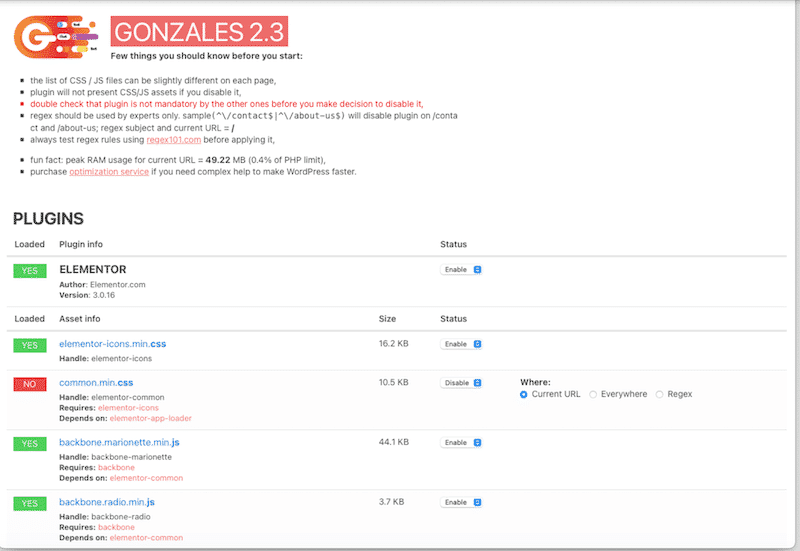
Gonzales allows you to conditionally disable CSS, JS, and plugins depending on the page visited by a user. The goal is to eliminate an overloaded website by excluding useless CSS and JS files added by themes and plugins.
- Remove CSS and JavaScript files that are useless for certain pages of your site:
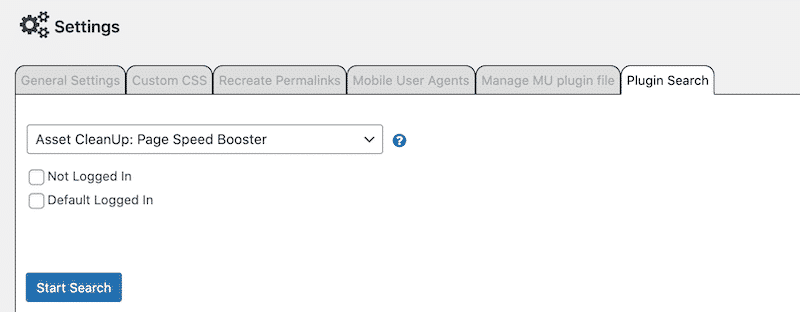
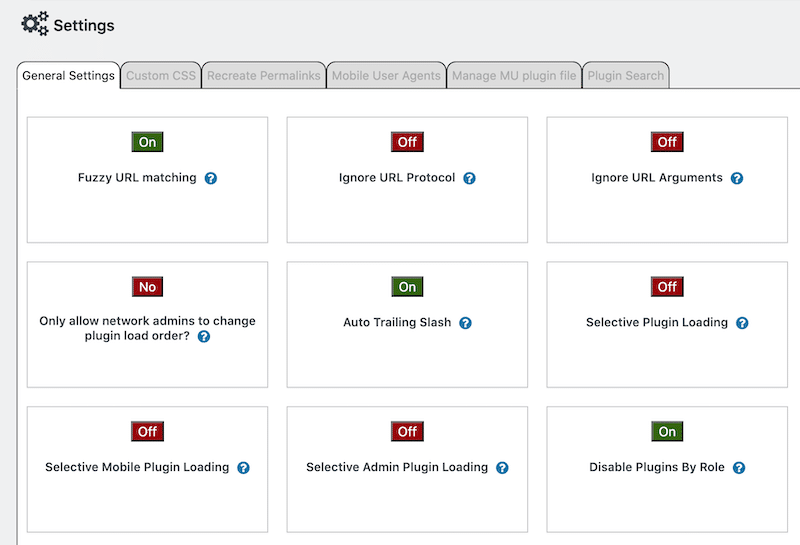
4. Plugin Organizer
The name speaks for itself! This WordPress plugin offers two main features contributing to low request counts:
1. Change the order in which your plugins are loaded.
2. Selectively disable plugins by any post type or WordPress-managed URL.
5. Autoptimize
This is a powerful performance plugin that minifies all scripts and styles and configures your web server to compress them.
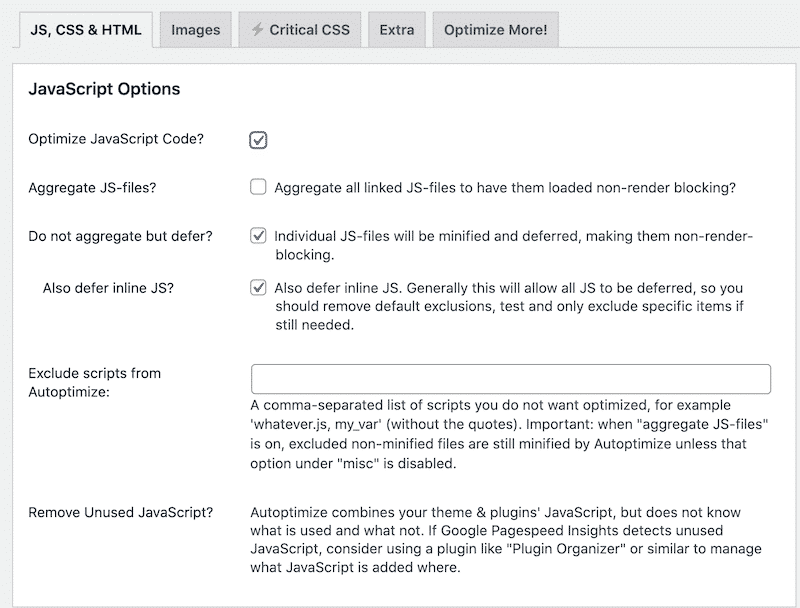
- Combine and optimize JS files:
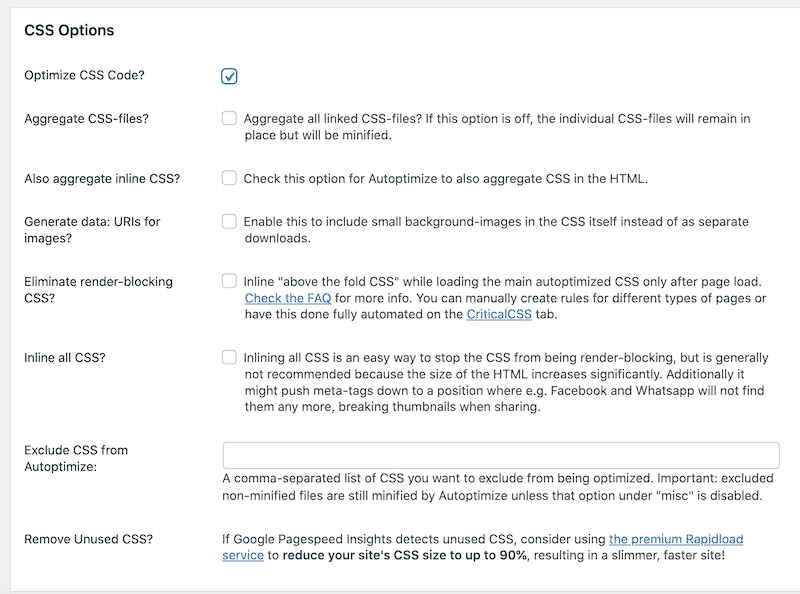
- Optimize CSS code:
- Inline and defer CSS.
- Minify the HTML code.
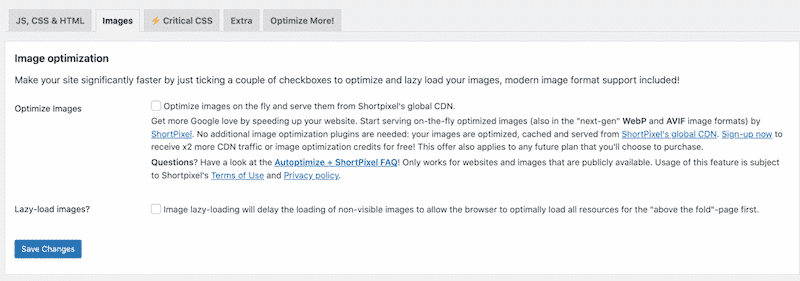
- Optimize images (lazy loading and Shortpixel CDN).
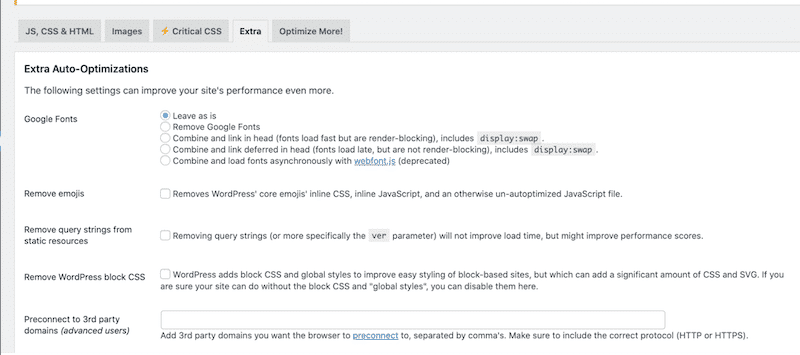
- Optimize Google fonts and third-party scripts:
6. Perfmatters
The main goal of this plugin is to speed up your site by disabling scripts that might not be used on your site.
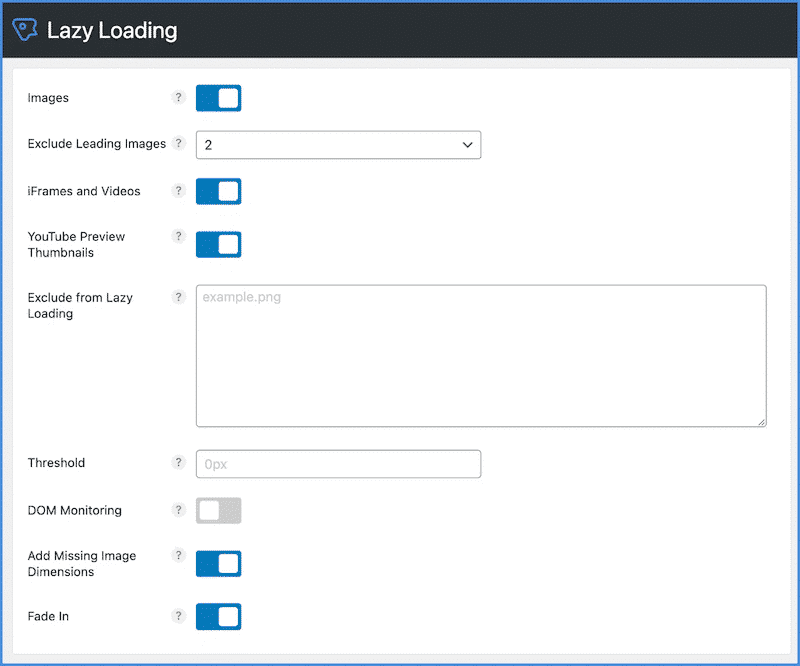
- Advanced lazy-loading and image optimization features:
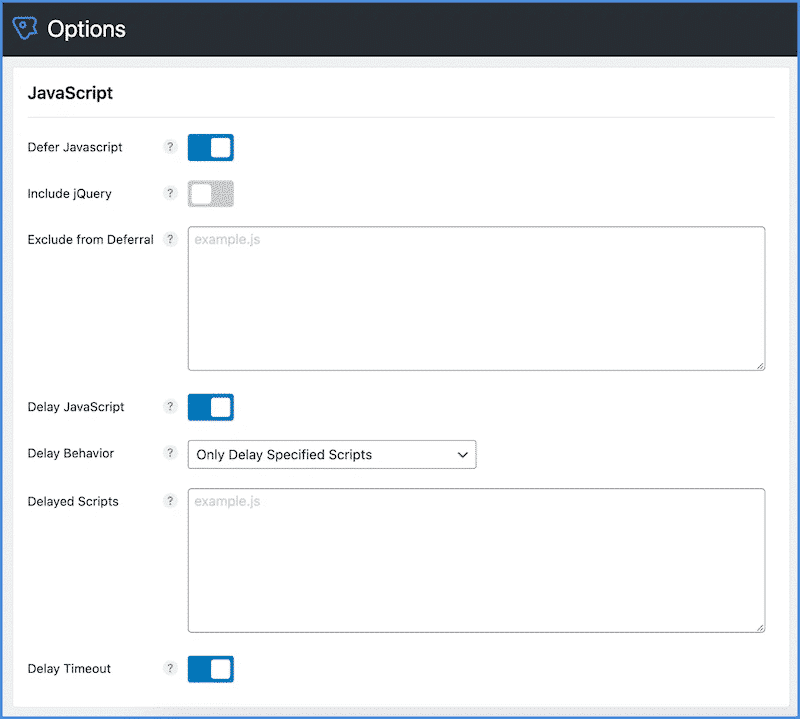
- Defer and delay JS (using the defer and async attributes):
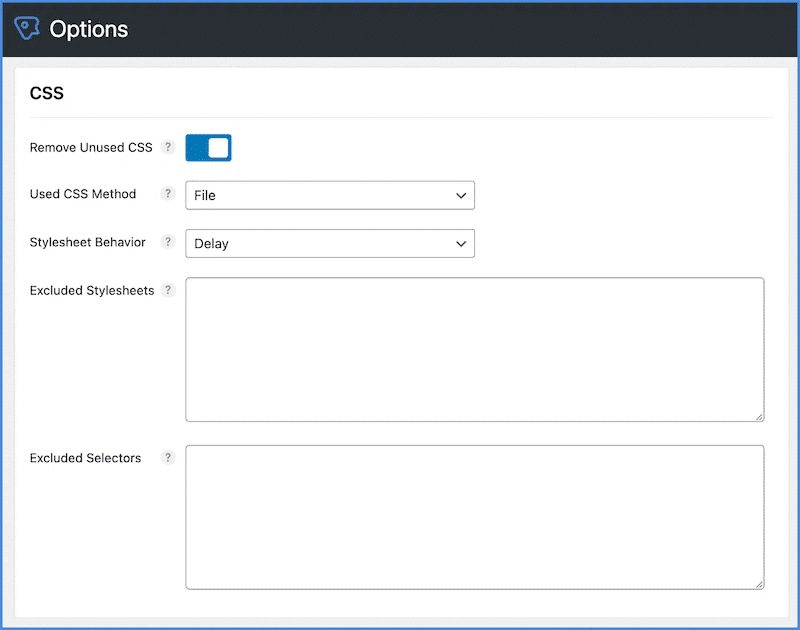
- Two remove unused CSS methods: file and inline:
To sum up, those 6 WordPress plugins can be classified into four main categories: assets control, assets management, assets combining, and assets tree-shaking. To help you better understand the main strength of each plugin, we have made an overview in the table below:
| Assets Control(e.g., delay and defer JS, caching, and lazy-loading) | Assets Management(e.g., prevent unnecessary styles and scripts from loading) | Assets Combining(e.g., combine and minify JS/CSS) | Assets Tree-shaking(e.g., remove unused CSS) | |
| WP Rocket | ✅✅✅ | ✅✅✅ | ✅✅✅ | ✅✅✅ |
| Asset Cleanup | ✅ (only delay/defer JS and CSS) | ✅✅✅ | ✅✅✅ | / |
| Gonzales | / | ✅✅✅ | / | / |
| Plugin Organizer | / | ✅✅✅ | / | / |
| Autoptimize | ✅✅ (no caching) | ✅✅✅ | ✅✅✅ | / |
| Perfmatters | ✅✅ (no caching) | ✅✅✅ | / | ✅✅✅ |
Wrapping Up
Keeping requests count low and transfer size small will help you regain control over your page load performance.
You can go through the optimizations manually using Google advanced instructions or choose a WordPress plugin to help you.
WP Rocket is one of the most complete plugins that can help you to control your request counts and your transfer size for each asset. Get it now, and test the improvements right away! No risks are taken with the 30-day money-back guarantee!


