
Table of Contents
Last update on
APIs allow you to connect your WordPress site to third-party services and data sources. This allows you to add new features and functionality, make your website more interactive and informative, or integrate it with tools like analytics, email marketing providers, or CRMs.
WordPress can handle both simple and complex API integrations using plugins as well as custom code. In this tutorial, we will teach you how to do both as well as discuss the potential performance impact of API integrations and how to mitigate them.
| TL;DR No time for the entire post? No problem, here are the main points: ✅ APIs open your site to third-party services, from weather data, integrated maps, and social media feeds to payment gateways, and beyond. They can automate tasks, enhance user experience, and make your site smarter overall. ✅ There are two main ways to integrate an API: using plugins (single-purpose and general API plugins) or via code — mainly PHP and JavaScript. Plugins are easier, while custom code offers more control and flexibility. Each API needs basic info like an endpoint, parameters, and possibly an authentication key. ✅ API calls add load time, making it necessary to optimize both their individual performance as well as general site speed. Use WP Rocket to add caching and best practices for code optimization to your API-enhanced WordPress site. |
What Is an API and Why Add One to WordPress?
API stands for “Application Programming Interface.” In computing, an interface is something that connects two or more components to each other. In this case, the components are different systems or applications.
APIs allow them to exchange data securely, in real-time, and in a way that each of them can understand and process it. They are very common on the web. If you have ever logged into a website using your Google or Facebook account, it happened thanks to their authentication API.

In WordPress, you can use APIs to pull information from external services into your WordPress site — or send data out. For example, you can use them to:
- Show live weather, exchange rates, or stock market updates on your site.
- Display social media feeds.
- Automatically post your content on social networks.
- Integrate your site with a payment gateway like Stripe or PayPal.
- Show real-time shipping rates in your online store.
- Pull in product information from a warehouse system.
- Send subscriber data from a web form to an email marketing service.
APIs also allow you to automate processes on your site. For example, you can outsource image optimization to a service like Imagify. In short, APIs make websites more functional and user-friendly.
Important API Components
To use any API, you usually need a few basic parts:
- Endpoint URL: The URL you send your request to. This tells the API what you’re asking for (e.g., current weather, list of blog posts, etc.).
- Parameters: These are optional values you pass along to customize the request, such as location, ID, search terms, or date range. Parameters help refine what the API gives you back.
- Data format: This is the format in which the data is transmitted. The most common format is JSON because it’s lightweight and easy to use in both JavaScript and PHP. XML or plain text are also options.
- Authentication: Many APIs require an API key or token to verify that you’re allowed to access the data. You need to send it along in order to legitimize your request.
Not every API requires each of these pieces to give you a response. We’ll discuss real examples further below.
The WordPress REST API
WordPress itself has several integrated APIs. The most prominent is the REST API. REST stands for “Representational State Transfer,” which simply means that the API uses a certain format and architecture.
The purpose of the REST API is to make WordPress data accessible to other systems. This is useful, for example, for building mobile apps to manage your site. The REST API also enables so-called headless WordPress setups. Here, you connect a custom, often JavaScript-based user interface with the WordPress back end via API.
This is an important topic, but not our focus here. Instead, we will deal with how you can add external APIs to your WordPress site.
| 💡 To learn more about the REST API, check the official developer documentation. |
How to Add an API to WordPress With a Plugin
There are two main ways you can integrate APIs into your WordPress site:
- Code: If you have the skills or hire someone who does, you can connect your site to an API using custom code, usually PHP or JavaScript.
- Plugins: WordPress has plugin solutions for almost anything, including adding and configuring APIs on your website.
We will go over both, starting with plugin solutions. These are comfortable for non-developers because you can configure them through a user interface and display their data with shortcodes, widgets, or blocks instead of dealing with code or website files.
Access the Google Maps API
For our first example, we will learn how to add a Google Maps map to your website. This ability is possible thanks to the Google Maps API, which lets you embed maps, add markers like store locations, and change map design.
The first thing you need is to create a free Google Cloud account with billing enabled. Once you have that, log in and create a new project at the top.
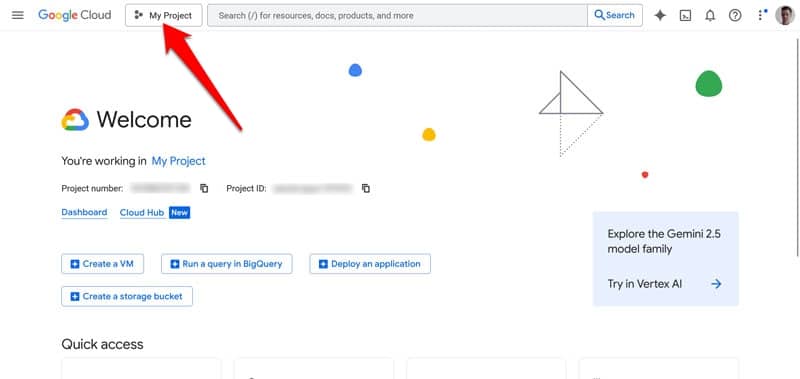
Access your project and go to APIs & Services either via the navigation menu or the shortcut on the dashboard.
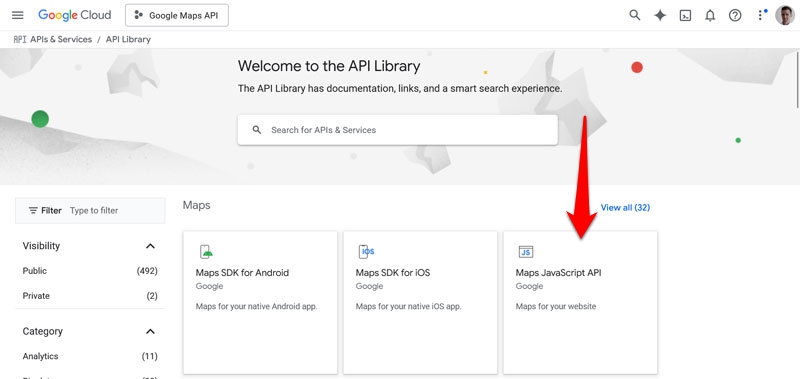
Click on Library, then find the Maps JavaScript API.
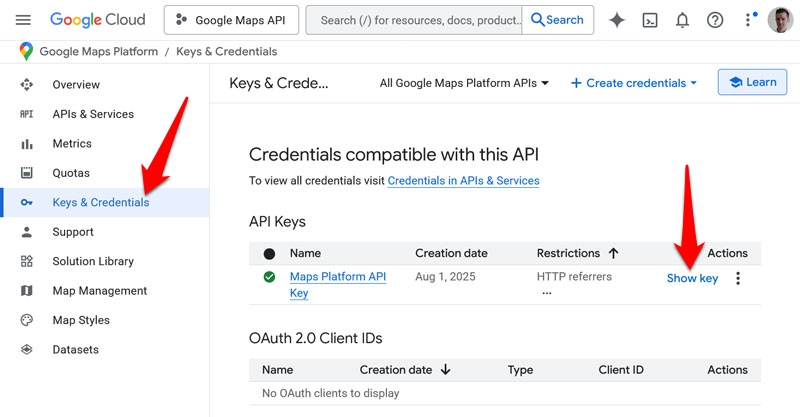
Access and enable it. You will receive an API key during the process, but you can also find it under Keys & Credentials later. Make sure to restrict its use to your domain for security.
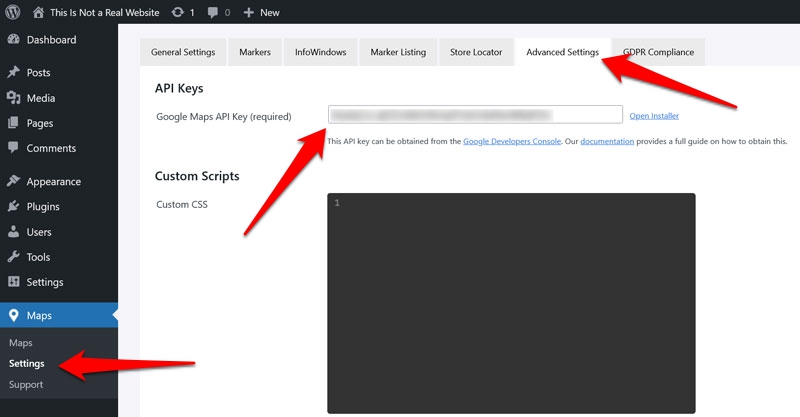
Next, install and activate the WP Go Maps plugin from the WordPress plugins menu. Once ready, go to Maps > Settings > Advanced Settings, paste in your Google Maps API key, and save the settings.
After that, you can create a new map using the plugin’s interface.
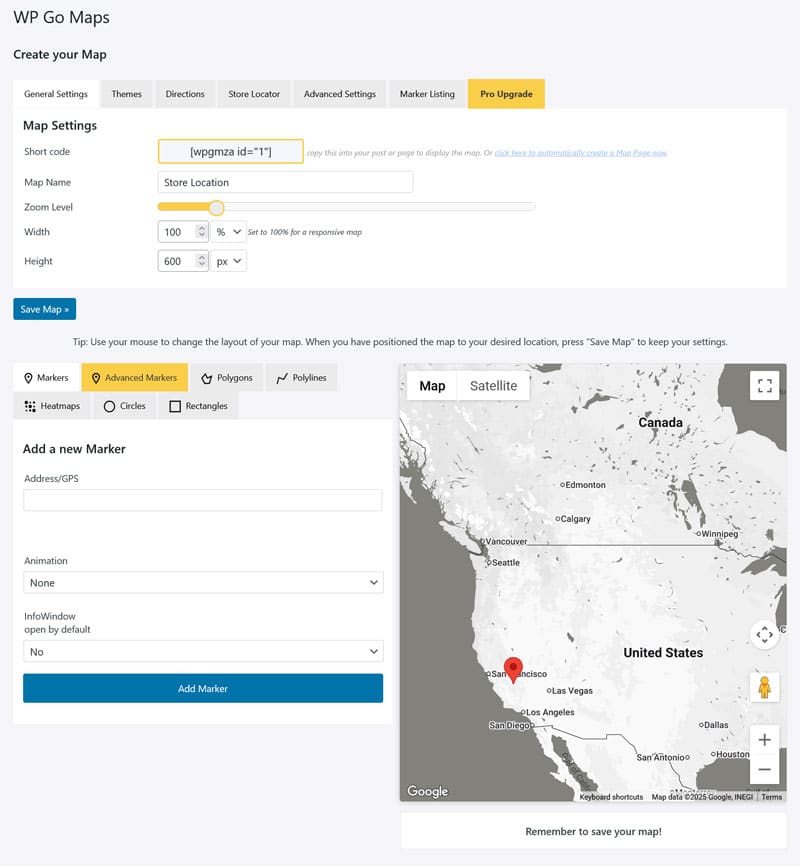
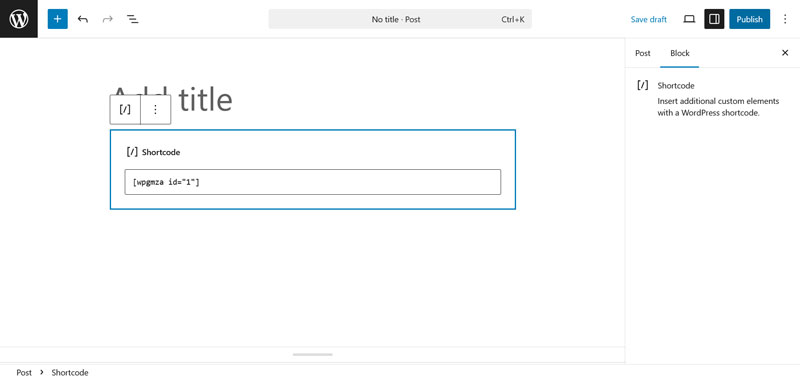
Save it once you’re satisfied. You can then display it on your site wherever you want using the Map block or with the shortcode the plugin generates for your custom map.
Congrats, you just added an API to your WordPress site.
Use WPGetAPI For Almost Any API
The example above works only for a particular API. If you want a plugin solution that’s more general for integrating APIs into your site, one of the most popular is WPGetAPI.
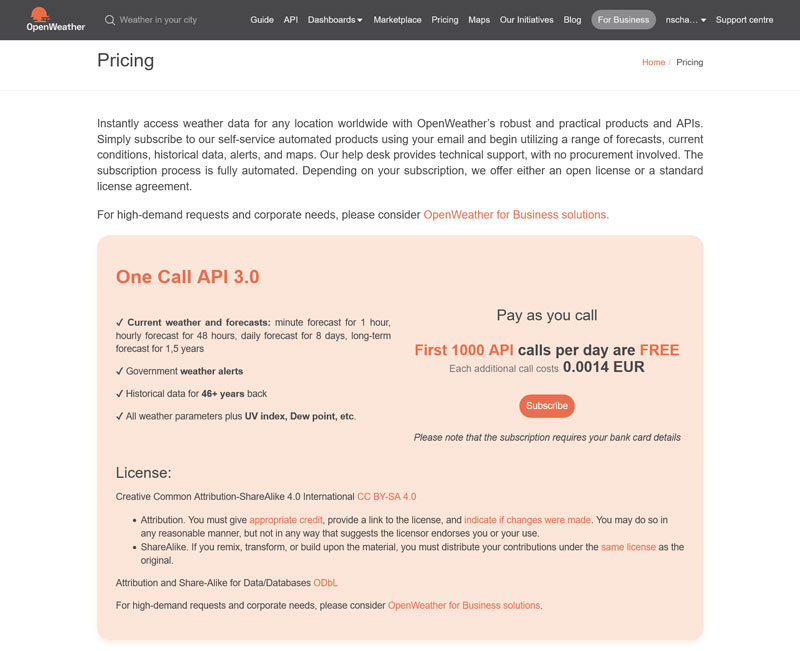
Here’s how it works: For this example, we want to display weather information from OpenWeatherMap.org. The first step for that is to create an account for that service and sign up for a plan (there is one with 1000 free calls per day you can use for testing).
All the information for using the site’s API is available in the documentation.
Set Up the API Call
To get started, install and activate WPGetAPI, then go to WPGetAPI > Setup in your dashboard.

Fill in the information on the first screen as follows:
- API name: So you know what each API is for.
- Unique identifier: The WordPress-internal name of the API to display it. Only use lowercase letters and underscores, e.g. “open_weather_map.”
- Base URL: The general address of the API, without an endpoint. In this example that’s https://api.openweathermap.org.
Once ready, save to continue.
Configure Your Endpoint and Parameters
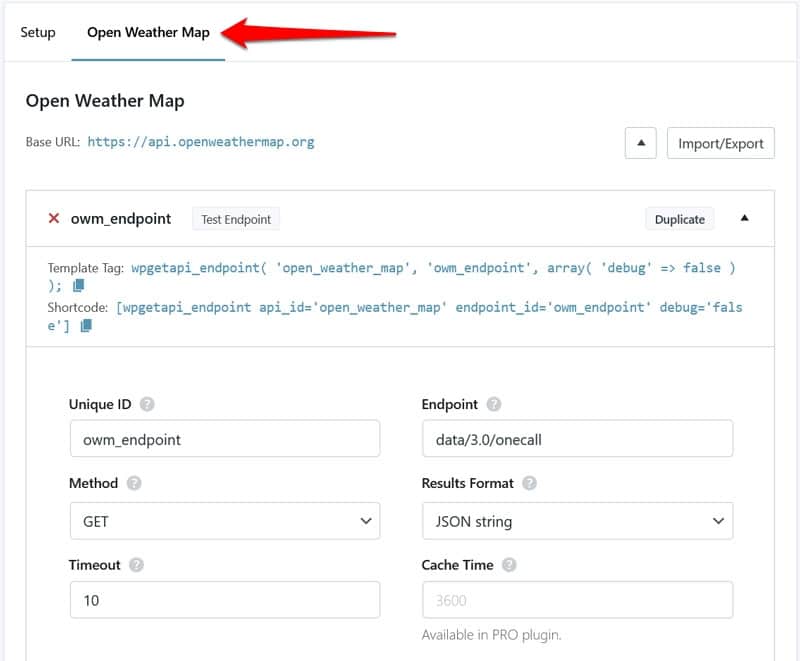
Next, click the API’s tab on top to configure the rest of the API call.
Here’s how to do that:
- Unique ID: The name of the endpoint you’re going to use.
- Endpoint: This gets appended to the base address (here, it’s “data/3.0/onecall”).
- Method: The HTTP request that states whether to send, read, create, update, or delete something at the endpoint. We want to receive something, so we use GET.
- Results Format: Whether you want to receive the data in PHP or JSON format from the API, we’re using JSON here.
- Timeout: How long the connection should stay open.
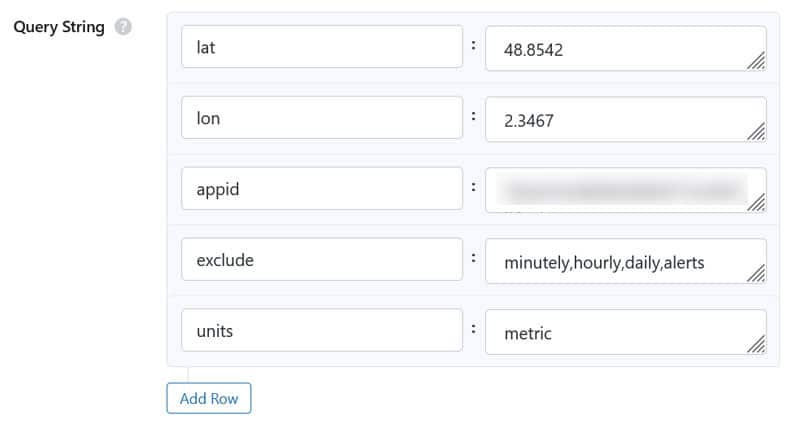
Below that, set the parameters. The Open Weather Map API requires three:
- lat: The latitude of location you want weather information for.
- lon: As you can probably guess, this is the longitude of your target location.
- appid: Your API key, which you can find in your account.
The OpenWeatherMap API also accepts optional parameters:
- exclude: Allows you to omit some parts of the weather data, e.g. daily or hourly forecasts.
- units: Set your preferred units of measurement.
- lang: Choose your output language.
Set the parameters in the Query String section in key value pairs, e.g. “lat” on the left and “48.8542” on the right.
Save, then click Test Endpoint at the top. You can see if it works and review the response.
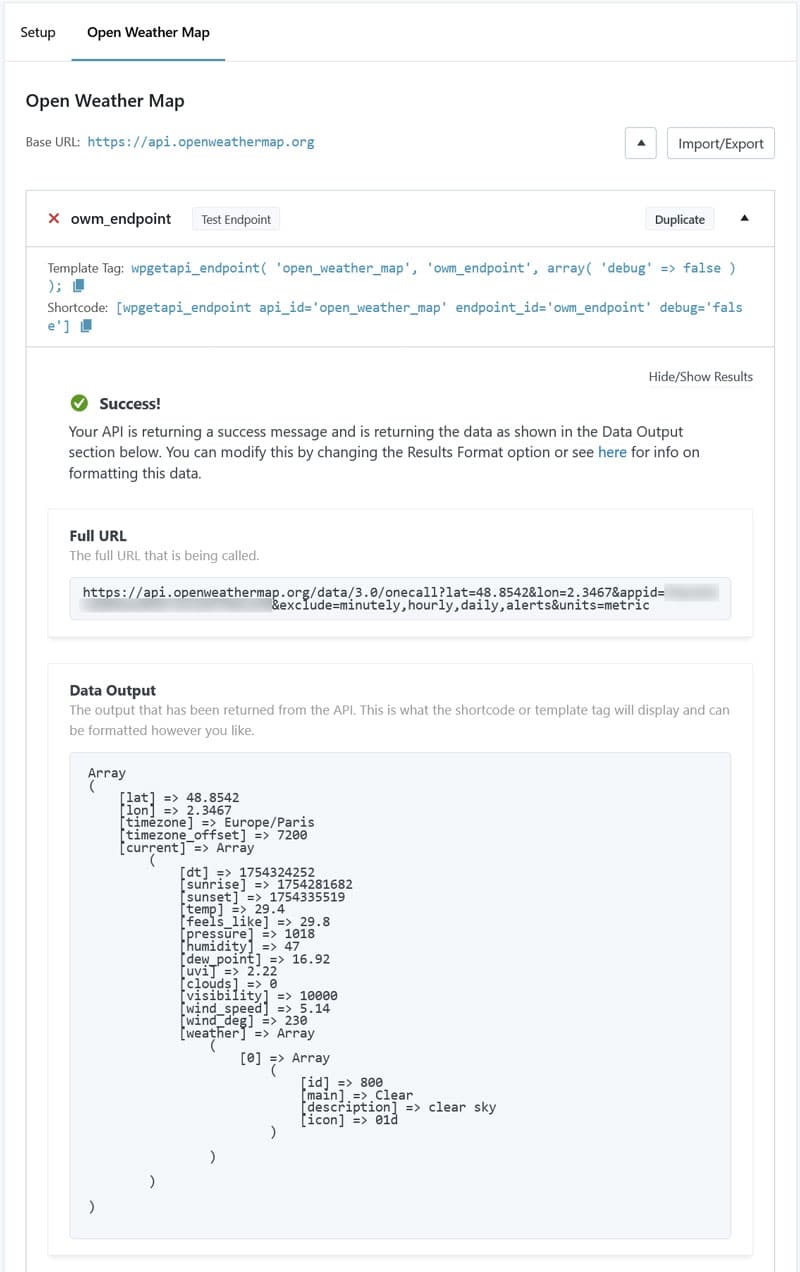
Display the Output
If all is well, you can use the template tag or shortcode WPGetAPI provides to display it on your site.
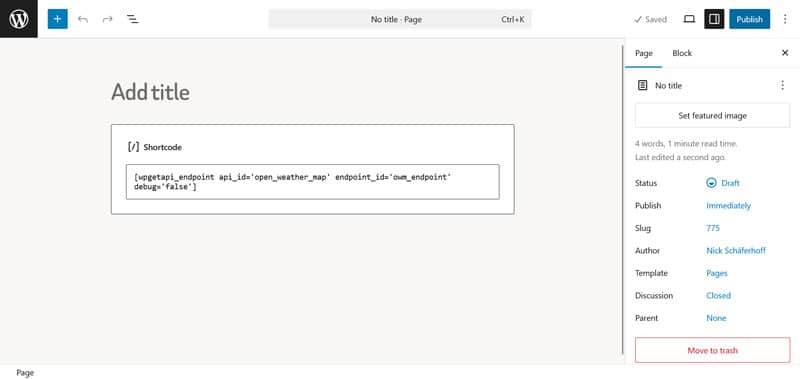
When you now preview the page or post, you see that the data appears.
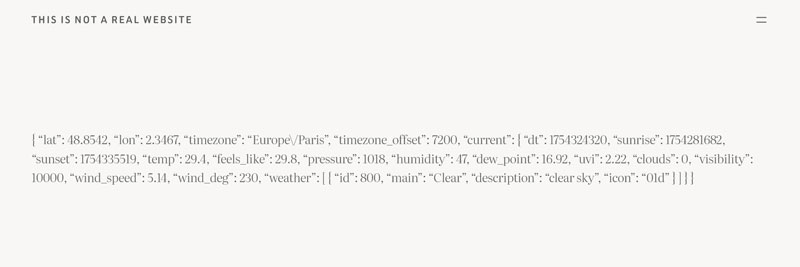
Of course, currently it’s raw JSON data, so it’s not that informative to look at. The paid version of the plugin has functionality to format and customize the output further.
Accessing APIs in WordPress Manually
If you don’t want to go the plugin route, you can create API calls by hand. This gives you more control because you can customize the data you request and its output right away.
Using PHP
Continuing with the Open Weather Map example, here’s a PHP function to get the same weather information as above:
function get_weather_data() {
    $api_key = 'YOUR_API_KEY_HERE'; // Replace with your actual API key

    $endpoint = "https://api.openweathermap.org/data/3.0/onecall?" . http_build_query([
        'lat' => 48.8542,
        'lon' => 2.3467,
        'exclude' => 'minutely,hourly,daily,alerts',
        'units' => 'metric',
        'appid' => $api_key
    ]);

    $response = wp_remote_get($endpoint);

    if (is_wp_error($response)) {
        return '<div class="weather-widget error">Failed to fetch weather data.</div>';
    }

    $body = wp_remote_retrieve_body($response);
    $data = json_decode($body, true);

    if (!empty($data) && isset($data['current']['temp'])) {
        $temp = esc_html($data['current']['temp']);
        return '<div class="weather-widget">Current temperature in Paris: <span class="weather-temp">' . $temp . '°C</span></div>';
    }

    return '<div class="weather-widget error">Weather data not available.</div>';
}

function weather_shortcode() {
    return get_weather_data();
}
add_shortcode('weather', 'weather_shortcode');
Here’s what it does:
- Makes a call for the same coordinates and other parameters.
- Uses wp_remote_get() to make the HTTP GET request.
- Pulls only the current temperature from the JSON response.
- Wraps the output in some HTML so you can style it if needed.
- Registers a shortcode called “[weather]” for outputting the data in WordPress.
Put the function either in the functions.php file of your (child) theme or a custom plugin. Then, use the shortcode as before. Here is what it looks like on the page:

| 💡 Note that the function above is for demo purposes only. It’s not optimized for performance in any way and not production-ready. |
JavaScript
You can also use JavaScript to connect to APIs. This is especially useful for dynamic content updates, AJAX requests, or single-page applications.
Here is a very simple example using the fetch() method for displaying random information about cats from the Cat Facts API:
<div id="cat-fact">Loading cat fact...</div>
<div class="wp-block-buttons">
<div class="wp-block-button" id="new-fact"><a class="wp-block-button__link wp-element-button">New Cat Fact</a></div>
</div>

<script>
  function loadCatFact() {
    fetch('https://catfact.ninja/fact')
      .then(response => response.json())
      .then(data => {
        document.getElementById('cat-fact').textContent = data.fact;
      })
      .catch(error => {
        document.getElementById('cat-fact').textContent = 'Failed to load cat fact.';
        console.error(error);
      });
  }

  // Load the first fact when the page loads
  loadCatFact();

  // Add button click handler for new facts
  document.getElementById('new-fact').addEventListener('click', loadCatFact);
</script>
You can input this into a Custom HTML block to display it straight away in WordPress.

| 💡 Note that this approach is only suitable for applications where you don’t need any sensitive information like an API key. To use authentication, you would instead route the API request through PHP again, put the JavaScript to fetch it in a separate file, and enqueue that through functions.php or a custom plugin. |
Third-Party APIs and Website Performance
Adding third-party APIs to WordPress can impact your site’s performance and load times if not handled properly. Every time a page loads and makes an API call, it adds information to load and increases server processing time. Slow or unresponsive API responses can also delay your page rendering, show empty page sections, or break your site.
To avoid these issues, it’s important to cache API responses so they’re not fetched on every page load. Many API plugins like WPGetAPI have built-in options for that. If you write API calls by hand, you have to set up your own caching mechanisms.
In addition, you can reduce the performance impact by limiting API calls to specific events (e.g., a click on a button) instead of every page load. Another option is to schedule API calls using wp_cron() and store the results for display later.
Improving Performance With a Plugin
Another effective step to minimize the effect of API calls on site performance is using WP Rocket.
First of all, the plugin adds caching to your site (including a separate mobile cache). This creates static versions of your rendered pages and allows visitors to see preloaded content instead of waiting for API responses. This works especially well for API data displayed using shortcodes or server-side PHP.
If you load API content via JavaScript, WP Rocket helps improve its load time by:
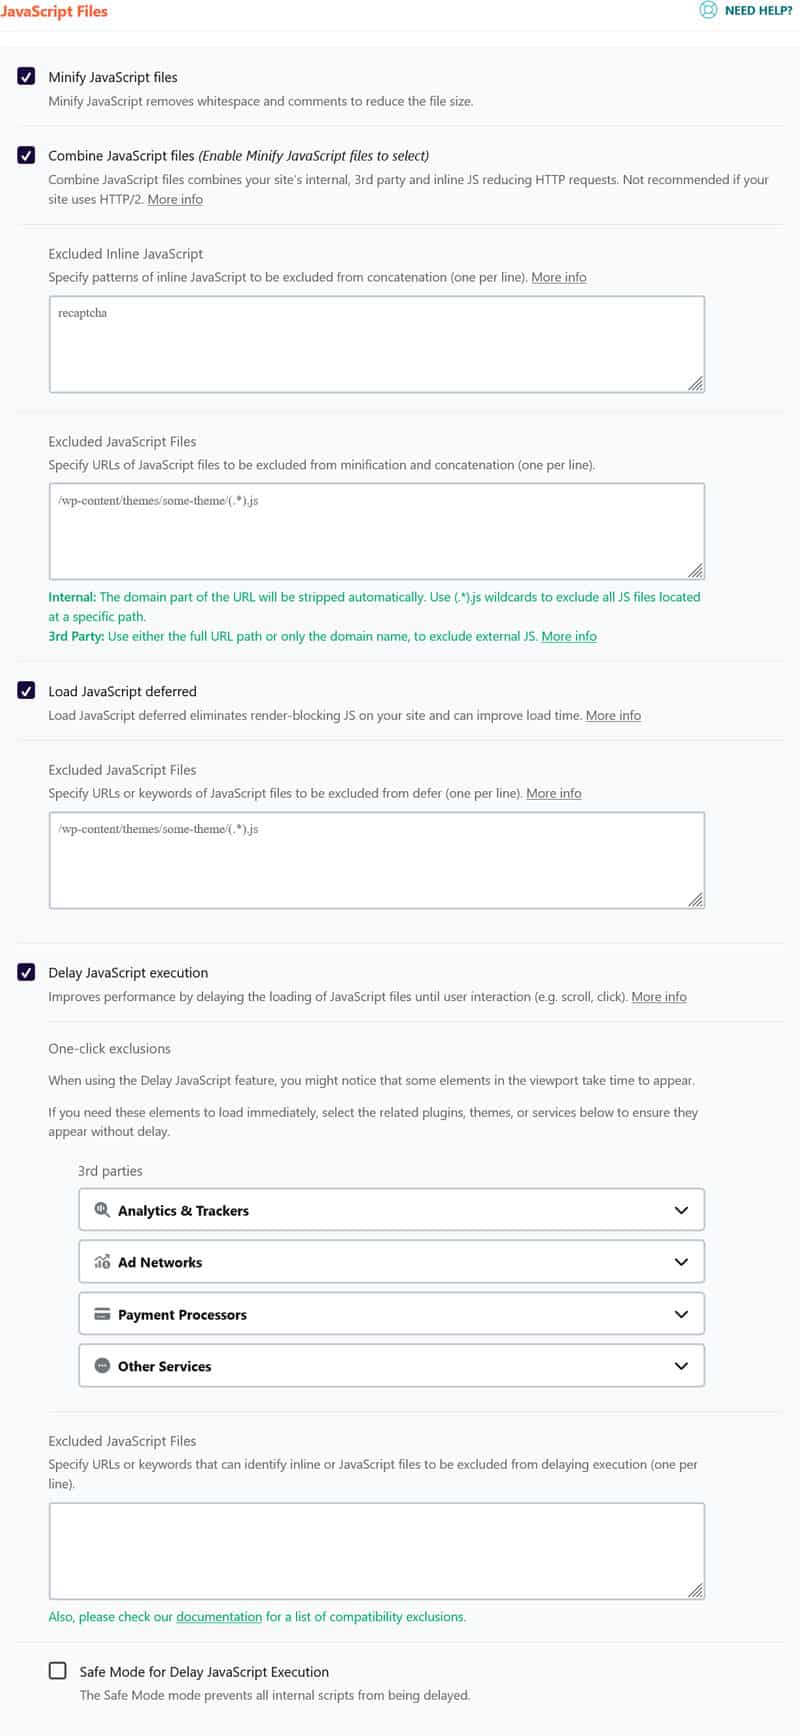
- Minifying JavaScript to make files smaller (enabled by default)
- Combining several files into one for faster downloads
- Deferring and asynchronously loading files
- Delaying JavaScript execution
You have the option to exclude individual scripts, plugins, and files from being optimized, in case it interferes with the display of your API content. Plus, you can do all of the above by simply checking a few boxes in the File Optimization menu.
What’s more, WP Rocket comes with a range of automatic performance improvements in the background, such as:
- Preloading for cache and links
- Critical image optimization (excludes images above the fold from lazy loading) to improve Largest Contentful Paint
- Automatic lazy rendering to load elements appearing high on your web pages faster
Just installing and activating the plugin allows your site to benefit from 80% of performance best practices and speeds it up immediately without any effort required from you. Plus, there are many other features you can manually activate to increase your site speed, like:
- Lazy loading for images, including CSS backgrounds, videos, and iframes
- Preloading external files and fonts
- Database optimization
Case Study: Speed Up API Calls With WP Rocket
To better understand how adding an external API affects site performance — and how a plugin like WP Rocket can help — we set up a controlled testing environment. We created a demo WordPress website with dummy content and added a map from Google Maps using WP Go Maps.

Completely unoptimized, its PageSpeed Insights results were as follows:
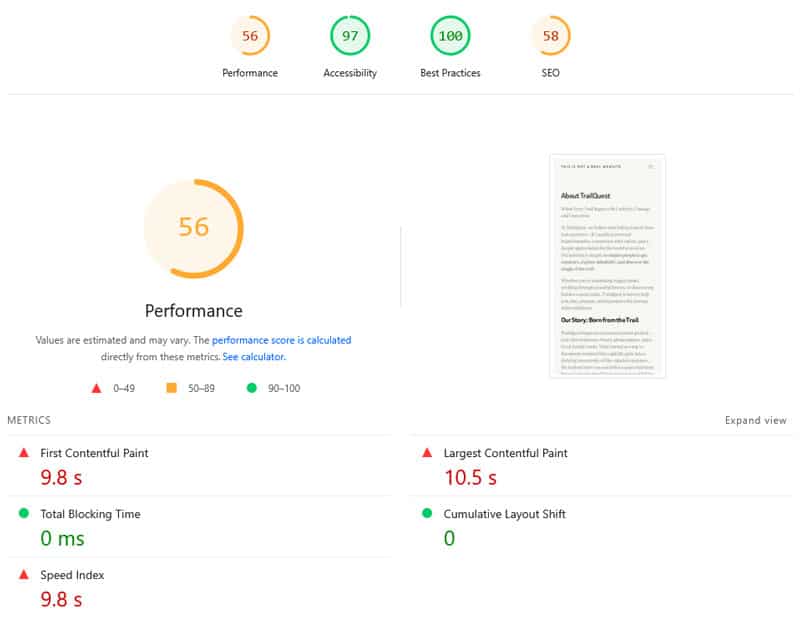
| Mobile Performance score | 56 |
| First Contentful Paint | 9.8s |
| Largest Contentful Paint | 10.5s |
| Speed Index | 9.8s |
We then activated WP Rocket and the following features:
- Minify CSS and JavaScript
- Remove unused CSS
- Load JavaScript deferred
- Delay JavaScript execution
This let to the following changes:
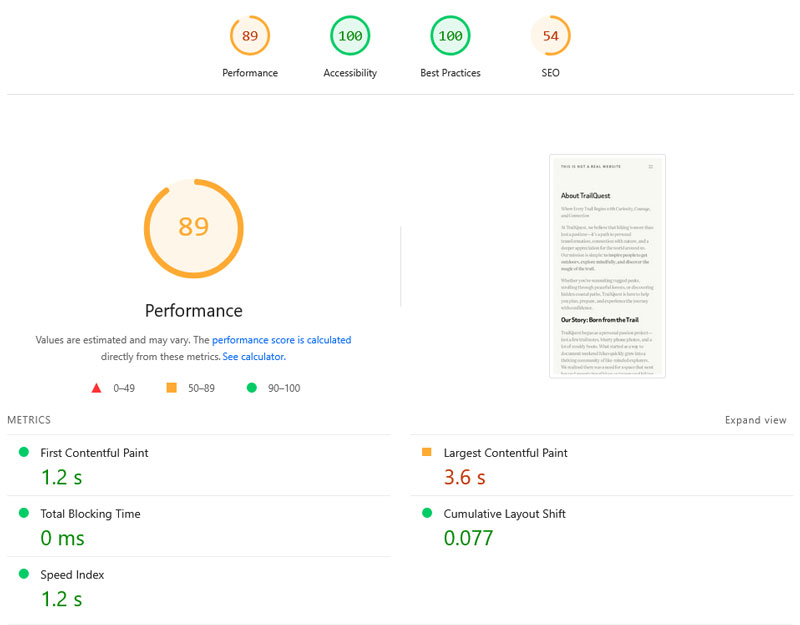
| Mobile Performance score | 89 |
| First Contentful Paint | 1.2s |
| Largest Contentful Paint | 3.6s |
| Speed Index | 1.2s |
That’s a massive improvement in comparison to the baseline! Even though it can make your website a lot more engaging, dynamic content like Google Maps comes with a lot of extra code, which may slow down your site. WP Rocket mitigates its impact — and all it takes is a few clicks.
Add APIs to WordPress Without the Drag on Performance
APIs open endless possibilities for dynamic, real-time content and powerful integrations. Thanks to WordPress plugins and easy integrations, you can even add them to your site without being a developer.
Just keep in mind that every API call can impact page performance. Feeling out of your depth optimizing it? WP Rocket is here to help — try it risk-free for 15 days!