
Varnish Cache: How It Works and How to Use It on Your WordPress Site
Table of Contents
Caching is one of the pillars of web performance optimization, the set of techniques to make your website load faster. No website can call itself optimized without a caching system in place.
At first sight, caching can look like a very complex topic: we’re not going to lie, most of the time it is! But the good news is that we’re here to help. ?
All caching systems work under the same principle:
Caching is the process of storing data in a temporary storage unit, called cache.
So far, so good. Complexity comes into the picture when we try to define the storage unit our caching process is working on. Caching can take many forms and leverage on diverse aspects of our website.
Here’s a quick list of the different types of caching we can identify:
- Page cache: it happens on the server and stores the entire HTML of a page (as WP Rocket does);
- Browser cache: it keeps storing the HTML but occurs on the browser;
- Object cache: it stores database queries;
- Bytecode cache: it’s a PHP extension and stores precompiled script bytecode in the memory;
- CDN cache: it occurs on the CDN-side and stores the HTML and all other static files (images, CSS and JS);
- Reverse proxy cache: it happens on the server’s side and stores all its responses to the client’s server.
In this article, we’re going to focus on this last type of caching and, in particular, to one of the most popular HTTP reverse proxies: Varnish cache.
Understanding HTTP Reverse Proxies
Generally speaking, a ”Proxy” is a server placed between the Internet and a user (or a network of users, like a LAN). The proxy server is there to filter the requests sent by the user to a specific web page, following a particular rule.
A classic example of a proxy server (also called forward proxy) is the one implemented by several companies wanting to block employees’ access to some content on the Internet (i.e., social media websites).
On the other hand, a reverse proxy is a server placed between the Internet and a company’s web server. A reverse proxy is the entry point of all requests directed to a company’s website: its scope is to filter those requests before they reach the site.
The most used reverse proxy on the market are:
Some of them, like Apache httpd, NGINX, Lighttpd, and IIS are also web servers, but they can act as reverse proxies.
Why Should You Use a Reverse Proxy on Your Website?
The answer is simple: there are several advantages of using a reverse proxy. Let’s see them briefly:
- Anonymization: if someone scans a domain pointing to a reverse proxy, they will get information about the proxy, not about the actual web server behind it;
- Security: following the point above, a website protected by a reverse proxy can more easily avoid malicious attacks;
- SSL download, or SSL termination: the reverse proxy can absorb all the HTTPS requests and perform the SSL handshake with the user’s browser. These requests are then converted to HTTP and sent to the web server. In this way, you set your server free from the SSL handshake, and it can take care of other important actions (like downloading the rest of your webpage content);
- Centralized administration of multiple SSL certificates: with a reverse proxy you can place all the SSL certificates that you use in your web pages in a single server;
- GZIP compression: you can configure the GZIP mode on your web server, so it can compress your file sizes and transfer them quicker;
- Last but not least, caching! If you let the reverse proxy temporarily store the static content of your pages, this will be served whenever a new request asks for it: there won’t be any call to the origin server, and your pages will load faster.
We’re going to develop this last point in the following chapter.
What is Varnish Cache?
Now that you know what a reverse proxy is, you’re ready to dig into the magic of Varnish Cache!
Varnish acts as a cache HTTP reverse proxy and sometimes you can also see it defined as a front-end accelerator. It’s not a stand-alone solution, because it needs a dedicated web server to rely on, like NGINX or Apache.
You can use Varnish to cache both dynamic and static content: this is an efficient solution to increase not only your website speed but also your server performance. According to its developers:
“It can speed up delivery with a factor of 300 – 1000x, depending on your architecture.“
What Are the Benefits of Using Varnish Cache?
The first benefit Varnish provides, as already mentioned, is the speed boost for your website and server.
This happens thanks to a series of factors:
- The cache server is faster than the origin server when delivering objects because the workload on the first is less intensive and less varied.
- The cache server delivers all assets that don’t frequently change, like CSS and JavaScript files. This reduces the burden on the origin server, which can focus on rendering pages quicker since it doesn’t have to serve static content on every reload.
- Time To First Byte (TTFB) decreases because the processing time for the backend server database is lower.
- You can use Varnish as part of a highly available environment to serve cached content even when the web server is experiencing downtimes (more on this below).
How Does Varnish Cache Work?
Varnish handles all inbound requests before they land to your web server backend: its cache serves all web traffic and, by default, refreshes every two minutes (or a different lifespan, if you decide so).
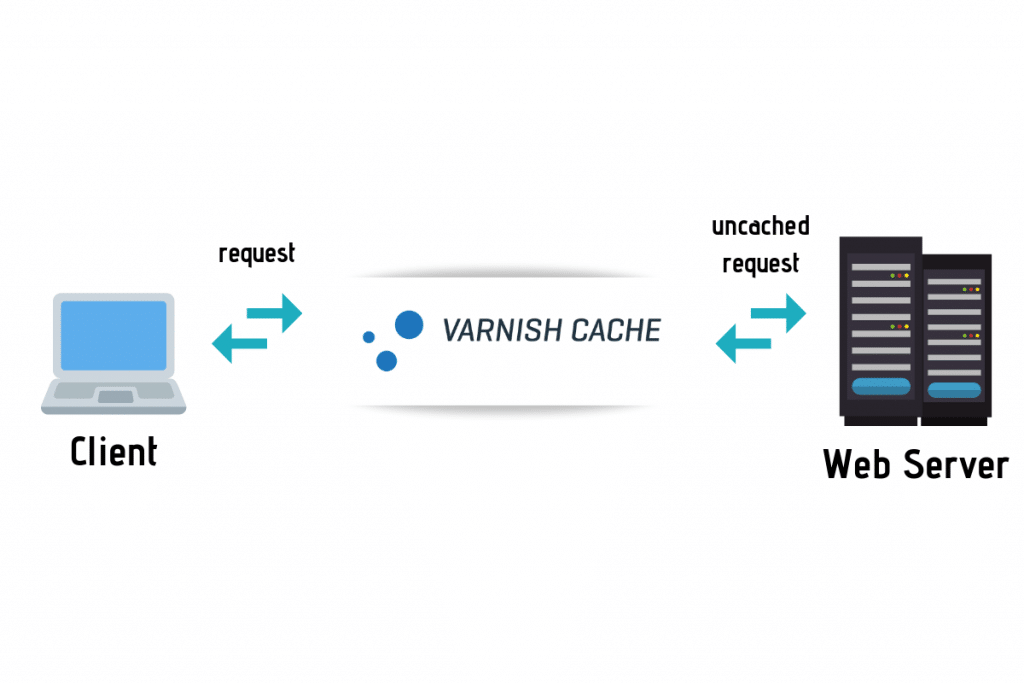
If the request is not cached, Varnish will forward the request to the web server’s backend and cache the result, as we already saw in the general reverse proxy paragraph.
The cached requests are then stored in the memory: from this moment on, retrieving and delivering them to clients will be much faster.
To specify configuration, caching policies and other rules, Varnish uses a language called VCL (Varnish Configuration Language).
Through this language and its alterations, you can handle each request differently. For example, you can choose to forward specific requests to a particular backend, or you can ask Varnish to act differently depending on the properties of the inbound request or its output.
Another cool behavior of Varnish is that thanks to a built-in tool called backend polling, cached content can continue to be served even when the web server is not available.
The backend polling interrogates the server with a frequency that you can flexibly configure: if Varnish detects downtime, it will keep serving cached content for a period called grace time (which is also customizable).
More info on the configuration commands is available in Varnish documentation.
How to Use Varnish Cache on Your WordPress Site?
Millions of WordPress sites are using Varnish Cache.
Once Varnish is installed and configured on your web server, you’re ready to instruct WordPress to interact with it and purge Varnish Cache whenever the cached content changes.
To achieve this, you can use a WordPress plugin: one of the most installed (and better maintained) is Proxy Cache Purge.
But there are several other plugins with features interacting with Varnish and making cache purging easier.
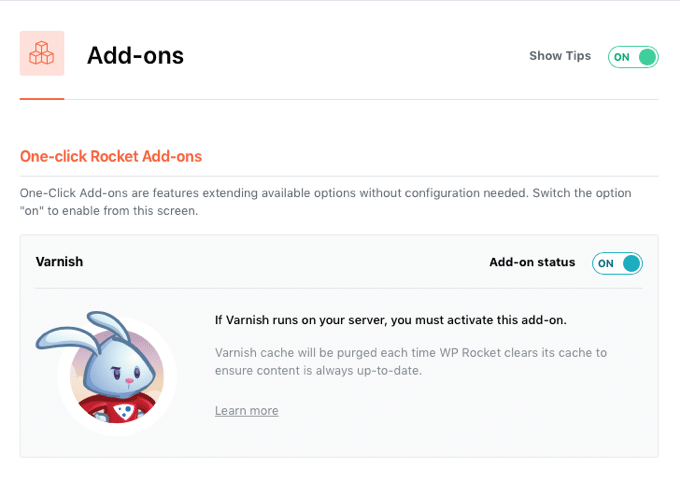
WP Rocket, for example, includes a Varnish add-on that allows you to flush the Varnish cache at the same time as WP Rocket.
Try it by yourself, get WP Rocket now!