
Caching for WordPress: What It Is and How It Works
Table of Contents
“What’s caching? And what does this mean for my WordPress site?”
As an amateur site owner, you’ve most likely stumbled across the word “cache/caching” or the phrase “use a caching plugin” and found yourself scratching your head over the exact same question.
(Trust us – we know the feeling!)
You see:
One of your primary goals as a website owner is to drive traffic to your site. But if your visitors experience slow page speeds or your website takes more than 4 seconds to load, they will most likely click out without even reading the content.
And the result?
Increase in bounce rate and all your hard work going in vain.
Luckily, this is exactly where website caching comes to the rescue!
Caching is one of the most powerful tools to improve performance, even if you have yet to start using it.
In simple words, caching can make your WordPress website fast. Like, really fast.
OK, we know what you’re thinking:
If website caching is this powerful, it must surely be a complex technical task to do, right?
Turns out, it’s not as complicated as you may have thought.
In this post, we’ll take a closer look at what caching is, how it works, its benefits, and how you can enable it on your WordPress site – and a lot more!
What is WordPress Caching?
Let’s break down the idea of caching in WordPress this way:
Imagine someone asking you a difficult math problem, like: “What’s 9895357 times 8975?”.
You will look around all confused and won’t be able to answer the question immediately.
Suddenly, the idea of bringing out a calculator hits you.
And a few minutes later, after doing the math, you get to know the correct answer and respond back.
Now, if that person asks you the same question again, you will reply at that very minute. That’s because the time-consuming process and hard work had already been done thanks to the calculator.
And that’s it! That’s caching in a nutshell.
If we apply it to the context of your WordPress website:
- A user visits your website and makes a request.
- Your web server takes some time to process.
- And finally, after a few seconds, it responds to the request by delivering the page.
And it doesn’t stop there.
The server saves a copy of that webpage so that when another visitor makes the same request, it can skip the initial time-taking process and provide the web page much faster.
So, What Does Caching Mean?
If we sum up the whole scenario:
Caching is the storing of frequently used data so it can be accessed faster if someone needs it again. It also prevents the browser from utilizing its resources to load the entire site files again.
It’s simple, isn’t it?
Now before we go any further, let’s discuss the types of caching first.
Types of Caching
Three of the most common types of caching are:
1. Site Cache (Page Caching)
A site cache, also known as page cache, temporarily stores website data (such as images, webpages, files, and similar multimedia) the first time a web page is loaded. So whenever a user revisits your website, saved elements are quickly retrieved and displayed to them.
However, site caching is a type of client-side caching. This means that all the stored data is controlled by the end user. And as a website owner, your only authority is to specify how long content remains in the cache.
Site caching is perfect for sites with a lot of static content. Because when your website rarely updates, visitors will be able to continue loading your web pages fast while still seeing the latest version of your site.
On the other hand, it isn’t well-suited for dynamic websites where content frequently updates, such as e-commerce pages with shopping carts.
So, what’s the magic formula?
Consider using a WordPress plugin to take full benefit from site caching.
There are various caching plugins, like WP Rocket, that you can use to control WordPress site caching.
WP Rocket is a straightforward caching plugin used to take care of caching across different devices, optimize your files, and improve your website’s performance.
(P.S: We’ll discuss more of the caching plugins in the upcoming sections)
2. Browser Cache
Like site caching, browser caching also happens on the client’s end.
It works the exact way as site caching but is a cache system built into a web browser. The browser temporarily saves copies of a website’s files, including:
- HTML code
- CSS stylesheets
- JavaScript scripts
- Images
These files are known as “static assets” because they don’t change between visits.
It all boils down to this:
When the user revisits your website, their browser will fetch the cached files and utilize them to assemble your website’s content. And because of this, it doesn’t have to load everything from scratch.
Typically, a web browser will keep its cache for a limited time or until it is full. After that, it will automatically flush out the old content and save the updated one in its place.
However, as a user, you can also manually clear out your browser’s cache whenever you want.
3. Server Cache
Server caching is also similar to site caching, but instead of saving the content on the client’s end, it keeps the content on a site’s server.
This type of caching is administered on the server without any input from the end user.
For example:
Your server stores HTTP files of your website’s content and serves them immediately when the visitor requests. That way, it doesn’t have to render a new HTTP file every time a user visits the site, reducing the load.
Some of the types of server caching include:
- Object Caching – stores database queries in a server-side cache so that the next time a visitor requests content, the server can deliver it immediately without having to query the database repeatedly.
- Opcode Caching – occurs when the PHP file loads on a web page for the first time. It stores the results of the PHP script for faster loading instead of executing every single time your website receives a request.
- CDN Caching – A Content Delivery Network (CDN) is a system of servers located worldwide. When a user visits your website, the CDN will serve cached files from the server closet to them to reduce loading times.
| 📖Read our dedicated article to deep dive into the caching types. |
Why Does Caching Seem To Break Stuff?
– Want to know the scary part? 👻
Caching works flawlessly with web pages having static content (content that doesn’t change unless you change them), such as text, photos, and videos.
But nowadays, websites have a lot of content or features that update automatically or adjust differently for each user looking at the page.
Let us give you some examples:
One example could be an online streaming site. Dynamic entertainment websites (like Netflix) allow their content to be displayed according to a user’s location, watching activity, preferences, and subscription.
This is an example of dynamic content because content adjusts according to who is looking at the page.
Another example is an e-commerce site.
These websites contain a shopping cart icon on every page, telling customers the total number of items available in their shopping cart. This feature varies for each customer because everyone has a different number of items in their cart. Therefore that number is dynamically generated for each customer.
This type of content needs special care with caching. You need to code things correctly – and if you don’t do that and use a caching plugin, you’ll notice that the website won’t respond as usual (considering the above example: the customer’s cart won’t be able to display the accurate number of items available).
Now, in case you might be wondering:
The main culprit here is PHP!
If the dynamic features present on your website are coded in PHP for output retrieval, they won’t work with caching.
Remember what we discussed at the beginning? Caching stores a copy of your webpage, so the server doesn’t have to load it again when requested.
Basically, PHP is part of the time taking work that gets neglected when you use caching.
So when you want your website to have dynamic features, you need to use another programming language called JavaScript (JS). JS operates on the browser’s side, so when your page is cached, and PHP is sitting idle, you can rely on JS and AJAX (Asynchronous JavaScript and XML) to handle the dynamic needs of your website.
Can a Caching Plugin Help, and How?
Good news:
The easiest solution for all this is to use a caching plugin on your WordPress site!
A caching plugin is a holy grail for eliminating some of the various steps taken by a browser in generating dynamic web pages. By using a caching plugin, you can achieve various server-side caching benefits (including page caching and object caching).
Moreover, these plugins also know to offload their cache and renew it whenever a fresh piece of content is published or existing content is updated on your site.
And what’s even better:
With top caching plugins, like WP Rocket, you can also get added performance optimization features that significantly help improve the Lighthouse Performance Score and metrics – including Core Web Vitals – of your WordPress site!
How Caching Works in WordPress
Here’s how caching works:
A cached page will be created for each web page, and when a visitor visits your website, they will be delivered the cached (static) version of each page.
Within a matter of seconds, WordPress caching plugins minimize the amount of data transmitted between the visitor’s browser, the WordPress database, and the web server, keeping visitors engaged with your site with faster loading times.

How a Caching Plugin Works?
There are many types of caching plugins available for WordPress that make caching a very easy process.
Let’s take WP Rocket as an example:
Using the WP Rocket plugin, you can instantly cache your website by just activating it . In addition, you can enable caching for mobile devices and logged-in WordPress users and specify the time after which the cache will be cleared.
What’s the catch?
It’s the simplest caching plugin that works straight out of the box and doesn’t require technical knowledge!
It applies 80% of performance best practices right upon activation – including site (page) cache and cache pre-loading.
All these features make WP Rocket the most beginner-friendly caching plugin to take care of your WordPress caching and make your website blazing fast! 🚀
A word of caution: If you’re planning to install more than one caching plugin, thinking it will make your site faster, stop there! Installing more than one plugin won’t make your site any faster. Instead, it’ll make your site slower or even break it.
Why Is Caching Important for Your WordPress Site?
Whether you want to start today or in the future – you’ll always need caching for your website.
Here are some of the other benefits of caching for your WordPress site:
1. Makes Your Site Faster
Speed is crucial for a website. If your site takes too long to load, not only will your website users abandon it, but Google will also penalize it leading to lower rankings.
That is why one of the primary benefits caching offers is improved site speed!
This results in much faster, easy-to-crawl websites and has a significant impact on your Core Web Vitals grades and the PageSpeed Insights performance score.
Why is it important?
Because Core Web Vitals metrics are part of Google’s Page Experience Update – the latest ranking factor launched by Google in 2021.
Core Web Vitals combined with a better PageSpeed Insights performance score may positively affect your website’s organic visibility and give visitors a hassle-free experience while browsing your page.
2. Improves User Experience
A fast website = a great UX!
Faster websites are known for reducing bounce rates, as users are not interested in waiting for a website that takes 10 seconds to load. So when the website moves faster for visitors, they will love browsing through it.
Most importantly, it will put a great first impression on a visitor landing on your website. One glimpse can turn someone into a customer or urge them to move on to another website. So first impressions matter the most when it comes to a website.
3. Helps Improve Conversions
Faster-loading websites help in higher rankings, and higher rankings mean more traffic!
When you combine it with a good user experience, it will turn all your visitors into actual customers and improve your conversion rate.
4. Reduces Server Load
As caching displays a static copy of the requested webpage, it puts less of a strain on your server and lowers server load by up to 80%. This is especially beneficial when it comes to highly dynamic sites or during traffic spikes.
5. Improves Time to First Byte (TTFB)
Caching is probably one of the easiest ways to lower your Time to First Byte globally. Once your website is cached, resources don’t need to be downloaded every time from the server – leading to reduced server processing time!
How to Enable Cache in WordPress
Here’s how you can manually enable caching on your WordPress site:
Step 1: Open the wp-config.php file, which you will find in the root folder of your website.
If you don’t know where exactly the wp-config.php file is located:
- Log into your hosting account.
- Go to cPanel.
- Click on the ‘File Manager.’
- Locate the ‘public_html’ folder.
You will find the wp-config.php in this folder.
Step 2: Edit the line that says
define (‘WP_CACHE’, false);
And change it to:
define(‘WP CACHE’, true);
Step 3: Create a file named “advanced-cache” and place it within the wp-content directory, just like this:
/wp-content/advanced-cache.php/
How to Enable a WordPress Caching Plugin
Now, if you want to save time by not doing the technical work, then caching plugins offer a quick and easy way to enable caching on your WordPress site!
But unfortunately, most caching plugins come with features that require technical expertise and can easily confuse a user who is not a developer.
However, this is not the case with WP Rocket.
Installing WP Rocket is the easiest way to enable caching in WordPress. One of the features that makes it the best caching plugin for WordPress is that once you activate it within just a few clicks, you’re already set up and ready to go.
Here’s how you can do it:
- First, you need to install and activate the WP Rocket plugin.
- Once activated, the WP Rocket plugin will automatically turn on the page and browser caching with optimal settings for your site.
- You can see your site’s caching status by visiting the WP Rocket dashboard under the WordPress Settings » WP Rocket page.
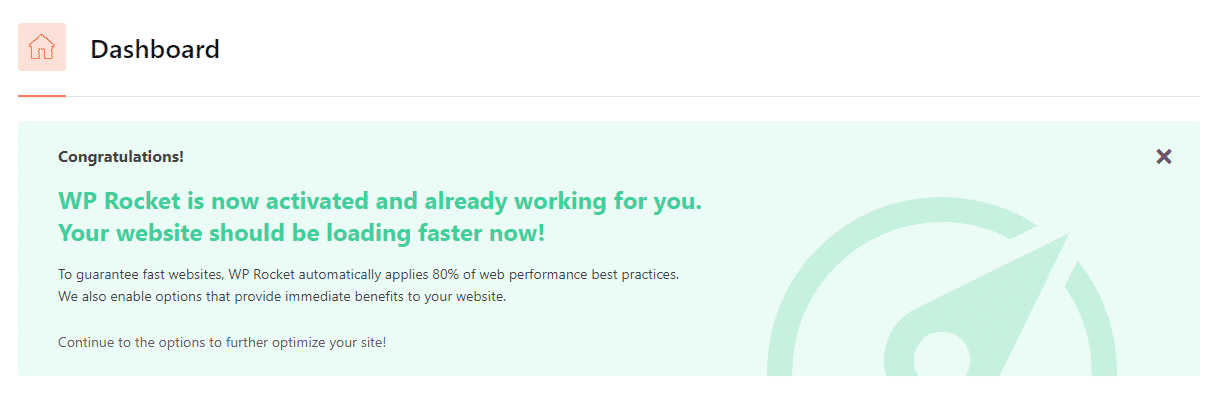
Once you land on the Dashboard tab, you’ll get this message:
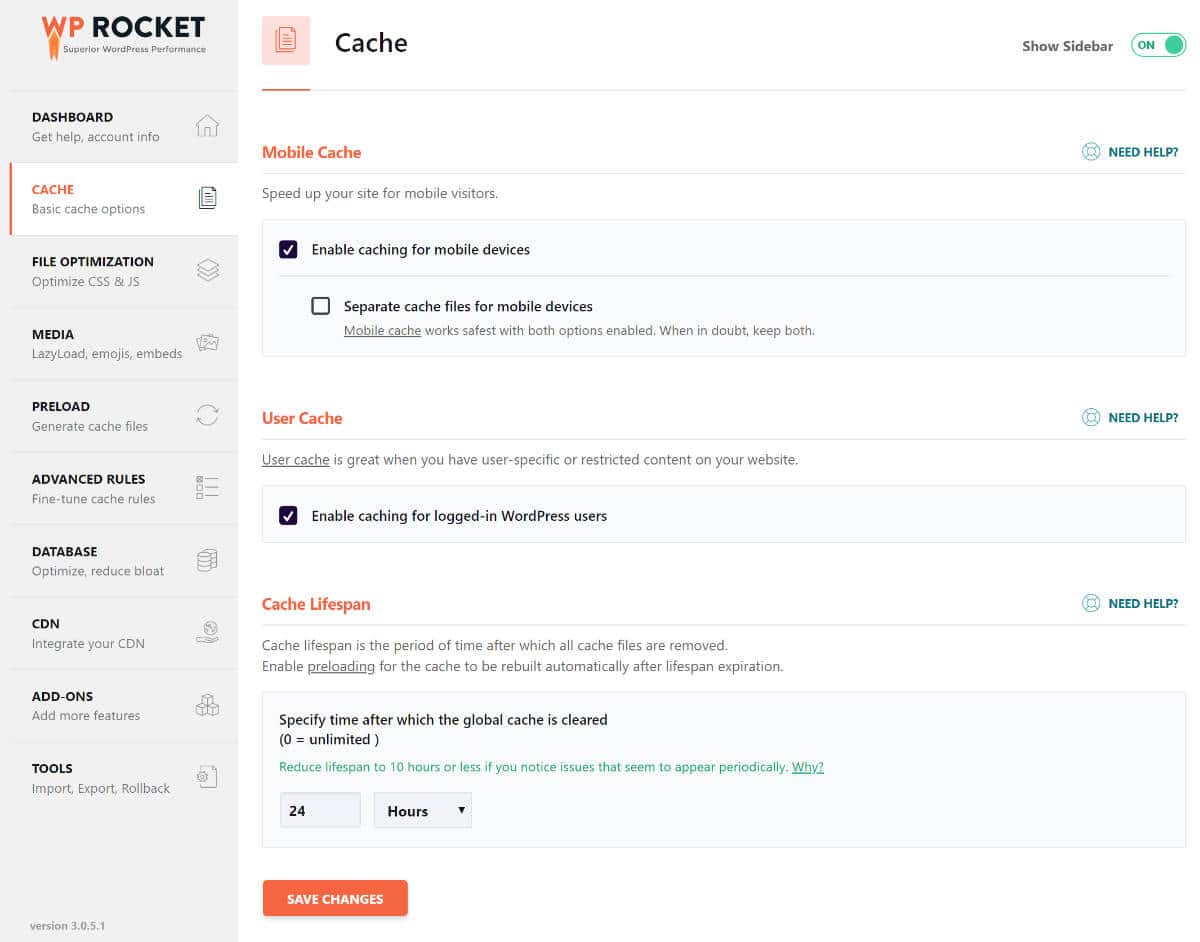
As for the caching tab, you can find the settings under Settings » WP Rocket » Cache.
In addition to automatically enabling page and browser caching, WP Rocket will activate by default Mobile Cache and Cache lifespan (10 hours). In this tab, you can tweak the settings according to your needs.
Moreover, the plugin includes other crucial features, such as optimizing CSS and JS files, that go beyond caching and make WP Rocket the easiest and most powerful solution to improve your website performance. 🚀
Wrapping up
*sigh* – that surely was a hell of a ride.
We hope you find this article helpful!
Website caching is the best way to speed up your WordPress website without sacrificing content or other performance factors. It doesn’t have to be technical or complex. When properly implemented, it will result in much faster load times for your users while decreasing overall server load.
If you’re not caching your WordPress website already, it’s time to get started. You can never go wrong by caching your WordPress site. In fact, it could be one of the biggest ways to your online success.