Table of Contents
Last update on
Do you want to boost your site’s performance? Optimize your images for the web!
What does that mean? It means offering high-quality images that delight visitors without slowing down your site.
Did you know that 90% of buyers on Etsy say image quality influences their purchase decision? Similarly, Airbnb found that listings with professional photos get 20% more bookings than those without. Beautiful images boost conversions, but there’s a catch: large, unoptimized images can drastically slow down your site.
We’ve got your back! That’s where image optimization comes in.
In this guide, you’ll learn the best techniques to optimize images for the web and CDNs to ensure faster load times and better performance.
| 🎯 TL;DR: Takeaways to Optimize Image for Web ✅ The easiest ways to optimize images for web include compression, resizing to the right dimensions, and converting them to a next-gen format such as WebP or AVIF. If you want to implement advanced optimization techniques, use lazy loading, serve responsive images, activate caching, preload critical images above the fold and use a CDN. 📈 GTmetrix, PageSpeed Insights and Google Analytics are your go-to tools to analyze performance, get optimization suggestions and make data-driven decision accordingly. 📊 To track the optimization of your image for web, you should always monitor metrics such as page load speed, image file size, page weight, number of HTTP requests, Largest Contentful Paint (LCP), Time to First Byte (TTFB), average time per session on desktop and mobile. 🛠 To implement caching, lazy loading and more advanced optimization you can use WP Rocket. For image compression and WebP/AVIF conversion, consider Imagify. To accelarate images delivery around the world with a CDN, check RocketCDN. |
3 Essential Image Optimization Techniques for the Web
The effective way to optimize an image for the web is to serve it in the right format and size and compress it without losing quality. Let’s go over the three basic techniques to start your optimization journey.
1. Choosing the Right Image Format for the Web
Older formats like JPEG, PNG, and GIF have served the web well, but they lack the efficiency of next-generation formats like WebP and AVIF. These modern formats offer the same quality with superior compression, meaning your images load faster without sacrificing detail.
📌 Example and Best Practices
- Always convert images to WebP or AVIF for smaller file sizes and better performance.
Google’s Web.dev study found that WebP images are 25-34% smaller than comparable JPEGs, making them a smart choice for faster websites. Below, you can see that the JPEG file weighs 43.84KB and the WebP one only 29.61KB, but the quality is the same.
img
2. Resizing Images for the Right Dimensions
Using larger-than-necessary images slows down your website because the browser has to load and resize them on the fly. By scaling images to the exact size they’ll be displayed, you reduce file size and improve loading speed.
📌 Example and Best Practices
Always resize your images to match the actual display size on your site.
- For a WordPress blog post, 800px width is ideal.
- For WooCommerce product images, a minimum of 800px × 800px ensures clarity.
3. Compressing Images Without Quality Loss
Image compression reduces file size, which means fewer HTTP requests and faster-loading images—both essential for improving page speed. However, compressing too much can lead to blurry photos, affecting your website’s credibility and conversion rate. The key is to find the right balance: smaller file size without noticeable quality loss.
📌 Example and Best Practices
Use a compression tool that does not alter the image quality but reduces the file size as much as possible.
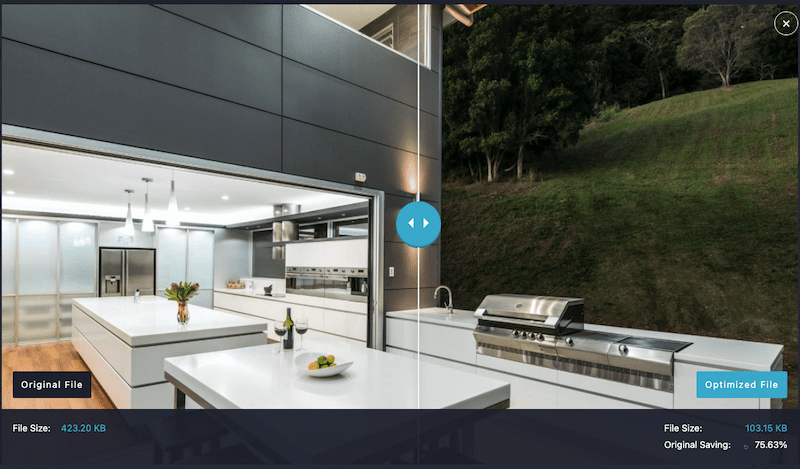
For example, can you spot the difference between these two images?
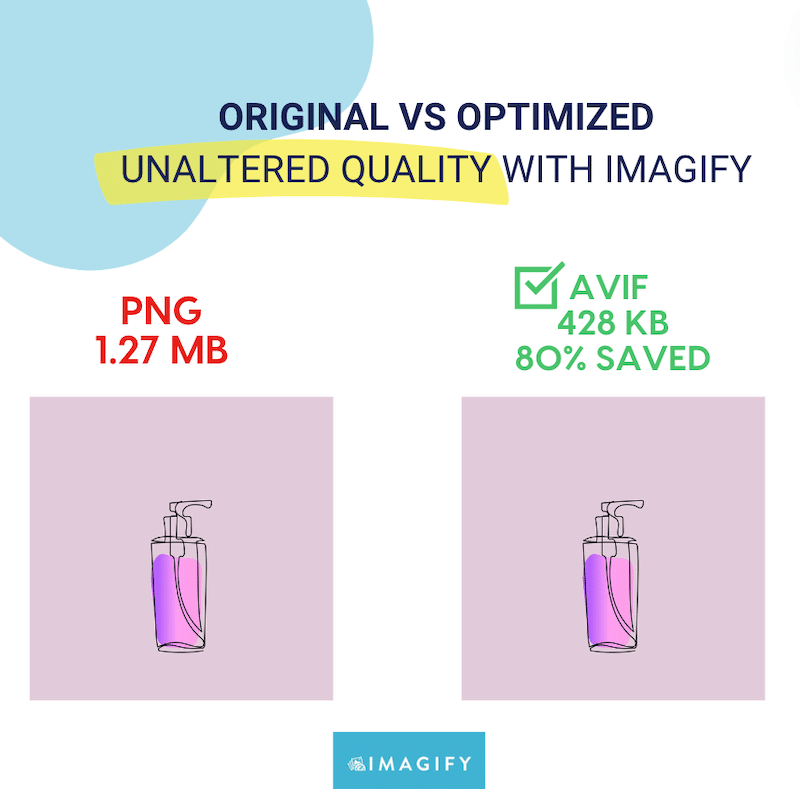
We can’t! The one on the right is compressed by 80%, yet the quality remains identical.
| 💡Hint: Imagify is the easiest image optimization plugin that automatically compresses images and converts them to WebP or AVIF. |
Now that you know the three basic strategies, you can take your image optimization efforts even further with more advanced techniques and get your images even more ready for the web.
Advanced Web Image Optimization Strategies
Image optimization goes beyond compression and next-gen formats. Consider advanced techniques like lazy loading, responsive images, and alt-text optimization to improve performance and SEO.
1. Implementing Lazy Loading for Faster Initial Page Load
The first advanced technique to prepare images for the web is to apply lazy loading. It helps reduce initial page load times by deferring the loading of offscreen pictures until they are needed.
By implementing lazy loading, you ensure that images only load when they become visible in the user’s viewport, making the page feel faster.
📌Example and Best Practices
Imagine you’re reading a WordPress blog post titled “10 Best Beaches in Thailand”. Instead of loading all 10 large images at once, lazy loading ensures that:
- The first beach image loads immediately with the page.
- The remaining images load only when you scroll down, reducing the initial load time.
All you need to do is to:
- Use native loading=”lazy” for images below the fold.
- Exclude hero images and key visual elements from lazy loading.
| 💡Hint: The WP Rocket plugin implements lazy loading for below the fold images (along with 80% of other performance best practices) as soon as it’s activated, so you don’t need to worry about the technical setup. It does the heavy lifting for you! |
2. Preload and Prioritize Your Critical Images to Be Loaded First
Along the same lines, another advanced technique for web image optimization is ensuring your browser prioritizes critical images such as the Largest Contentful Paint (LCP) element.
LCP is one of the Core Web Vitals that measures how long it takes for your largest content to be loaded on the page (which is usually an image). To improve LCP, you should tell the browser to prioritize rendering this key image as quickly as possible.
📌 Example & Best Practices
Imagine an LCP element on a WooCommerce product page—most likely, the main product image. To make it load faster, beyond lazy loading, you can also:
- Use fetchpriority=”high” on the LCP image to tell the browser to load it immediately.
- Use rel=”preload” if the image isn’t in the initial HTML, ensuring the browser loads it ahead of time.
| 💡Hint: Optimizing critical images with lazy loading, preloading, and fetch priority=high attribute may initially seem daunting as you’ll need to manipulate some code. Luckily, the WP Rocket plugin can do this automatically for you! |
3. Using Responsive Images for Different Screen Sizes
Using responsive images improves page speed by ensuring that browsers load the most appropriate image size based on the user’s device. This prevents oversized images from slowing down mobile experiences while maintaining high quality on larger screens.
📌 Example and Best Practices
- Use the <picture> element or srcset attribute to serve different image sizes based on the user’s device.
- Optimize images separately for mobile, tablet, and desktop displays.
- Design mobile-first when building a page or a whole website.
Here are the top common screen resolutions worldwide for reference:
- Desktop: 1920×1080, 1366×768, 1536×864, 1280×720
- Mobile: 360×800, 390×844, 393×873, 412×915
- Tablet: 768×1024, 1280×800, 800×1280, 820×1180
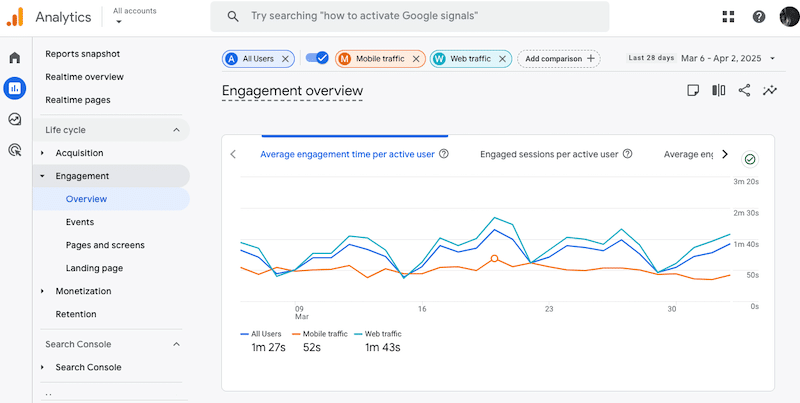
| 💡 Hint: Use Google Analytics to identify the most common screen resolutions visiting your site. You can do it via Reports > User > Tech > Tech Details and change the primary dimension to “Screen Resolution”. |
4. Optimizing Alt-Text for SEO
Alt-text improves accessibility and contributes to image SEO by providing search engines with relevant context. They give a textual description of images and may increase your chances of being featured in the top results of Google Images.
📌 Example and Best Practices
- Be simple and descriptive but concise, incorporating ONLY relevant keywords naturally.
- Avoid keyword stuffing and focus more on user-friendly and meaningful descriptions.
| 💡Hint: Read your alt text out loud. If you don’t understand it, that means it needs some rework. |
For example, here’s a good alt-tag example for a WooCommerce product:
“Women’s oversized blue jean jacket with button-up front and two chest pockets.”
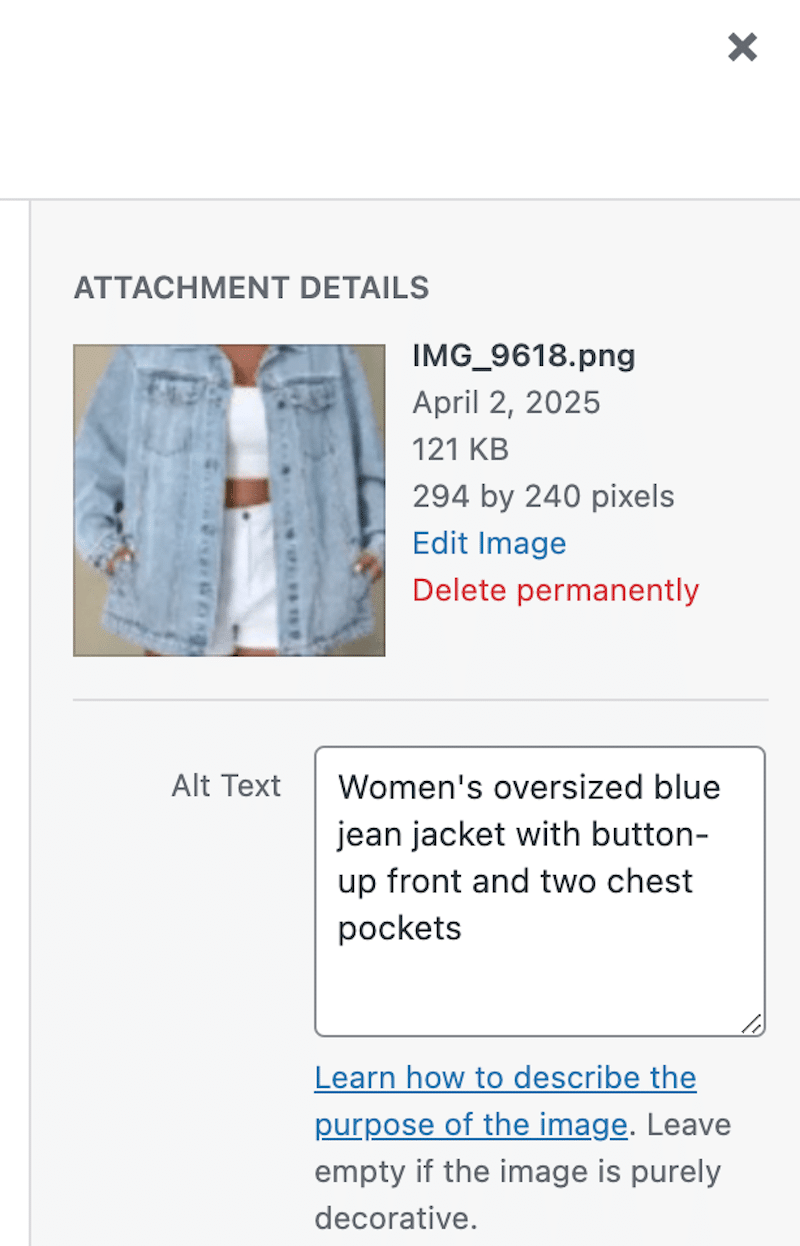
This Alt Tag is descriptive, includes key details, and naturally integrates keywords for SEO.
On the other hand, that would be a bad example (keyword stuffing): “Blue jean jacket denim oversized women’s blue jacket trendy fashion jacket ladies.”
5. Leveraging CDNs for Faster Image Delivery
CDNs (Content Delivery Networks) are another efficient technique for preparing images for the web and improving page speed.
CDNs enhance image loading speed by using caching and on-the-fly resizing, ensuring that images are delivered in the correct size for the user’s device.
Thanks to caching, once an image is optimized, CDNs don’t need to re-optimize it every time a new device requests it. On top of that, the images are served from the server closest to the user (Points of presence), speeding up image delivery.
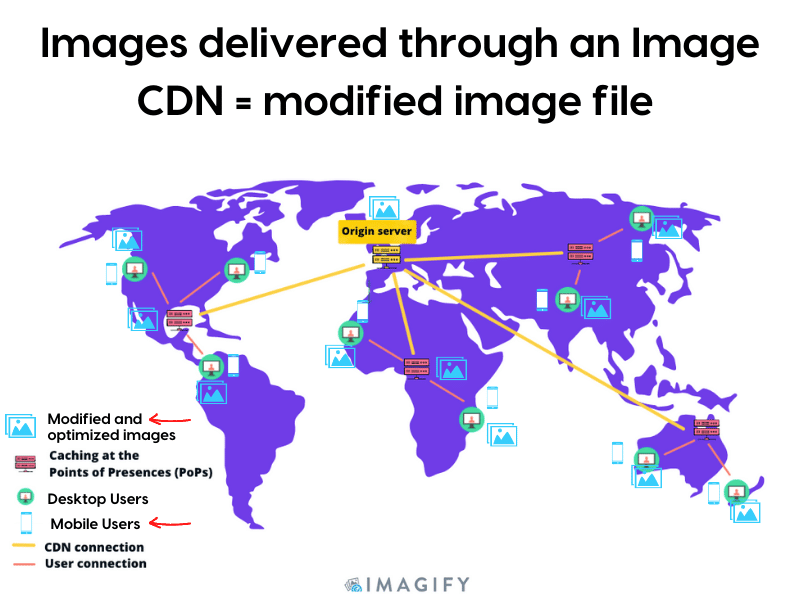
📌 Example
Your origin server is in London, but a client in Sydney wants to access your WooCommerce site, which is filled with product images. Without a CDN, the request travels all the way to London and then back to Sydney. However, with a CDN, the request is handled by a local server in Australia, and the image loads much faster.
📌 Best Practices for Optimizing Images with CDNs
- Check your URLs because an image CDN relies on URLs to determine which image to load and use parameters like size, format, and quality.
- Ensure CDN supports AVIF and WebP because, as mentioned previously, these next-gen formats improve image compression and quality.
- Optimize your images (e.g, with compression) before using any image CDN so you can add another layer of optimization.
| 💡Hint: If you’re looking for an easy CDN that comes with a plugin and does all the technical setup for you, consider RocketCDN. Other CDNs can also work, but they may require more technical setup on your end. |
Top Tools and Plugins for Web Image Optimization
The best way to optimize images for the web is to use performance optimization plugins such as WP Rocket, Imagify and RocketCDN. Additionally, design tools like Sketch or Photoshop can help resize images precisely for web use. Another rule of thumb is to use a fully responsive WordPress theme and a mobile-friendly plugin to ensure images adapt properly to different devices. Let’s go over each of these tools.
1. Imagify – The Easiest Image Optimization Plugin
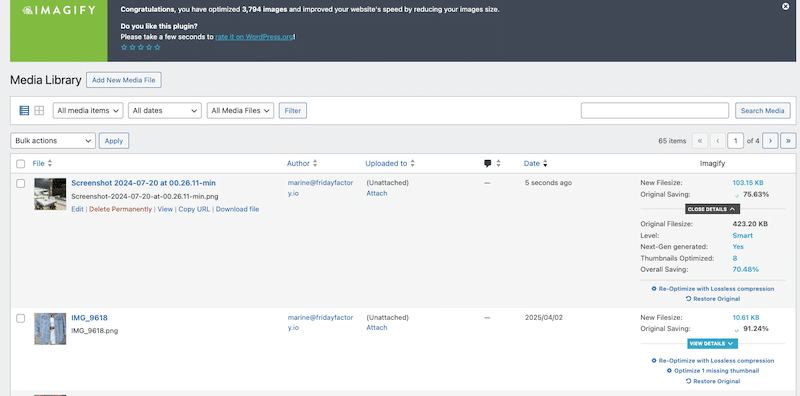
Imagify is the easiest image optimization plugin that automatically compresses images in bulk while maintaining high quality. Imagify helps you apply the three basic image optimization techniques mentioned before: compression, next-gen conversion, and resizing larger images—all effortlessly.
Key Features Beneficial for Web Optimization
Let’s go over these three features that help preparing images for the web:
- The Smart compression mode automatically delivers the best balance between file size reduction and visual quality. There is a bulk compression button you can press and optimize all your images at once.
If you are curious, you can see that the quality is the same on the original image (left) vs on the compressed one (right):
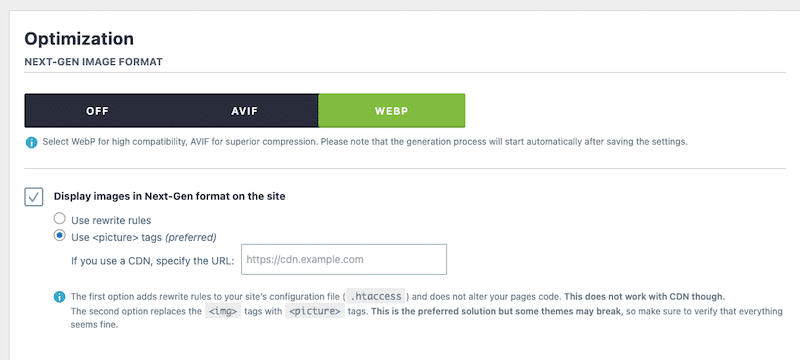
- The plugin automatically converts images to WebP for better web performance. There’s also an option to convert to AVIF.
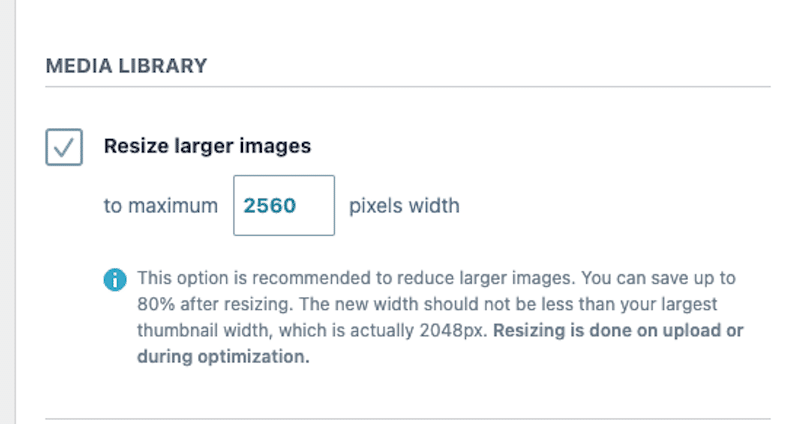
- There is also the option to resize larger images on upload to avoid performance issues.
The plugin is really beginner-friendly, and there is no need to be a pro designer. Imagify optimizes images for the web on your behalf! There is a free plan available for around 200 images a month so you can see the results for yourself.
| 📖 If you are looking for more image optimization plugins, have a look at our article comparing the best image compression plugins. |
2. Photoshop
This is a powerful tool for image editing and optimization.
- WebP conversion is available under File > Save > WebP.
- To use image compression go to File > Export > Save for Web, then adjust the image size and quality. Be careful not to over-compress and lose quality.
3. Sketch
This is a great tool for resizing and preparing images for multiple devices.
- It comes with pre-made mockups for iPhone, Android, and more ensuring you can prepare your image for responsive design easily.
- It also supports WebP conversion: Use File > Export > WebP.
| 🔎 Good to know: These tools are not integrated into WordPress and they are a steep-learning curve. |
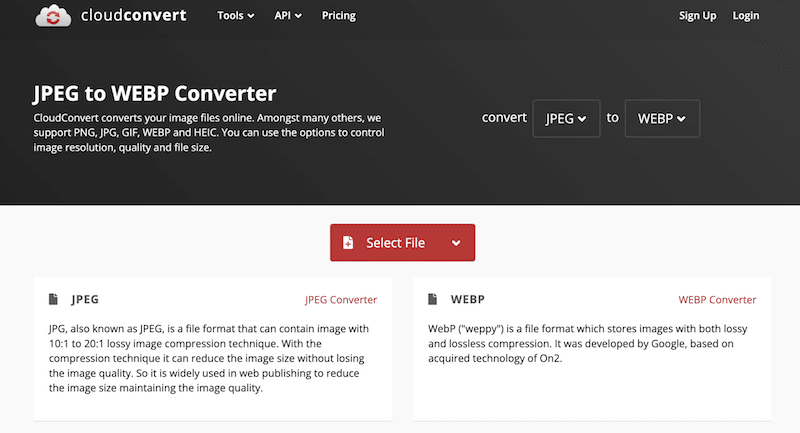
4. Cloudconvert and Optimizilla
Many online tools exist for image compression and format conversion, but it’s rare to find one that does both. You’ll likely need two separate tools to optimize images online such as Cloudconvert and Optimizilla.
Follow the steps below to use them together
- Use Cloudconvert to convert heavy JPEGs to WebP. Simply drag and drop your images to the Select File field.
- Download the converted image and compress it using an online image compressor such as Optimizilla.
5. WP Rocket
WP Rocket is the simplest and most powerful performance plugin to optimize your content and images for the web while improving Core Web Vitals. It also helps pass several PageSpeed Insights audits easily. Additionally, 80% of performance best practices are applied instantly, saving time and effort.
Key Features Beneficial for Web Optimization
WP Rocket helps address almost all the tips from the Advanced Image Optimization Techniques section, making it an all-in-one performance solution.
Let’s go over each feature:
- Browser & Page Caching (including Mobile Caching) and GZIP Compression, ensuring that images and other assets load faster.
- Critical Image Optimization: it automatically optimizes the above-the-fold images of the page so that they can be rendered faster by the browser. For example, the LCP image will be preloaded and rendered in priority to the user.
- Automatic Lazy Rendering: it allows the browser to render only the elements visible to users at that moment. This is a crucial optimization to improve user interaction and optimizing the Interaction to Next Paint grade, which is a Core Web Vital.
- Lazy Loading: it delays loading images until they are needed, instead of all at once. This helps pages load faster and saves data by only displaying images when users scroll to them.
| 💡 Good to know: WP Rocket also automatically minifies CSS & JavaScript to reduce network payloads and improve load times. |
Comparison of Image Optimization Tools for Different Needs
Here’s a recap of the tools based on your needs so you can choose the best one for optimizing images for the web.
✅ For Easy and Efficient Optimizations in WordPress
Imagify is your best ally. It handles compression, auto-resizing of large images, and next-gen format conversion (WebP/AVIF) directly in your WordPress dashboard. You can optimize images individually or in bulk, saving time and effort without dealing with technical complexities. And remember, Imagify makes sure to not serve any blurry images thanks to its Smart compression mode!
✅ For Advanced Image Optimization in WordPress
If you need caching, lazy loading, preloading LCP images, and optimizing images above the fold, WP Rocket is the go-to solution. It integrates with Imagify and provides a full performance optimization suite to boost loading speed in a few clicks.
✅ For Basic Optimization Outside WordPress
If you prefer not to use a WordPress plugin, CloudConvert or Optimizilla are easy-to-use online converters that support bulk image compression and format conversion (up to 20 images at a time). However, you’ll need to manually re-upload the optimized images to WordPress.
✅ For Full Control Over Image Size
Use a design tool like Sketch, Photoshop (Advanced), GIMP, or built-in tools like Preview (Mac) or Photos (Windows). Sketch is ideal for easily creating multiple size variations for different devices. Photoshop is also great but it’s a really steep learning curve.
✅ For Full Control Over Image Size and Compression Levels
Photoshop allows for precise control over compression levels before you export the image. However, with great power comes great responsibility and make sure to not over compress your picture.
✅ For a Powerful CDN With Easy Setup
If you’re looking for an affordable hassle-free CDN with WordPress integration, RocketCDN is a great choice. It comes with a dedicated WordPress plugin, meaning no complex technical setup (CNAME records for example) is needed on your side. With global Points of Presence (PoPs), it ensures fast image delivery worldwide which is ideal for multilingual websites with visitors from different regions.
Of course, other CDNs are available and perform well, but they often come with higher costs and a more technical setup, which can be challenging for beginners.
Measuring the Impact of Image Optimization on Web: 6 Metrics
To measure the impact of image optimization, you can use performance tools, responsive-checker tools, data tools (like Google Analytics), and key metrics to determine if your optimizations are working. Let’s go over them.
Here’s a list of metrics and KPIs you can track to measure the success of your image optimization efforts.
1. Fully Loaded Time
It measures how long it takes for a page to load completely. Optimized images should reduce this time.
2. Largest Contentful Paint
Largest Contentful Paint (LCP) measures how long it takes for the largest visible content (often an image or a large text block) to load on a page. Since images are usually the biggest elements affecting load time, optimizing them directly improves LCP.
If your LCP score improves after image compression and resizing, it means your optimizations are working!
3. Image File Size
Smaller file sizes mean faster loading times without losing quality. Once you have implemented compression and next-gen format conversion, you should see that your image file size is much smaller by at least 40%.
4. Page Weight
It’s the total size of a page’s assets, including images. With optimized images you should save a few KB.
5. Bounce Rate from Mobile Users
A high bounce rate may indicate slow loading or poor mobile responsiveness. If you improve the mobile user experience by serving proper size images, visitors should be more willing to engage with your content and not leave immediately.
6. Average Time on Page for Mobile Users
If users stay longer, it suggests a better experience and that images are well optimized.
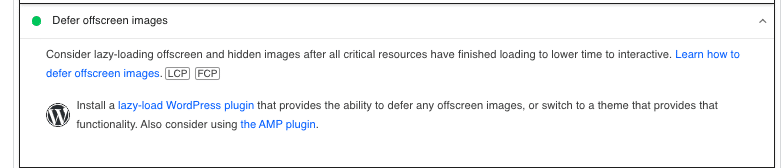
Note that it’s also useful to check the Audits and Top Issues sections of GTmetrix and PageSpeed Insights, before and after making changes. If the optimizations are working well, you should see improvements like “Efficiently encode images”, “Defer offscreen images” or “Properly size images” marked in green.
5 Tools to Use to Check if Image Optimization is Working
1. GTmetrix
Powered by Lighthouse, GTmetrix analyzes website speed and performance.
- KPIs measured for image optimization: Fully loaded time, Largest Contentful Paint (Core Web Vitals), Page Weight.
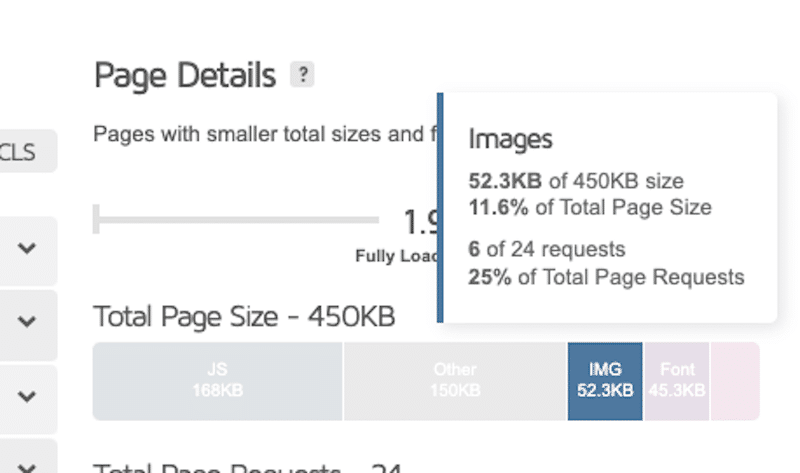
- Audit section for image optimization: The Top Issues section highlights areas for improvement.
IMG
2. PageSpeed Insights
Google’s Lighthouse-powered tool evaluates page performance.
- KPIs measured for image optimization: Overall performance score, Largest Contentful Paint.
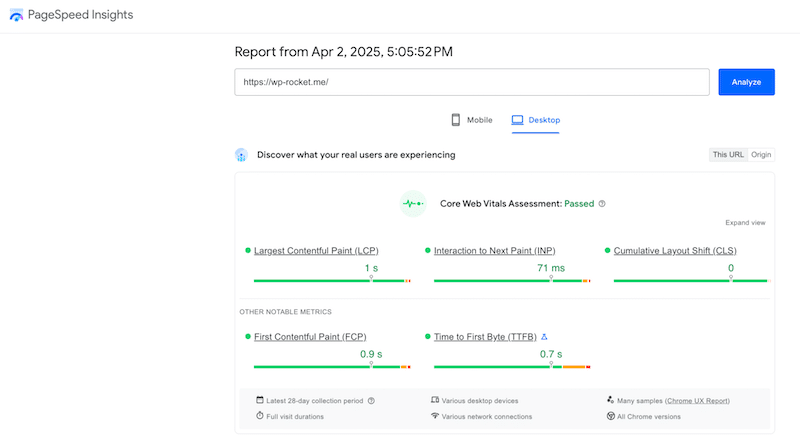
- Audit section for image optimization: The Diagnosis section highlights the issues to address.
IMG
3. Google Analytics
It tracks website traffic and user behavior, helping make data-driven marketing decisions.
- KPI measured for image optimization: Bounce rate, Average time on page for desktop and mobile users.
For example, follow those steps to measure the average time on page for mobile users
- Go to Google Analytics > Engagement > Overview (or a specific page)
- Compare desktop vs. mobile data
- Select before-and-after optimization dates
4. CadenceSEO.com
It’s a powerful tool for checking website responsiveness and mobile-friendliness.
- What it checks: It verifies how your website looks on several devices (tablet, mobile and desktop) and shows you the improvements that need to be made.
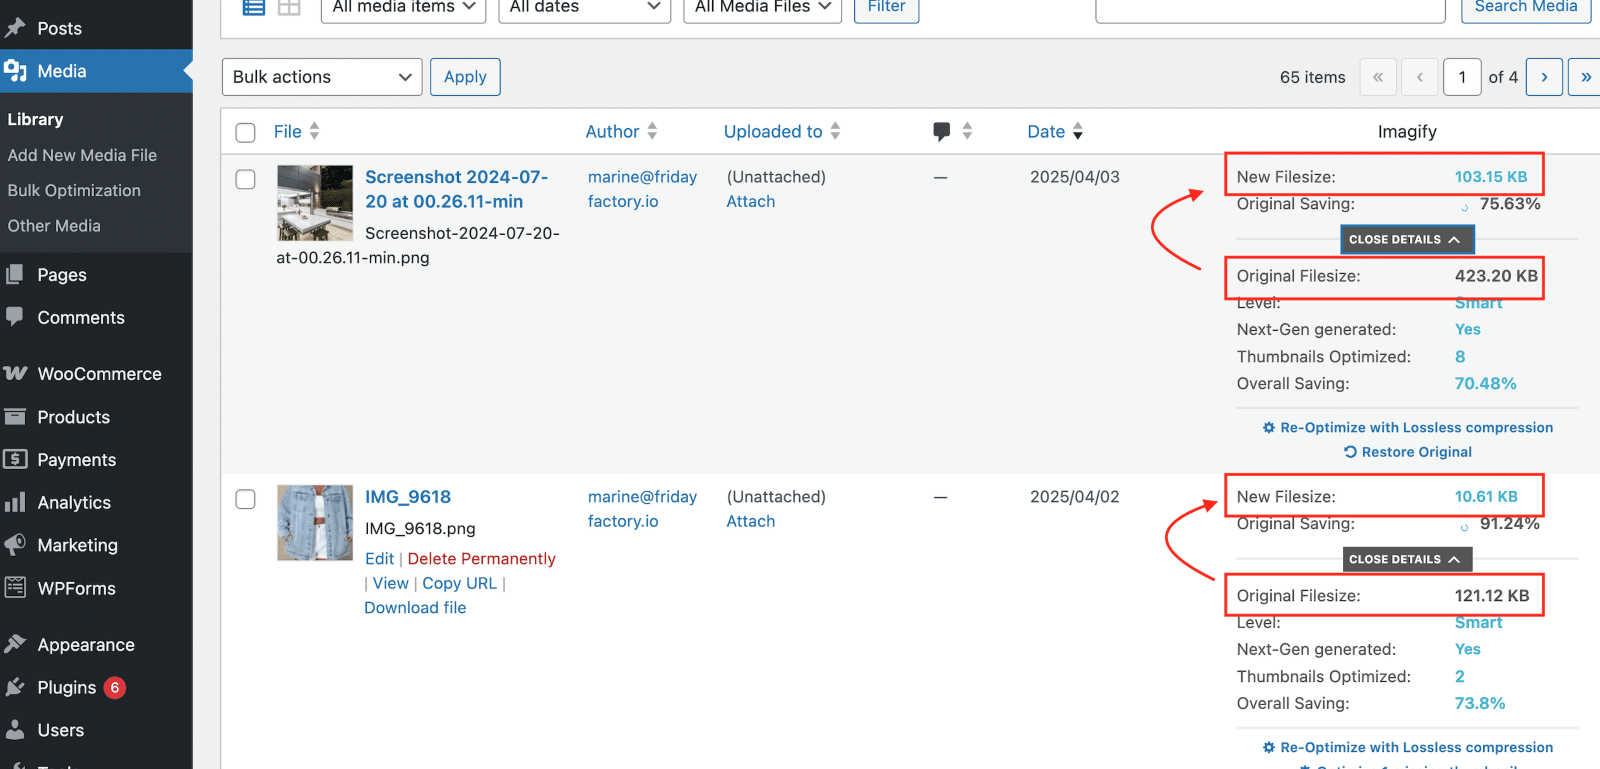
5. Imagify
Imagify compresses images directly from the WordPress library and tracks file size savings.
- KPI measured for image optimization: Image file size reduction.
5 Common Bad Practices in Web Image Optimization
Before you start optimizing your images for web design, take a moment to review these five standard bad practices. Avoiding these pitfalls will help ensure you’re on the right track for improving not only performance but also the user experience.
Over-compression Leading to Quality Loss
Compressing images too much can result in poor quality and a negative user experience. Always aim to balance compression with visual quality with an efficient tool that can do the job for you.
Neglecting Mobile-Specific Image Optimizations
Not resizing images for different display sizes (like mobile, tablet, and desktop) can lead to slower load times and unnecessary data usage, mainly when large images are used in small containers. Resizing images according to the context is essential for optimized performance.
Sticking to “Heavy” Formats Like GIF or JPEG
Relying on outdated formats like GIF and JPEG may result in larger file sizes. Consider using newer formats like WebP or AVIF for equal quality and smaller file sizes.
Lazy Loading Images Above the Fold
Lazy loading is excellent for off-screen images, but essential images, like those above the fold, should be prioritized to improve perceived loading time.
Only Using Lossless Compression
If you’re using a reliable compression tool, you should always opt for lossy compression. You shouldn’t notice a visual difference between lossy and lossless compression. Lossy modes will reduce file sizes much more than the lossless ones.
Wrapping up
You should now be well-equipped to optimize images for the web, from basic to advanced techniques! With the right tools, you can ensure your images are fully optimized and leverage CDNs to boost your page speed. You also know how to track your progress with key performance metrics and the best testing tools.
To kick-start your optimization journey without risks, follow these two powerful steps:
- Start with Imagify – Install it for free and optimize up to 200 images at no cost. Plus, you can restore your original images if needed.
- Install WP Rocket – Instantly benefit from 80% of performance best practices, including caching and critical image optimization. There’s a 14-day refund guarantee, so you can try it risk-free as well!