Table of Contents
Last update on
This is a guest post. Opinions and recommendations are the author’s own.
The task of creating an eLearning course site might be scary at first glance. Even if you are an instructor used to teaching and creating courses, an eLearning site creation might seem scary. But do not worry! We will help you easily set up an eLearning Course Site. We acknowledge that for most people creating an eLearning site might be technically challenging. You might not even be an instructor and want to start a business by hiring instructors to sell their courses on your site.
This is where we introduce WordPress. WordPress is the most popular Content Management System (CMS) out there. A CMS helps you quickly create, manage and edit a website, making it the perfect tool for beginners. WordPress lets you have a large number of nifty tools and theme packs, assisting you in setting up a site by simply dragging and dropping elements without much need for coding.
In this article, we use our expertise with WordPress to create a simple, step-by-step walkthrough of setting up your own eLearning website using the Tutor LMS plugin and WP Rocket. Join us on this wonderful journey from getting your domain and hosting to installing the Tutor LMS plugin and setting up your very first course.
Domain & Hosting
The first step in creating eLearning websites is to get a domain name. Simply put, it is the name of your website, and this could also be your brand’s name. If you are just landing into the eLearning world, brainstorm your name ideas to reflect your niche. You can register your domain name from registrars such as HostGator, Automattic, etc. Or, you can claim a free one from your web hosting package.
Talking about hosting packages, choosing the right hosting for your WordPress website is very important! Some of the popular hosting companies are BlueHost, DreamHost, and SiteGround. Whichever host you choose, keep in mind to never compromise on the hosting provider’s speed, uptime, and customer support. Your website’s health is dependent on them.
Choosing the Right eLearning Plugin
To create an eLearning site in WordPress, you need to use a Learning Management System or LMS for short. A Learning Management System is an application that provides a framework that handles each aspect of the eLearning process. This lets you create a central source for online courses and training materials, making it a one-stop solution to create, deliver, manage and track performance.
You need to be careful about the LMS plugin that you use to build your eLearning site on WordPress since it is the core of your eLearning site. It should offer you at least some basic features to deliver your course materials and run an eLearning platform.
The plugin you choose should incorporate easy course creation, and measure learners’ progress, all the way to managing the overall performance of your eLearning site.
WordPress has a plethora of plugins available for users. But how do you determine if an LMS plugin is right for you? Here are some of the basic features to look out for:
- Functional course building
- Easy to create quizzes
- Student interaction with email
- Easy payment integration
- Content Drip
- Certificates with a Certificate Builder
- Theme starter pack integrations
- And many more
Taking these features into consideration, we suggest using Tutor LMS. We will go over the pro features of Tutor LMS that help max out this LMS plugin’s power.
Installing the LMS Plugin
Now that you have decided on your choice of plugin let us go ahead and start setting it up.
To install Tutor LMS navigate first to your WordPress admin panel. Note that this is the installation of the free version of Tutor LMS.
From the admin panel, go to Plugins > Add new, search for Tutor LMS then install and activate the plugin. In a few minutes, it should be ready to be used.
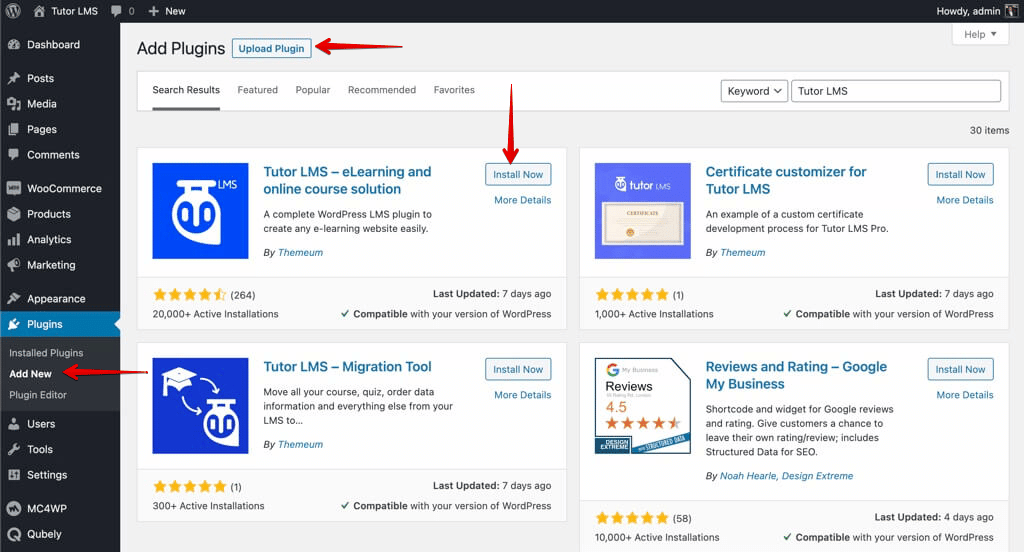
To install the pro version of Tutor LMS, navigate to Plugins > Add new > Upload Plugin. Simply upload the zip file of Tutor LMS Pro and hit activate.
You need both the free and pro version of Tutor LMS installed simultaneously for it to work as intended. With all that finished, you can go on to the next stage.
Designing Your Website
Once you have installed your LMS plugin, you now need to choose a theme for your online course website.
The design needs to attract consumers and help provide the authority you need to encourage people to sign up for courses.
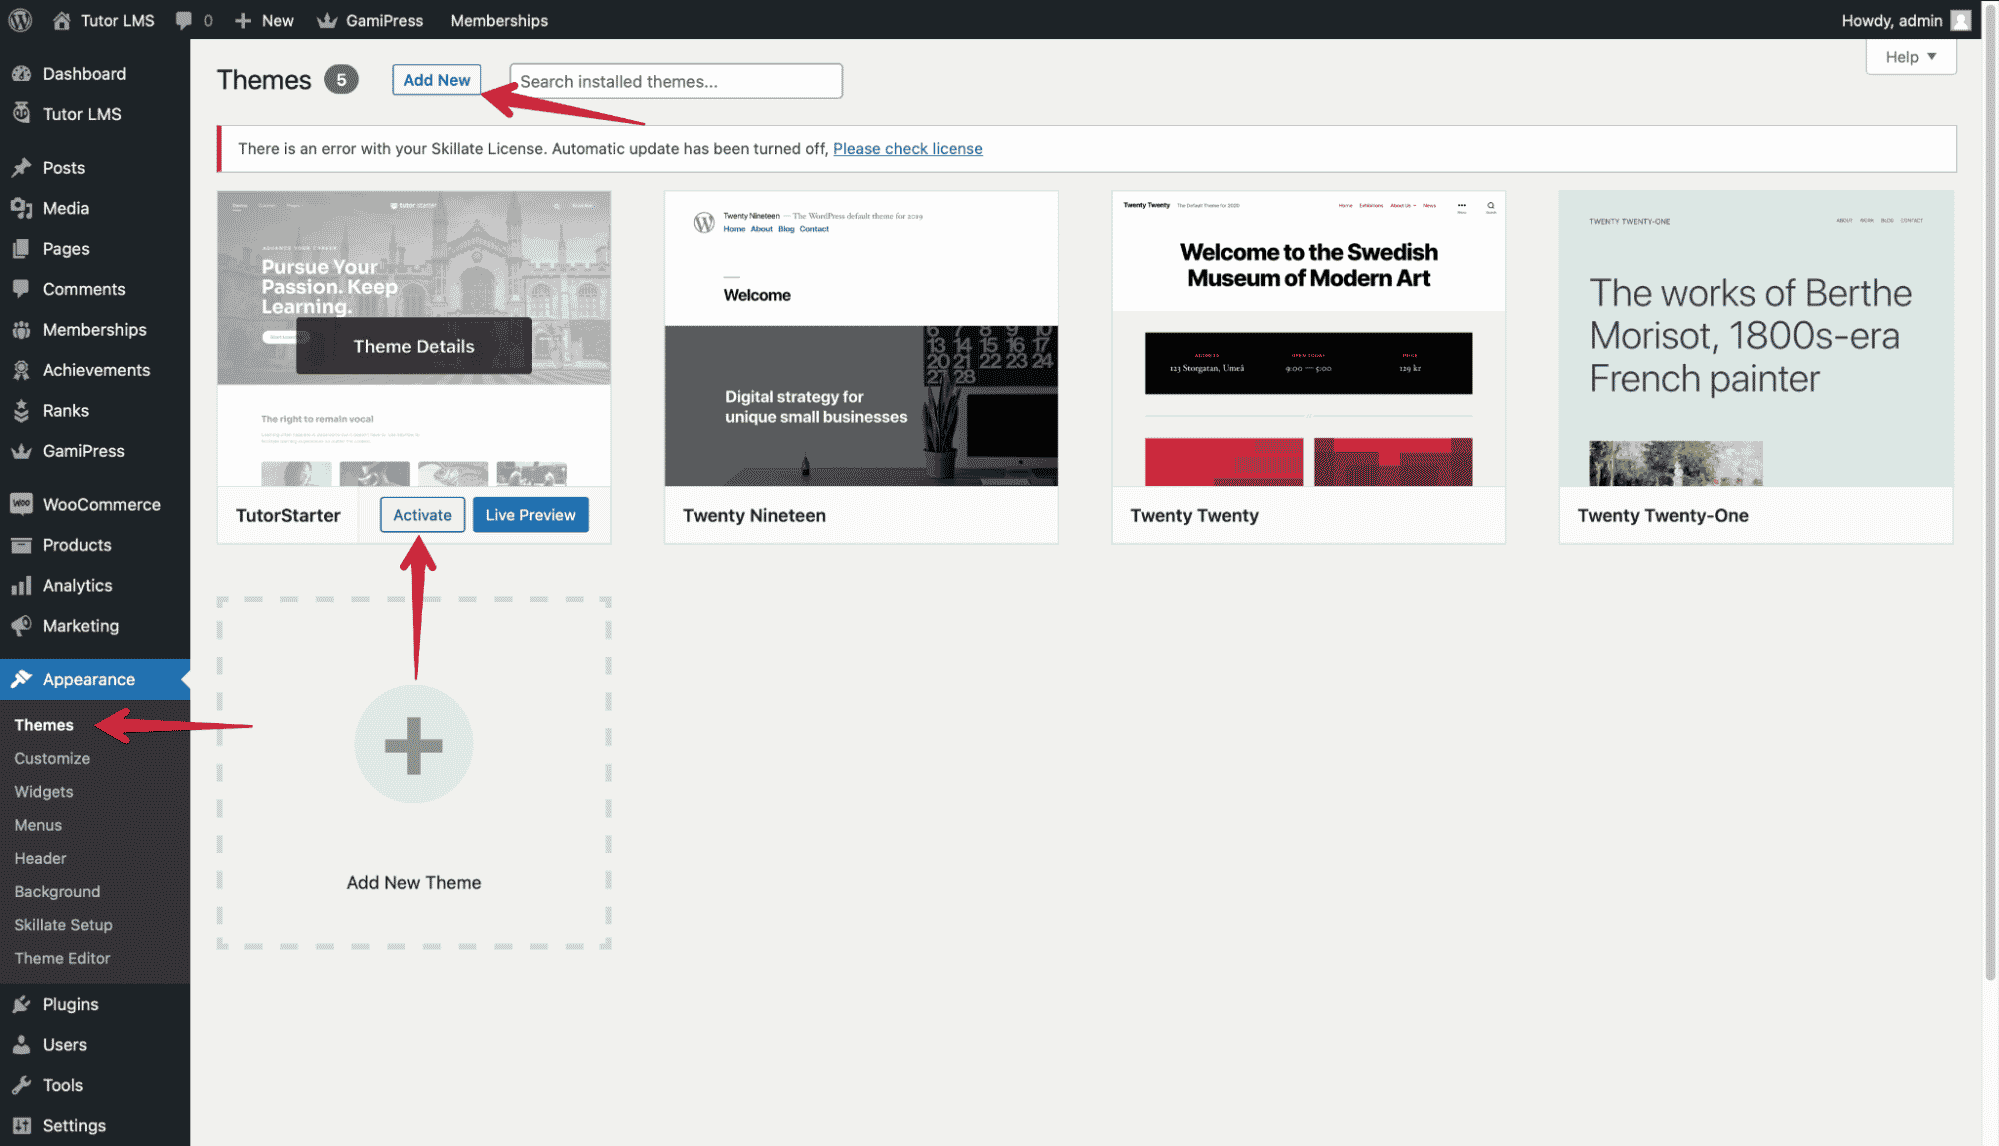
Following that, our suggestion for the theme would be Tutor Starter. This theme not only is free, but it was also made to be used with Tutor LMS. That makes life a whole lot easier for you.
To install Tutor Starter from the WordPress admin panel, you can find the Appearance tab. From there, you click on Add new and search for “Tutor Starter”. Go ahead and hit install and activate.
You need to add one more plugin before you can start utilizing Tutor Starter properly. In the same way, you installed the other plugins, you need to navigate to Add a new plugin and search for TutorMate. TutorMate is a companion demo importer plugin for the Tutor Starter theme. After finding it from Plugins > Add new, you click to install and activate it.
You are now geared up and ready to go. Let’s add a starter pack from Tutor Starter to your WordPress site. From the WordPress admin panel, go to Tutor Starter > Starter sites. Here you can find 4 unique demo starter sites for different types of sites according to what you want to create. The neat thing about starter sites is that they will load up your site with some pre-built content so you can see what’s what.
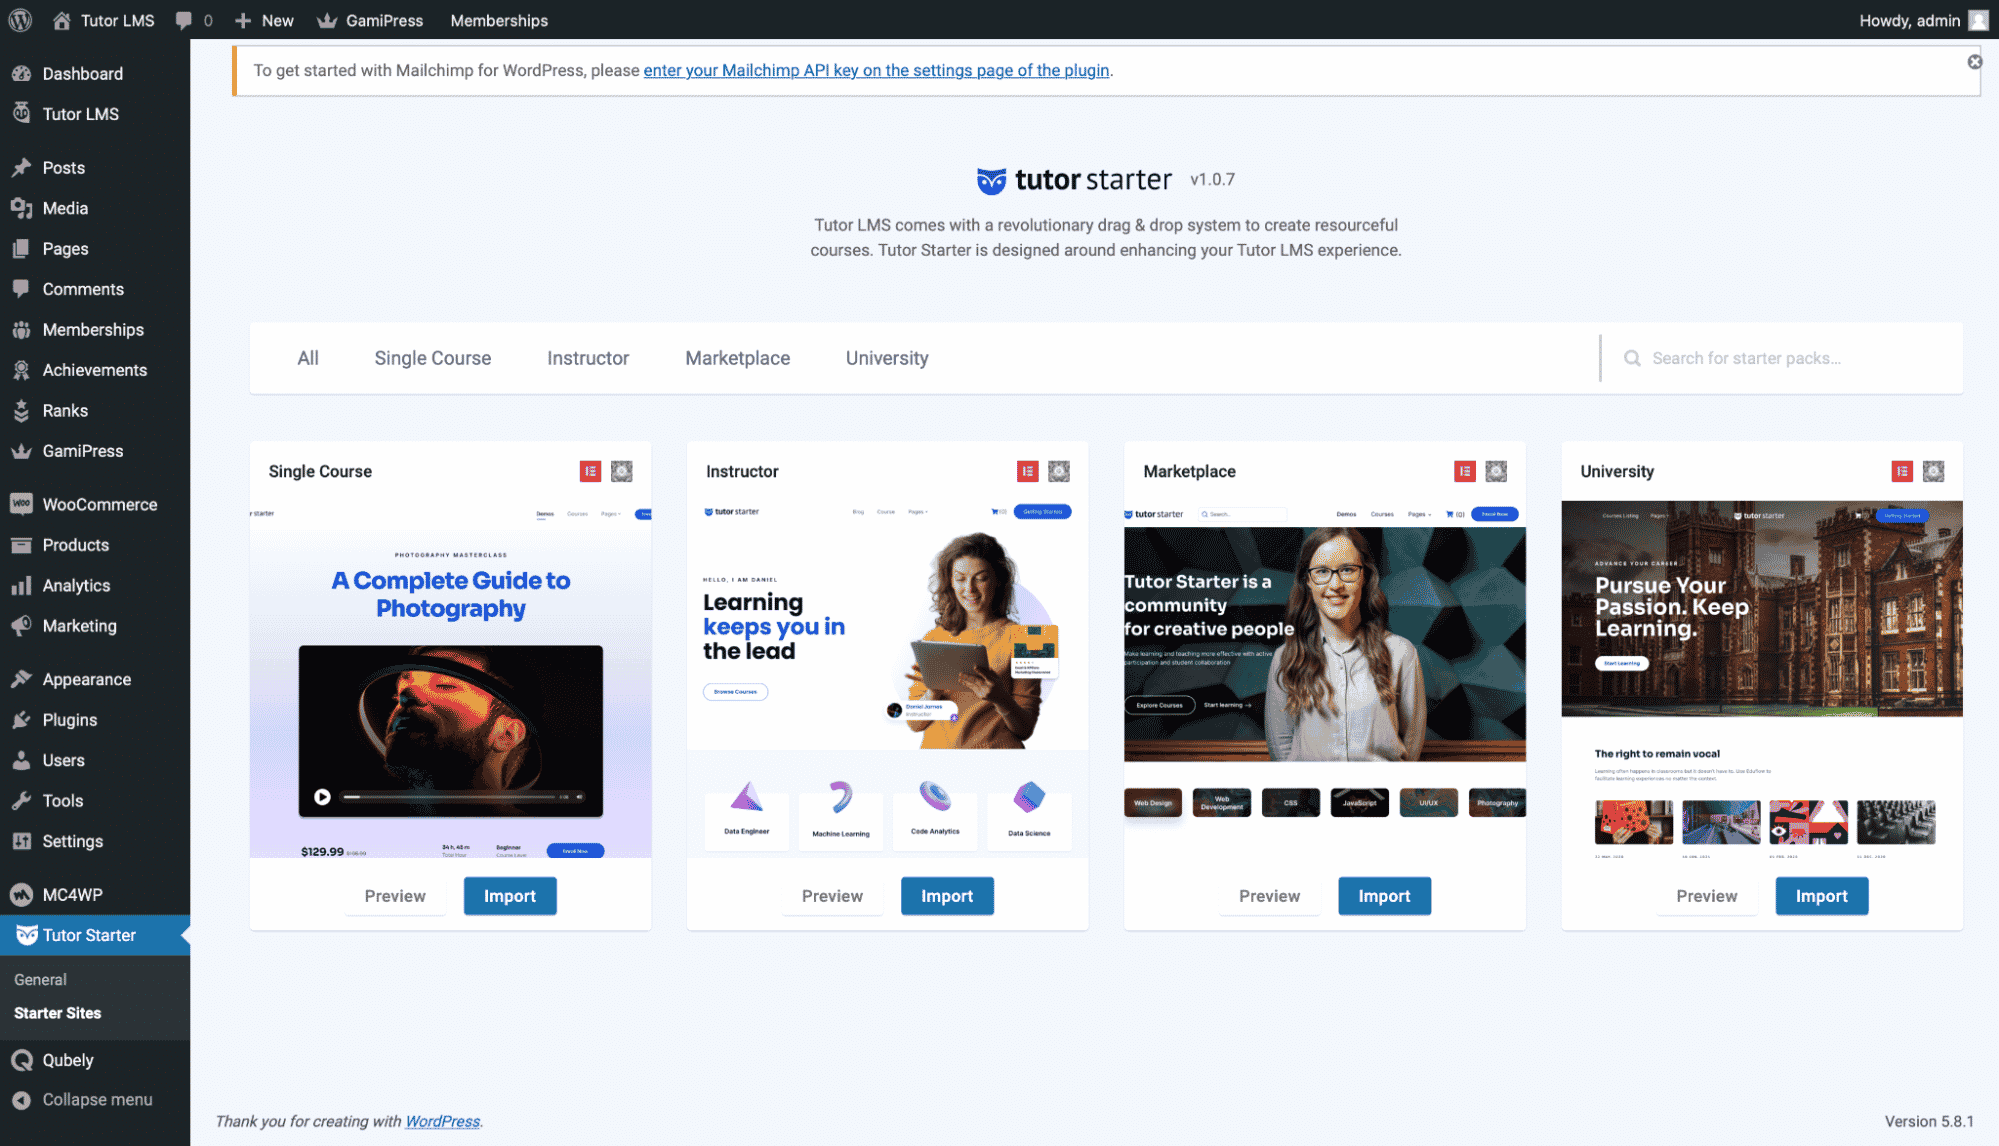
You can preview the site before you choose to import it. When you have decided which site to import, simply click the Import button. This will bring up this popup.
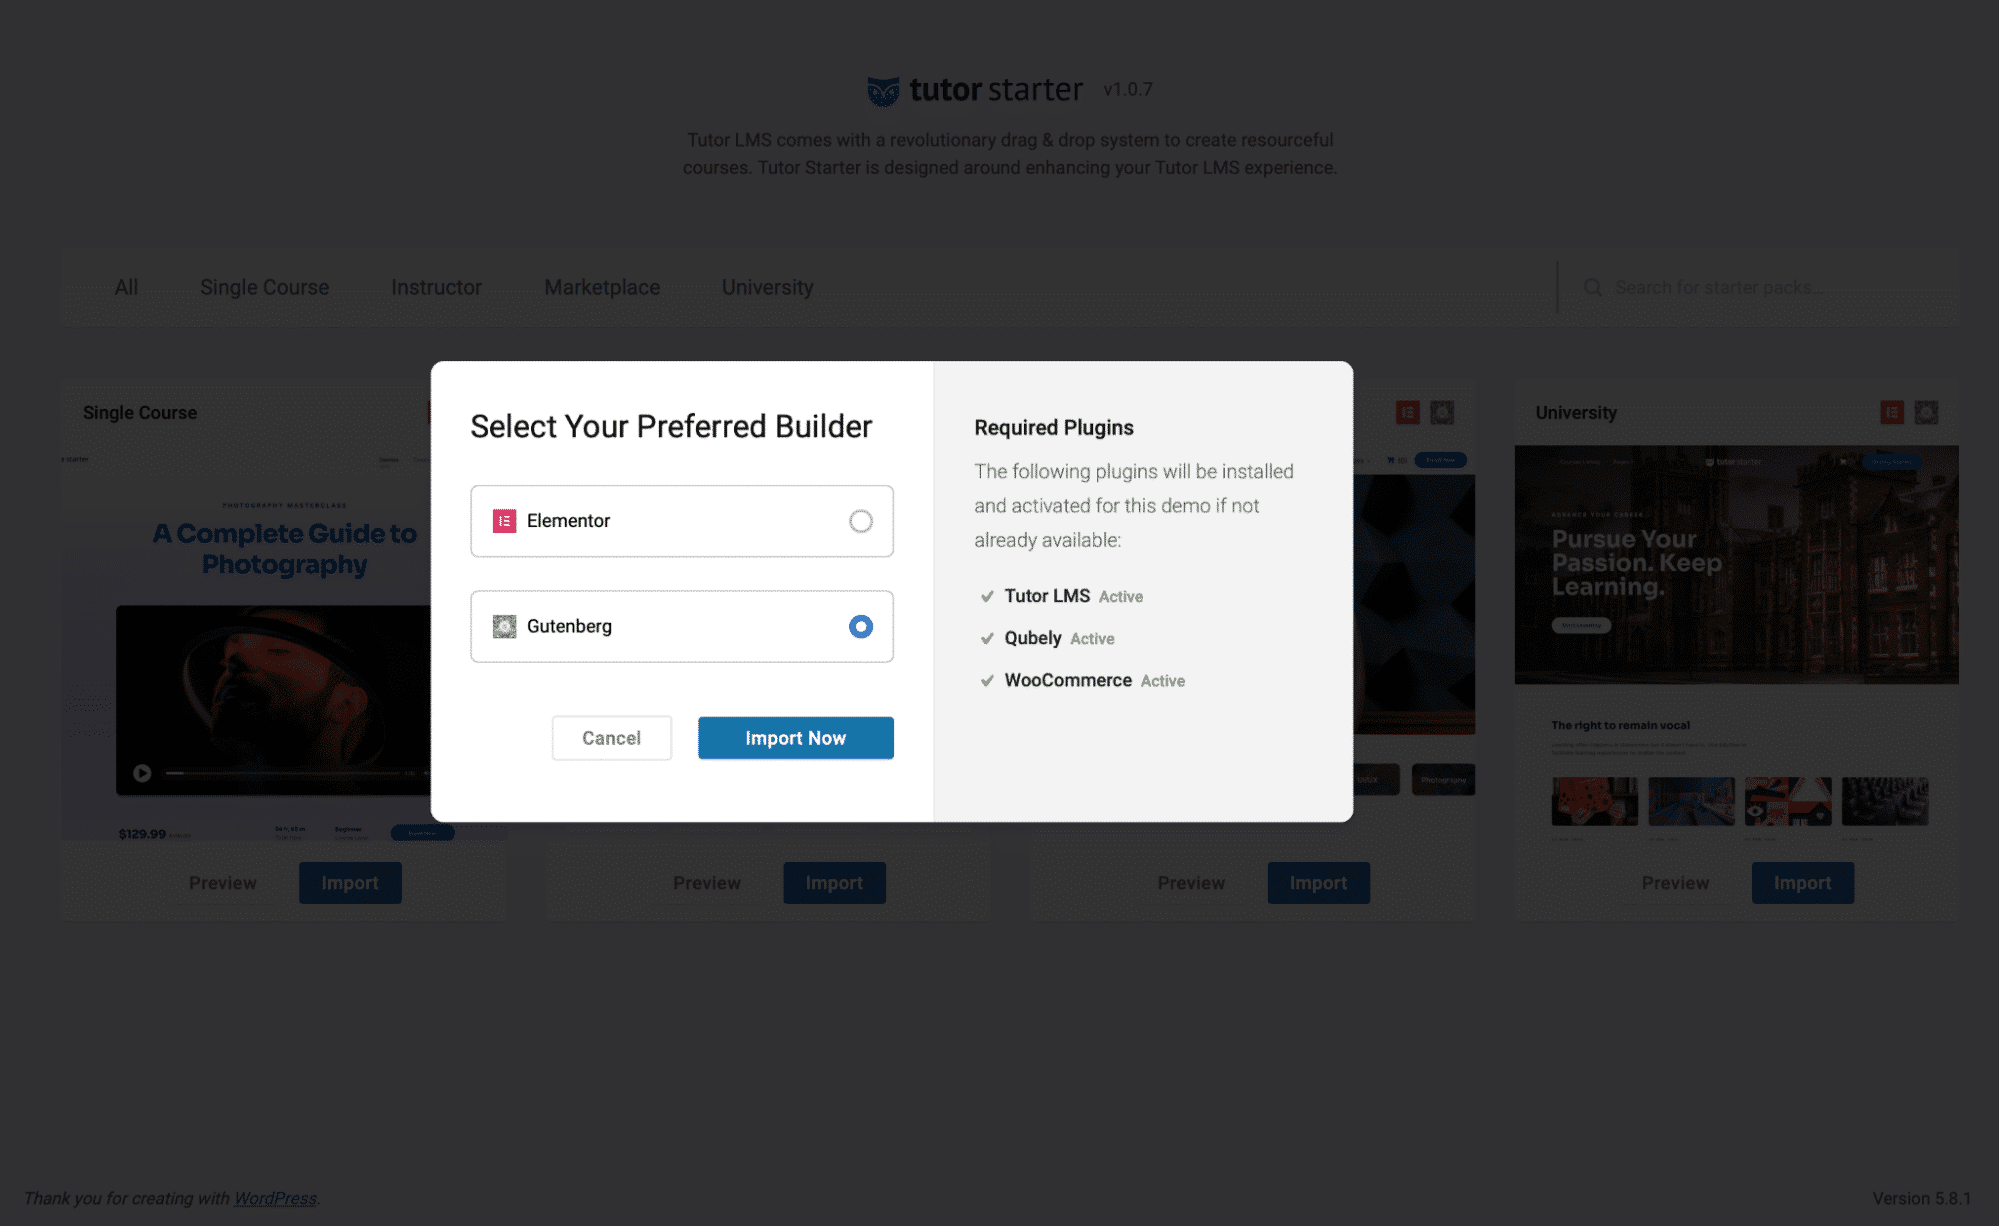
From here, you can choose to launch with Elementor or Gutenberg page builder. For this article, let’s go ahead and run it with Gutenberg. Luckily for you, Tutor Starter shows us which plugin/add-ons you are missing when you try to make this installation. So if you are missing Qubely and WooCommerce, they will be automatically installed and activated. Since you had already installed and activated Tutor LMS, you would see it is active.
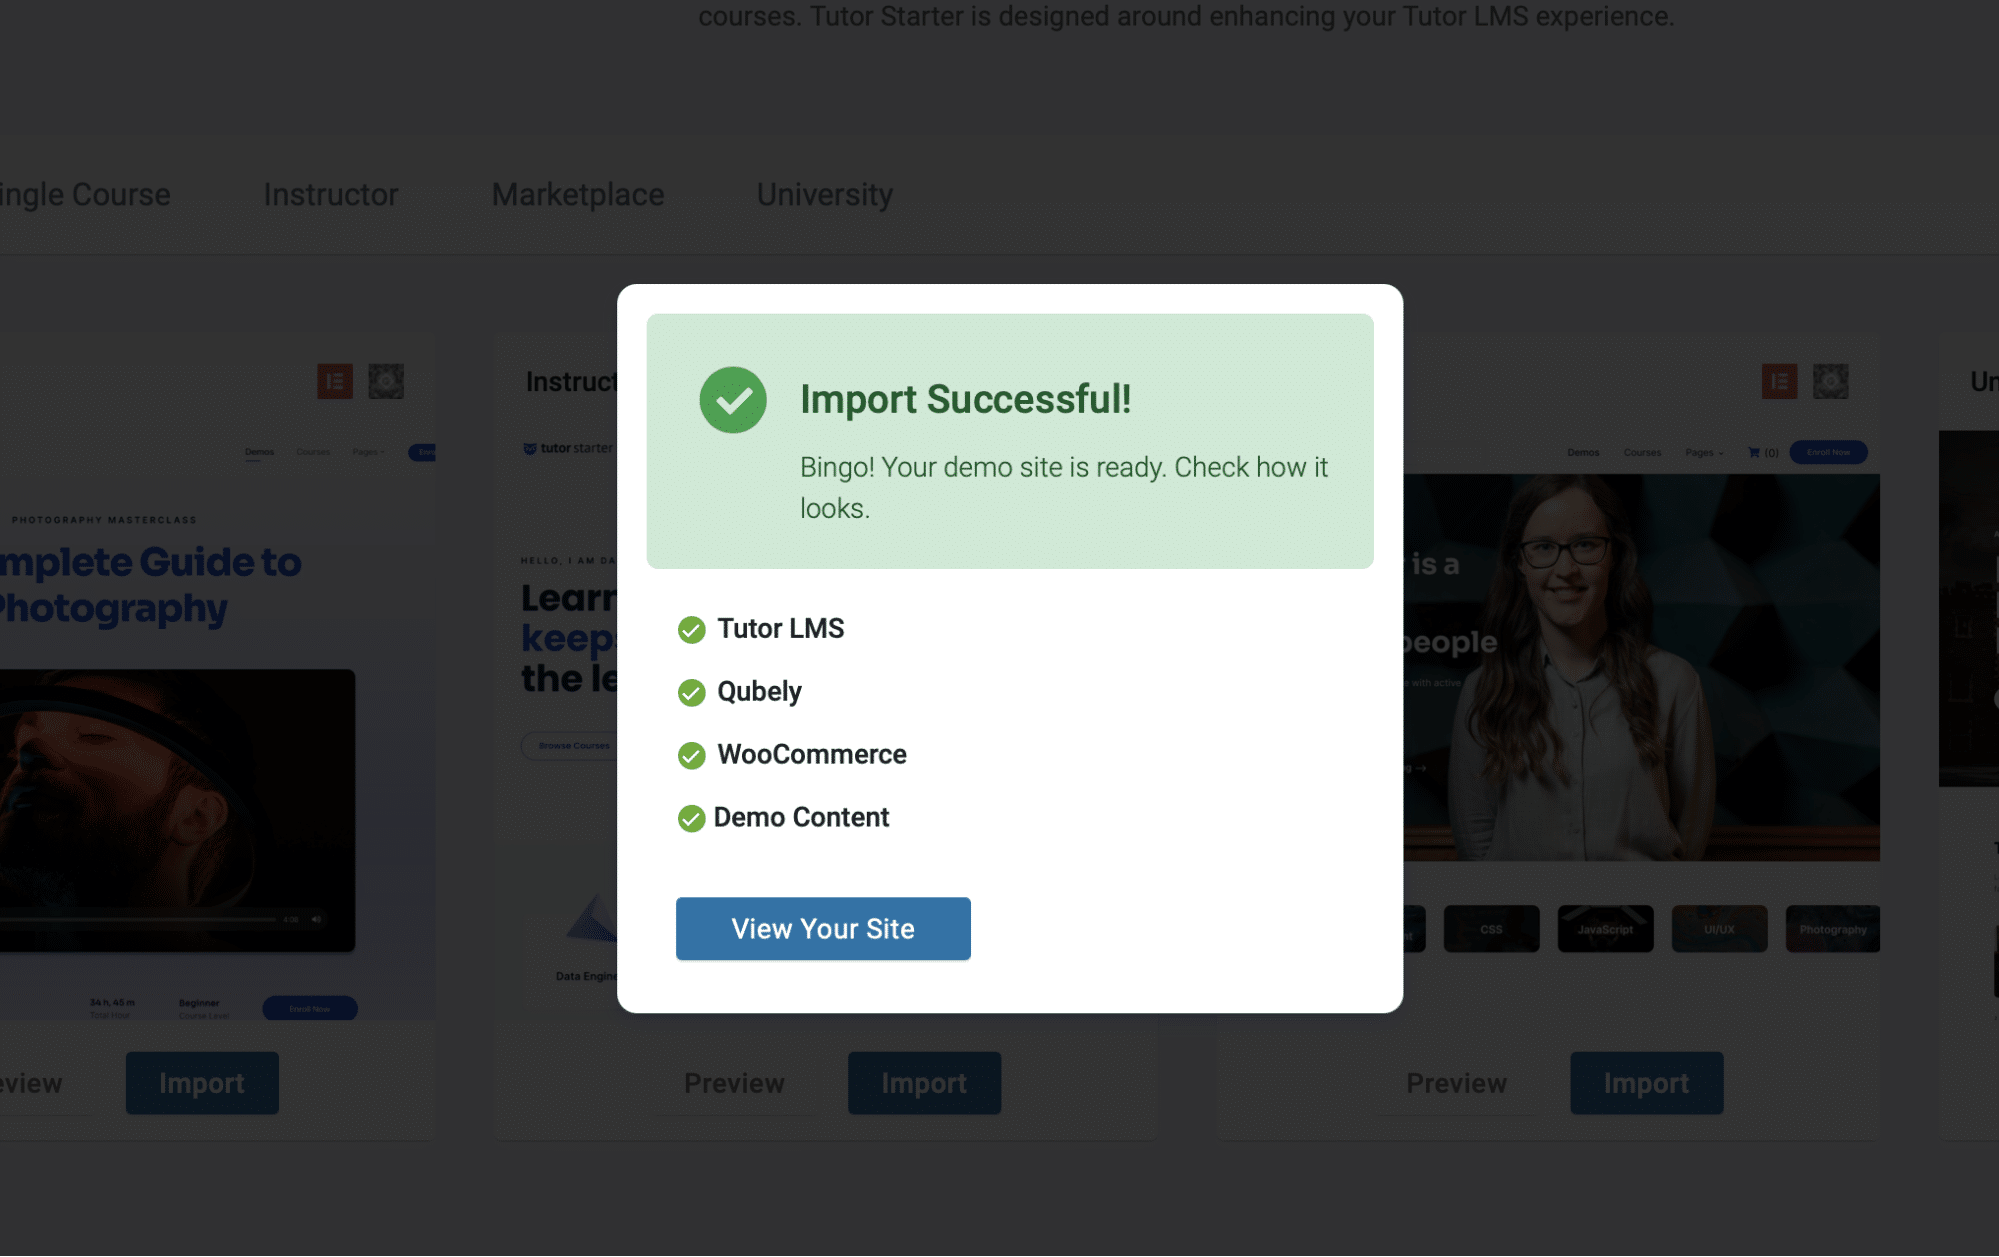
Once the import is complete, you can see the site by clicking “View your site”.
To edit the page, go to the WordPress admin dashboard and select Customize your site. This takes you to the customization page, where you can access all the background changes, widgets, and so much more. You can add design flair to your site by changing elements and blocks exactly how you want them to be.

How to Create eLearning Courses With Tutor LMS
Now that you have your plugin and theme ready, it’s time to start creating content for your LMS website! Tutor Starters demo site does give you some demo content, so your site has some substance to it already. But, let’s go over how you can add, edit and sell your courses to the world. To set up your courses, navigate to WpAdmin > Tutor LMS > Courses.
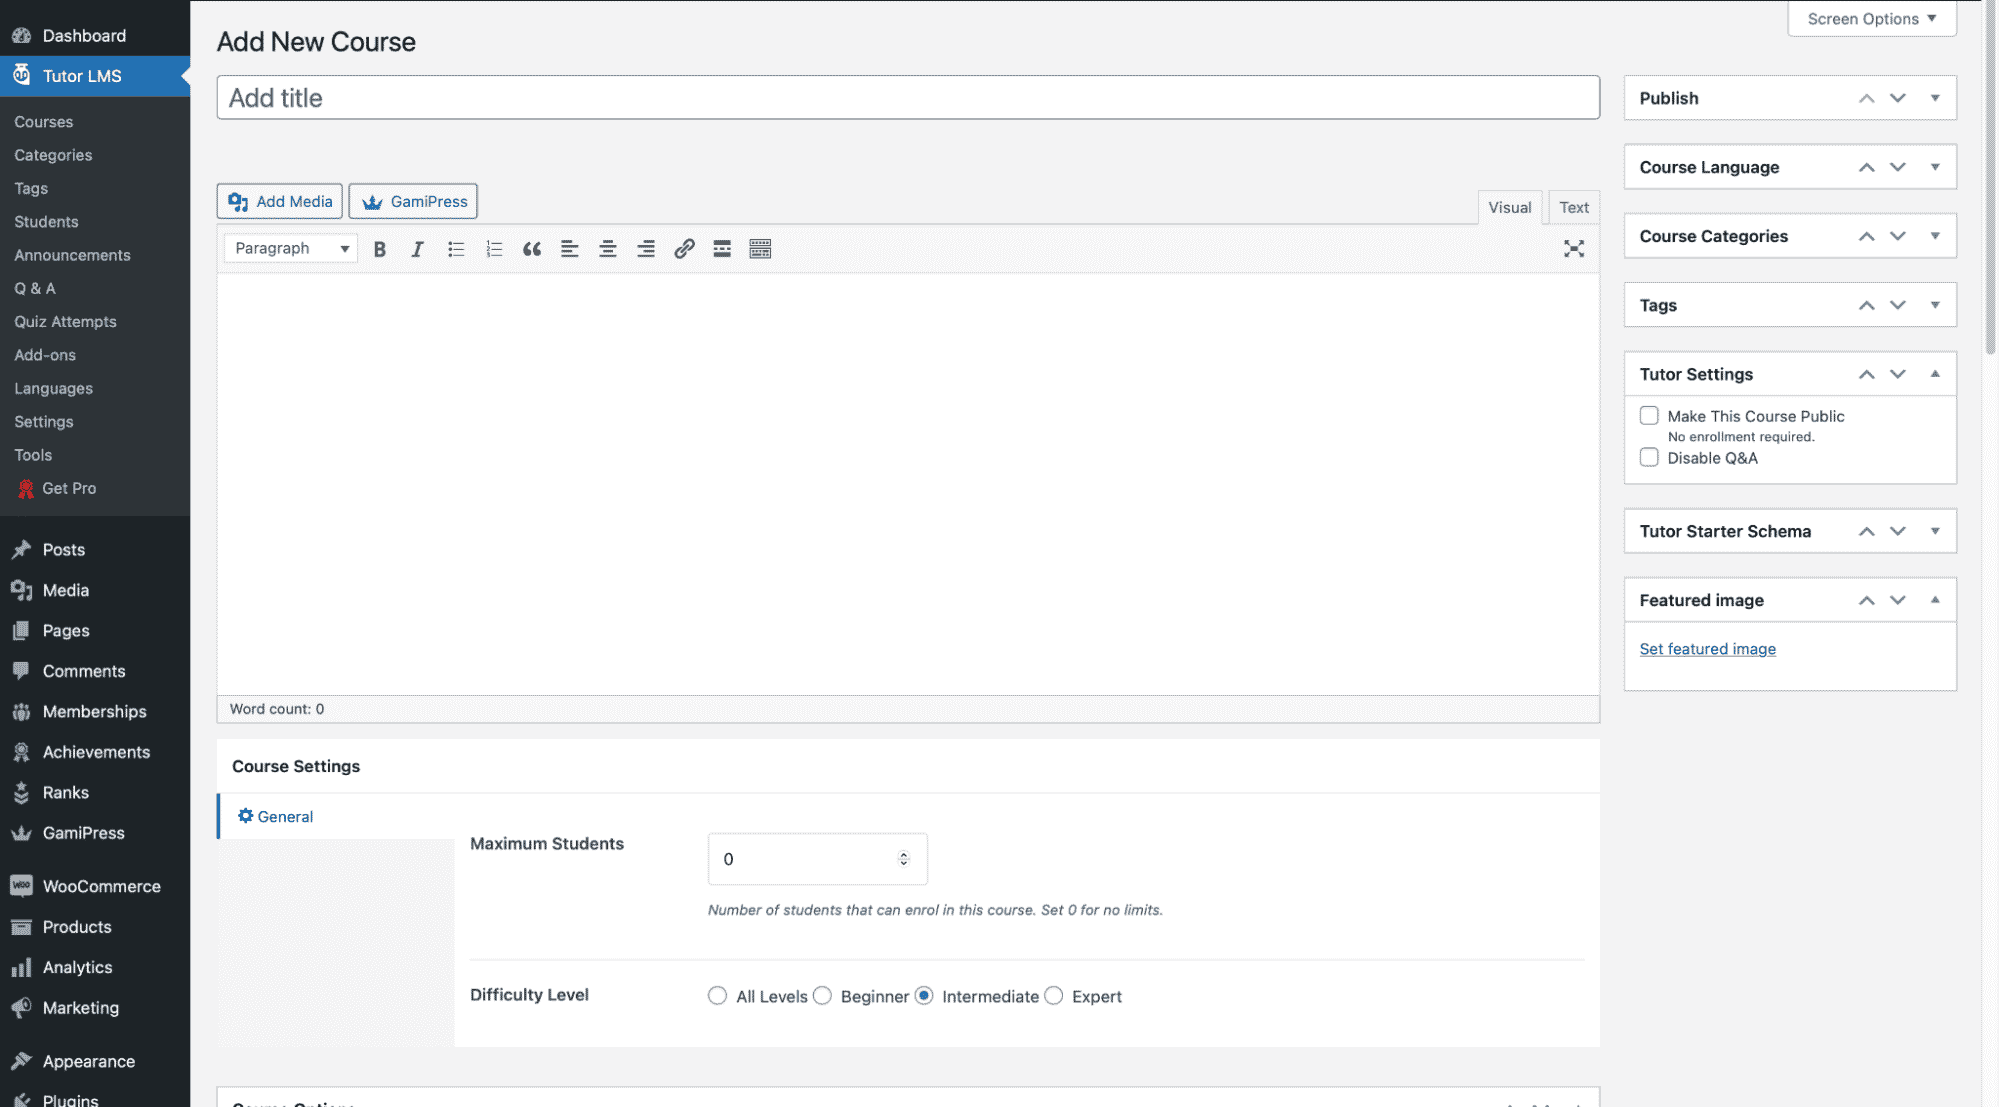
From the courses menu, select Add new to add a new course to your site.
You are then taken to the Backend Course Builder. Here you input the course name, add a course description, add a video if you need it, and a lot more. Add a meaningful title for your course and a description, so readers will understand what they are signing up for.
You can also set how many students can enroll for the course and determine a difficulty level for your course content.
There is also a featured image section that you can utilize to let students know what your course is about.
Tutor LMS Pro lets you have access to the drag & drop Frontend Course Builder from where you can visually create courses in no time.
This has been the barebones setup of the course, now you must give it more substance. A course comes up short if you do not evaluate your students on the material you are teaching.
How to Evaluate Students With Effective Quizzes
A crucial part of a course is taking quizzes to evaluate your students. Quizzes are designed to assist learners in remembering what they have already learned. So you must create quizzes to both assess your students and diversify your lesson plans.
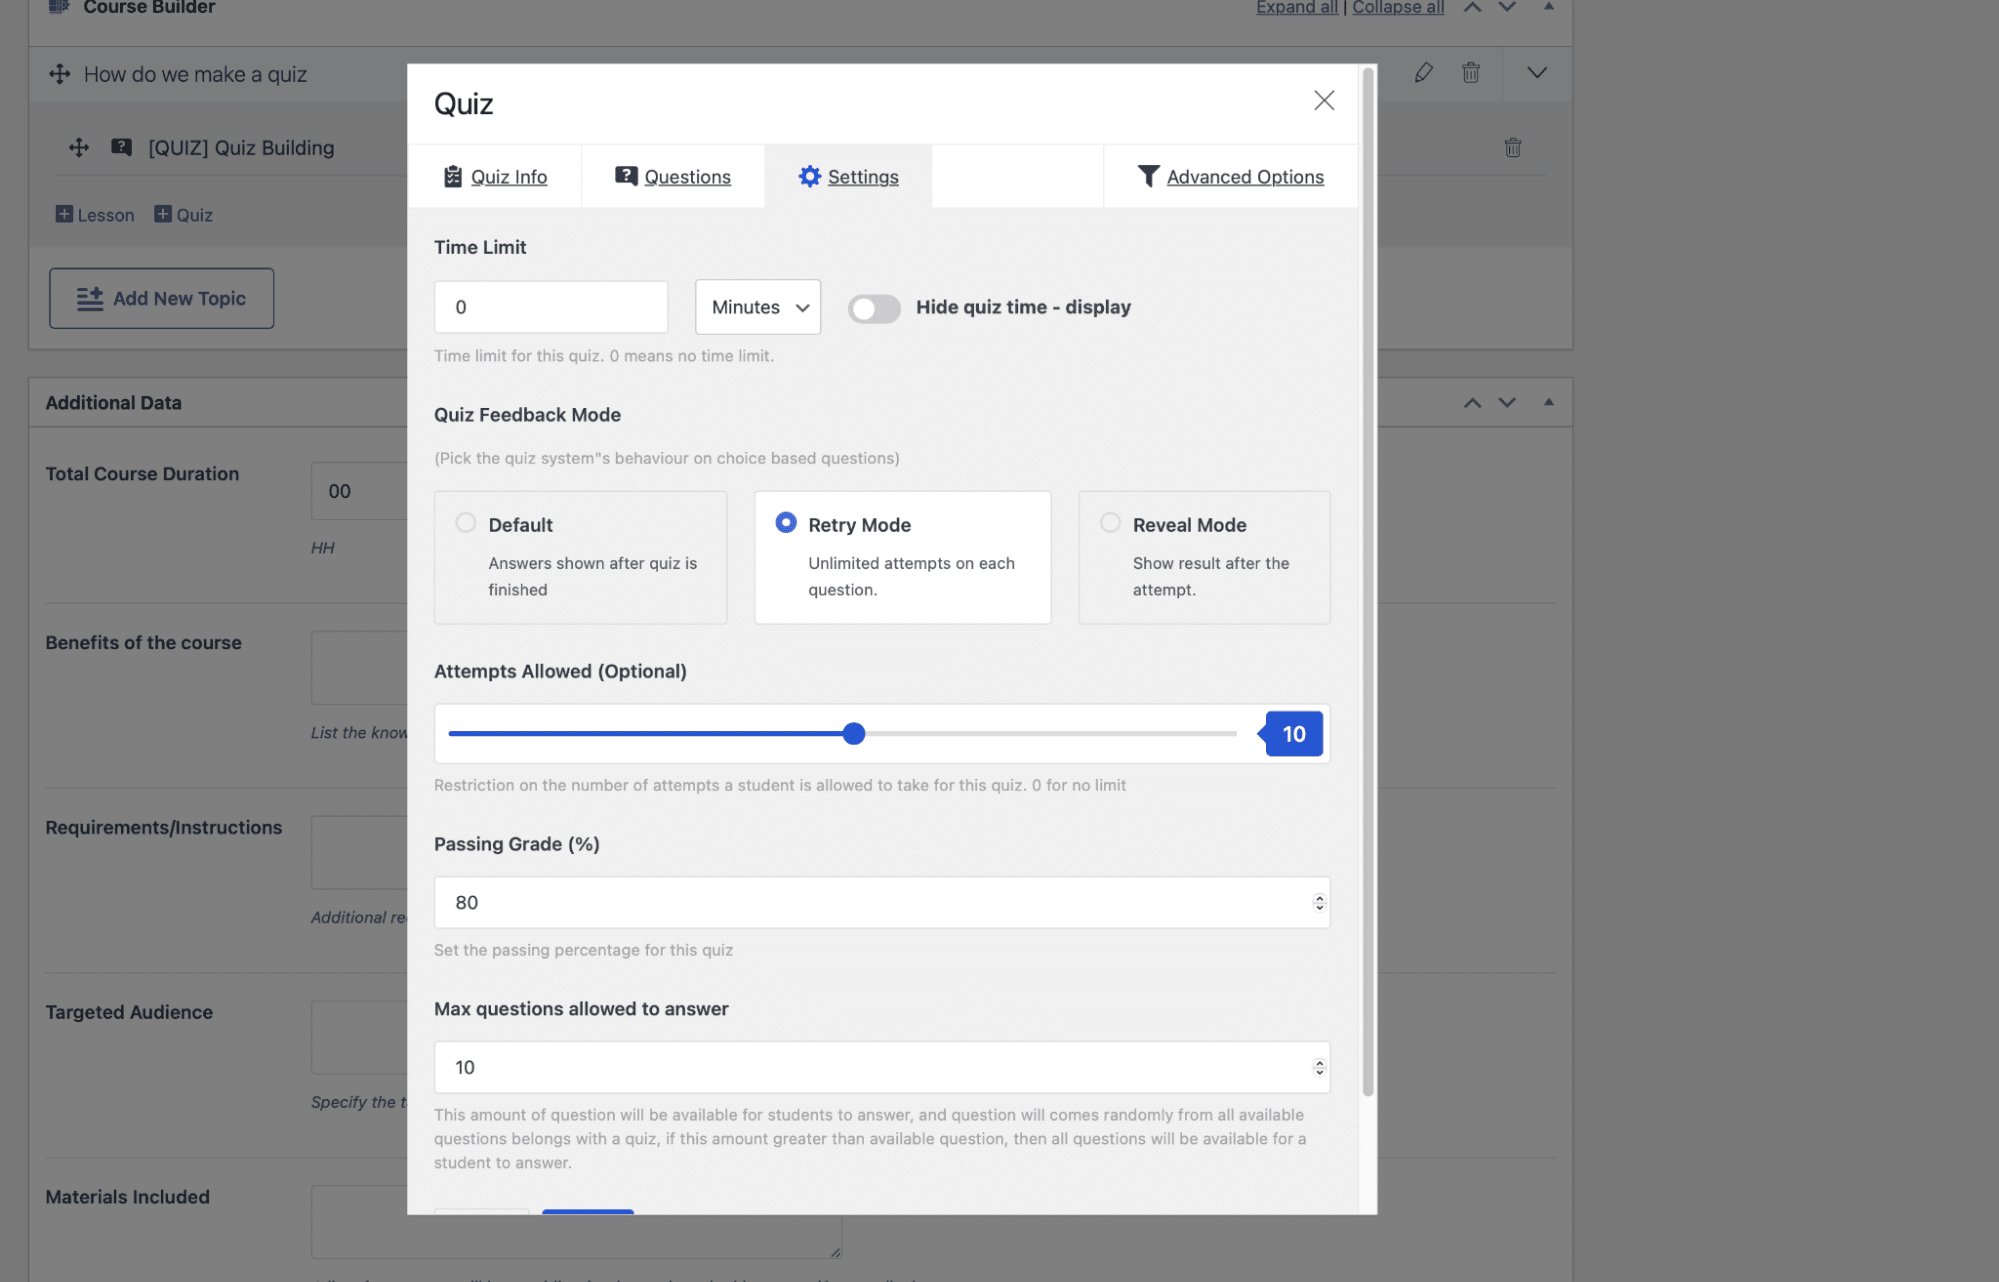
For quiz building, Tutor LMS comes with a powerful Quiz Builder. It gives you amazing freedom with 10 different quiz types and detailed settings to personalize your quizzes exactly how you want them. Most notably, you can set limits and timers to quizzes with an auto-grading system. Students can take the quizzes at their convenience, and the grade is shown automatically.
The burning question now becomes, how do you start? Let’s begin.
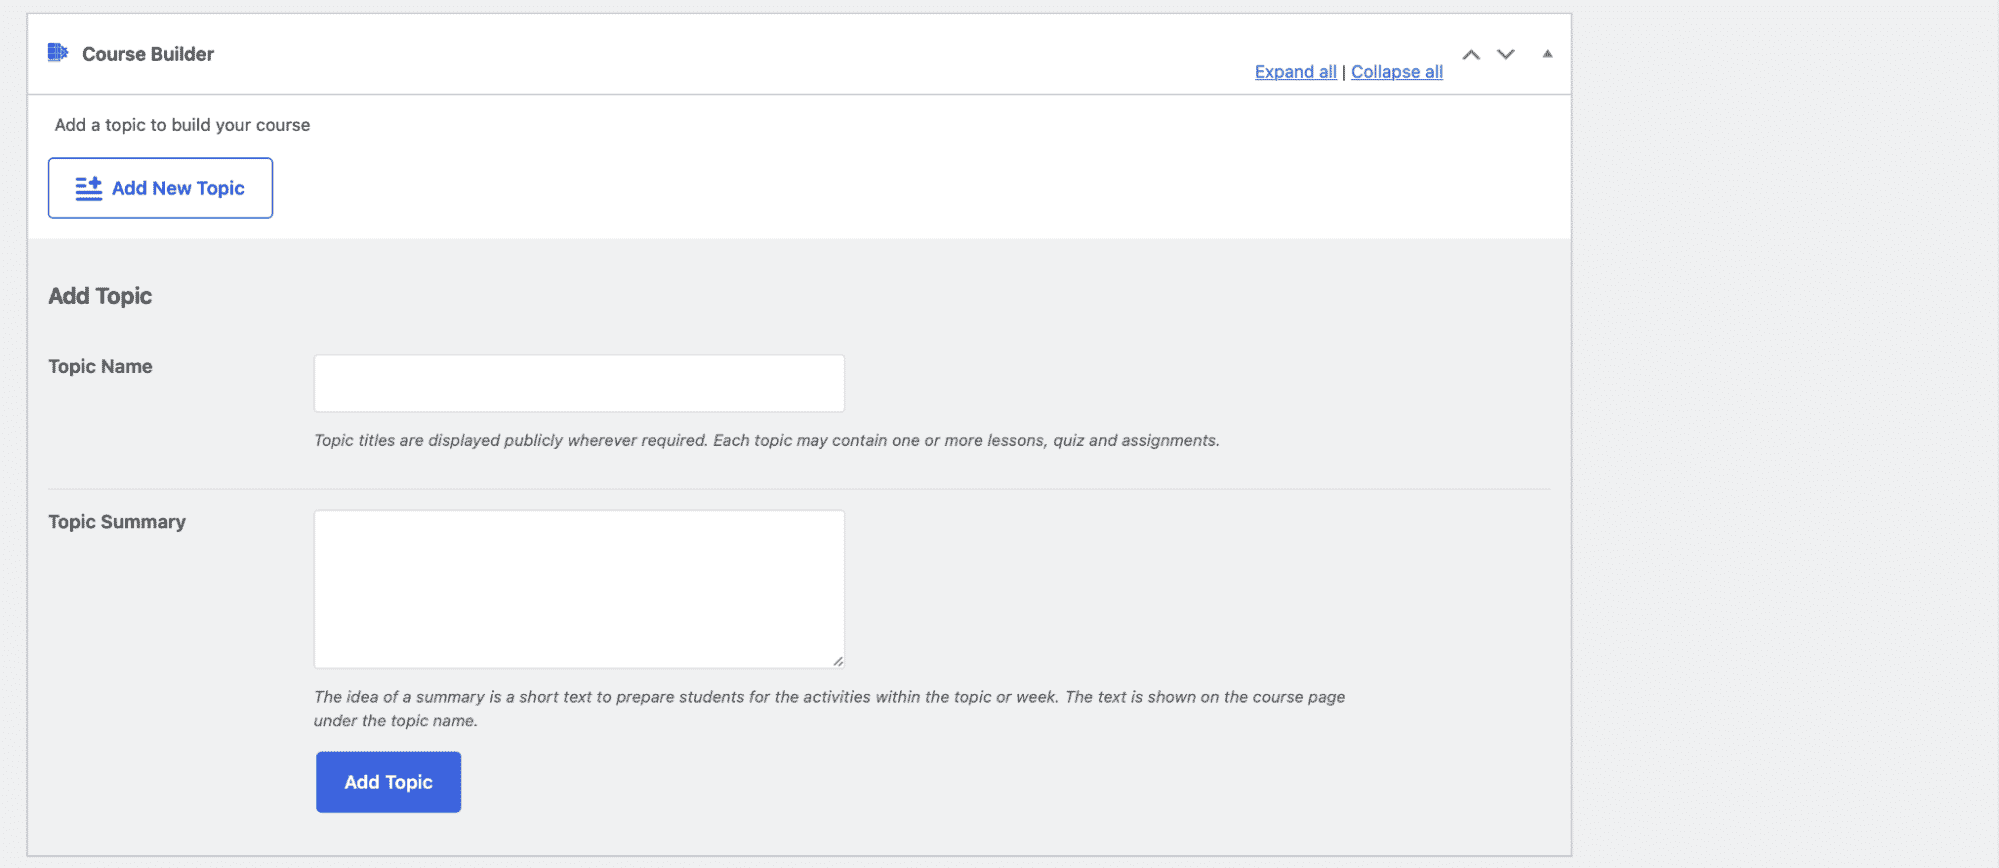
Step 1: Add a New Topic
To start creating a quiz, you first need to add a topic.
From the course creation page, scroll down a bit to see the Course Builder section.
From there, hit Add New Topic to create a new topic for your course.
Once you have done that, hit Add Topic to move on to the next step.
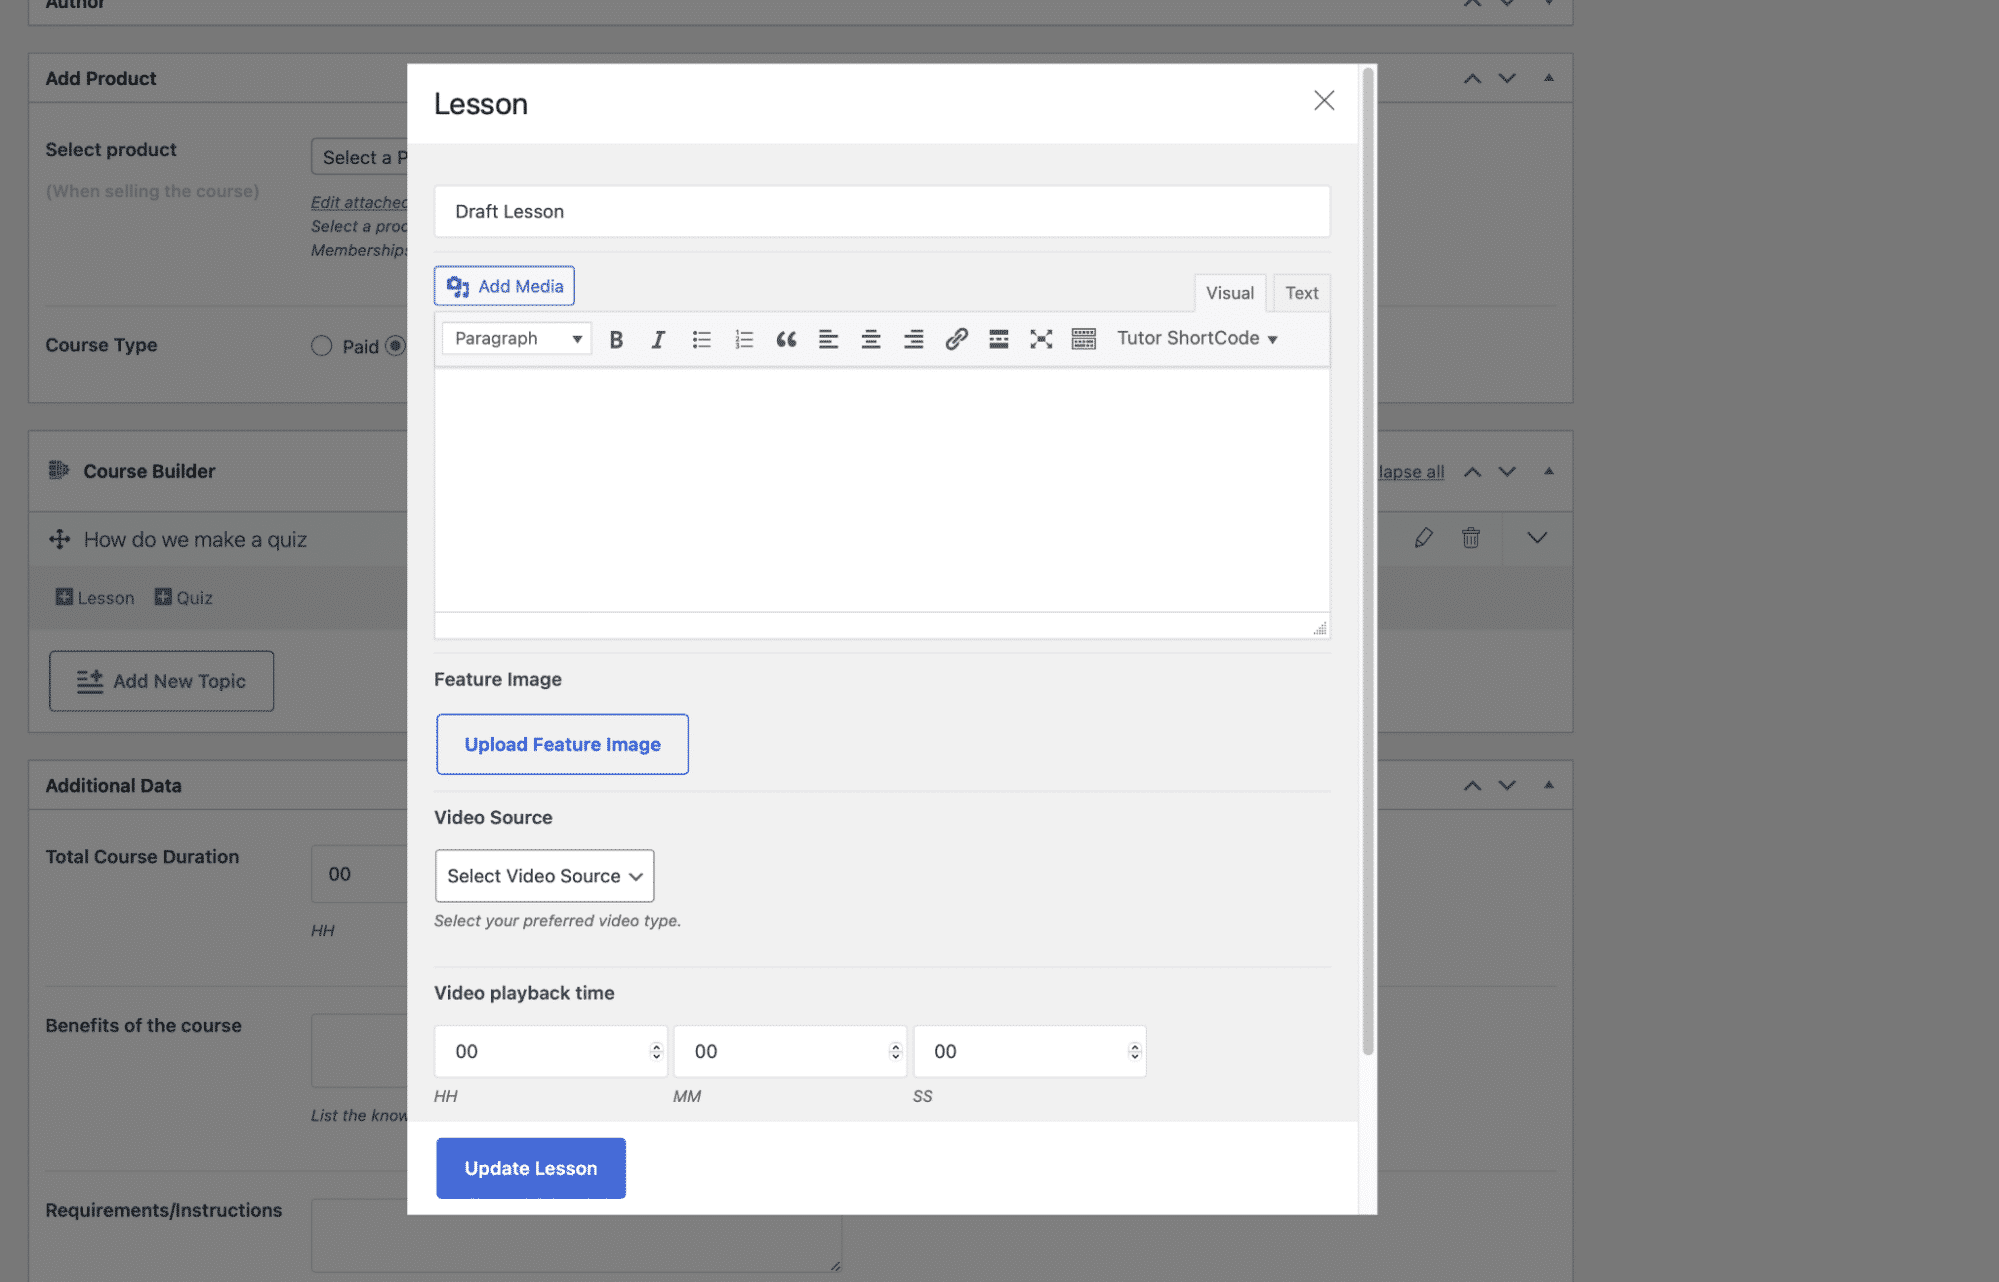
Step 2: Creating a Lesson
After a topic has been created, you can now create a quiz and a lesson.
To create a lesson, click on the topic you have created, and you will now see a new Lesson button.
Click on that, and you will see a pop-up window where you can add the lesson details. You can even configure the lesson with videos if you like.
Step 3: Creating a Quiz
After the lesson is set up, you can finally start creating a quiz. Click on the topic you want to add a quiz to, followed by a click on the Quiz button.
First, you need to set a name and description (if you like) for the quiz.
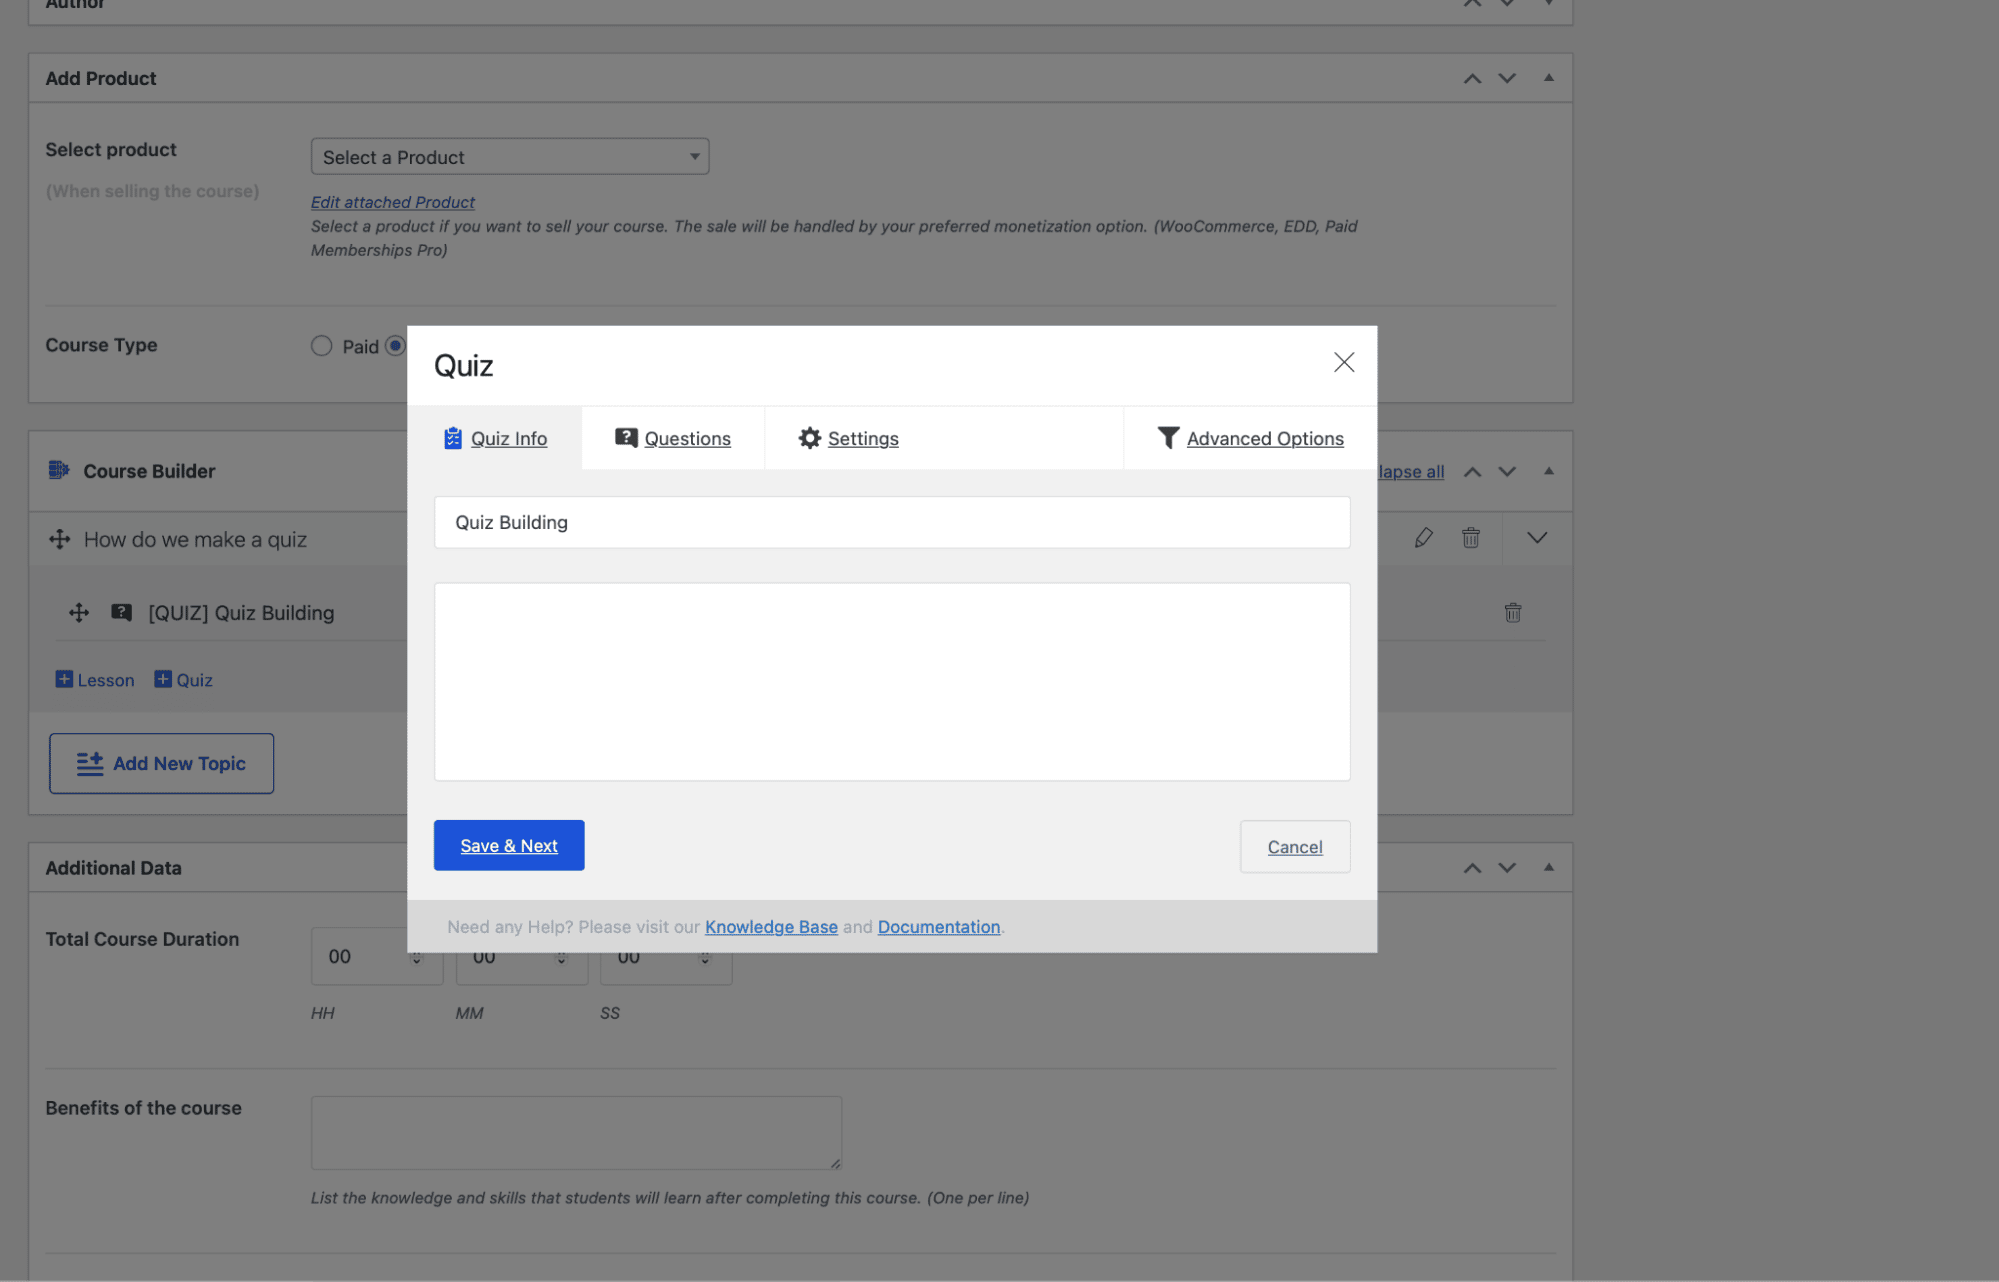
Click Save & Next to go to the next step.
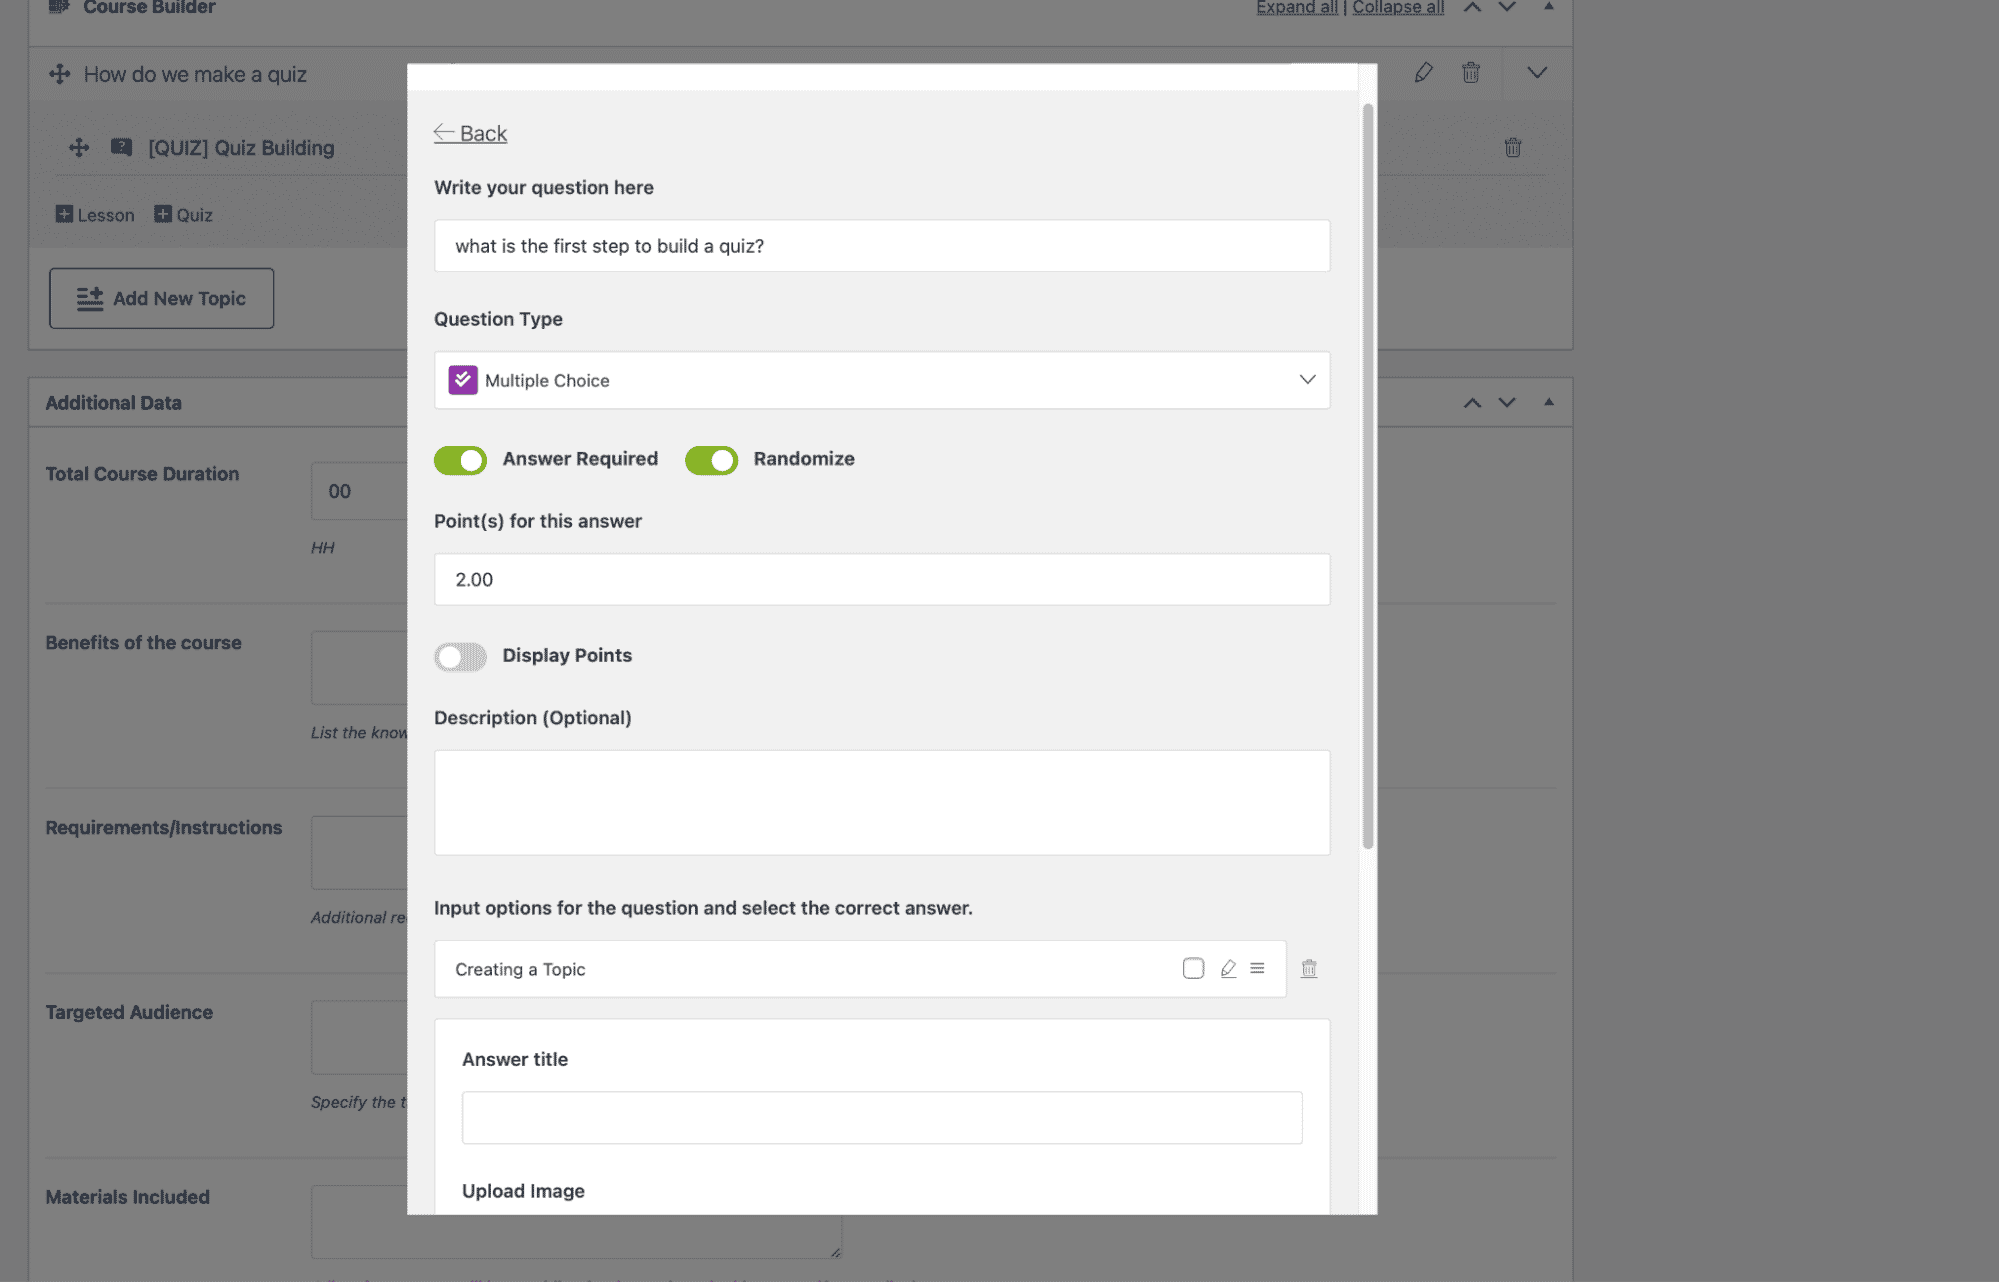
After your quiz’s initial setup, you can set the questions and grades. You can have different questions with different grade points, depending on the type of question you set.
For multiple-choice questions, there is a nifty Randomize option that jumbles up the choices.
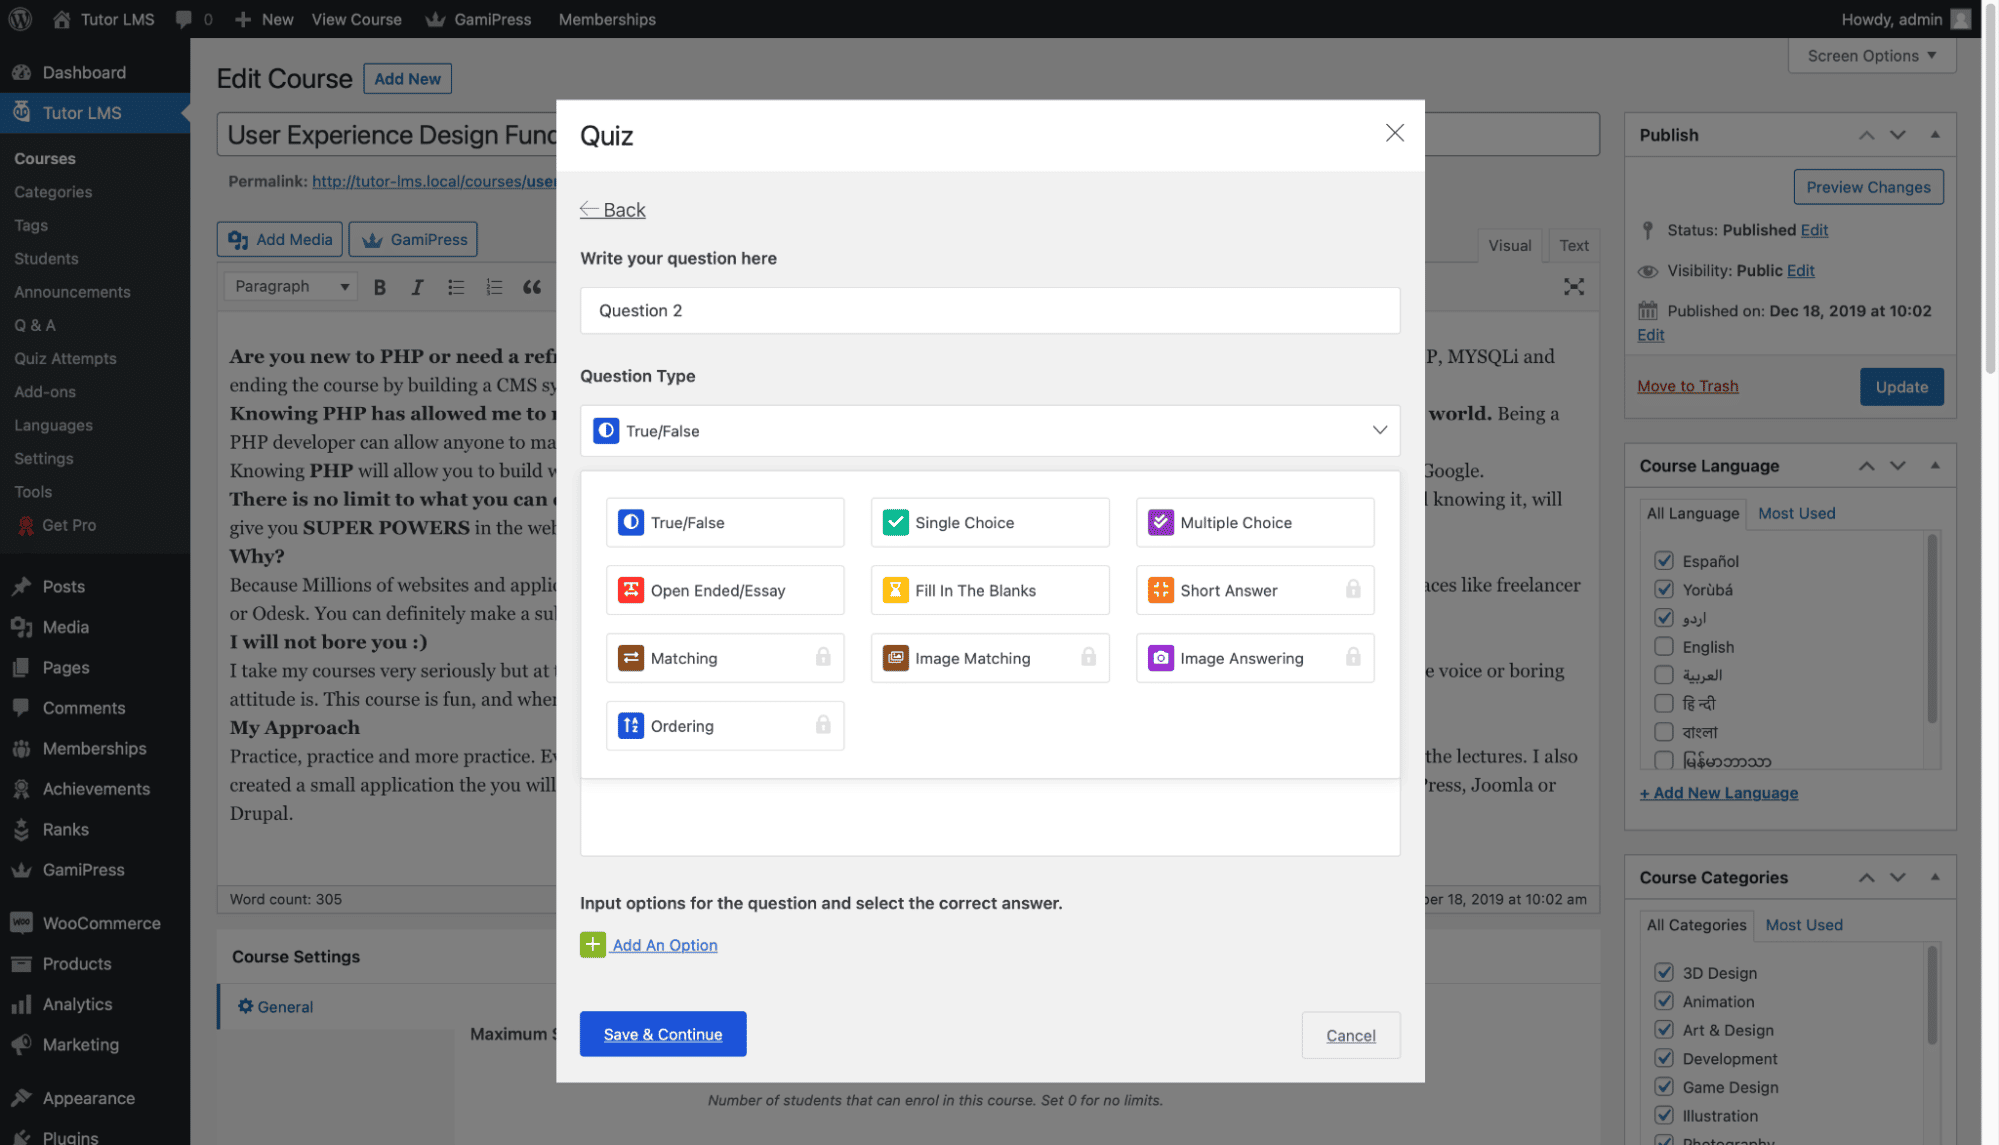
The quiz builder has a lot of other extra settings as well for added customizability. Feel free to play around with them until you’re completely happy.
Your course is now powered up and ready to go.
How To Monetize Your Course
You are done with the basic setup of your course. What comes next? The setup is followed by adding payment options to your course. You definitely want to make money off of your carefully created course. Tutor LMS has integrations with eCommerce plugins, such as Paid Membership Pro and Easy Digital Downloads.
Tutor LMS offers seamless monetization options, earning and commission allocation, and multiple payment gateways to make selling courses a breeze!
Rewarding the Achievements
So once your students have completed one of your courses, you must present them with a reward. The point of taking an online course is mostly for learning, but also partially for recognition and acknowledgment. A great way of fulfilling that is to reward your students with a certificate of completion. What better tool to use than the Tutor LMS Certificate Builder?
Remember that this tool is not included in the free version and is only available in the pro version of Tutor LMS. It is worth the investment that goes into the pro version of Tutor LMS, as you will have access to the powerful certificate builder of Tutor LMS along with many other advanced features.
Find out more about the Tutor LMS Pro Add-ons.
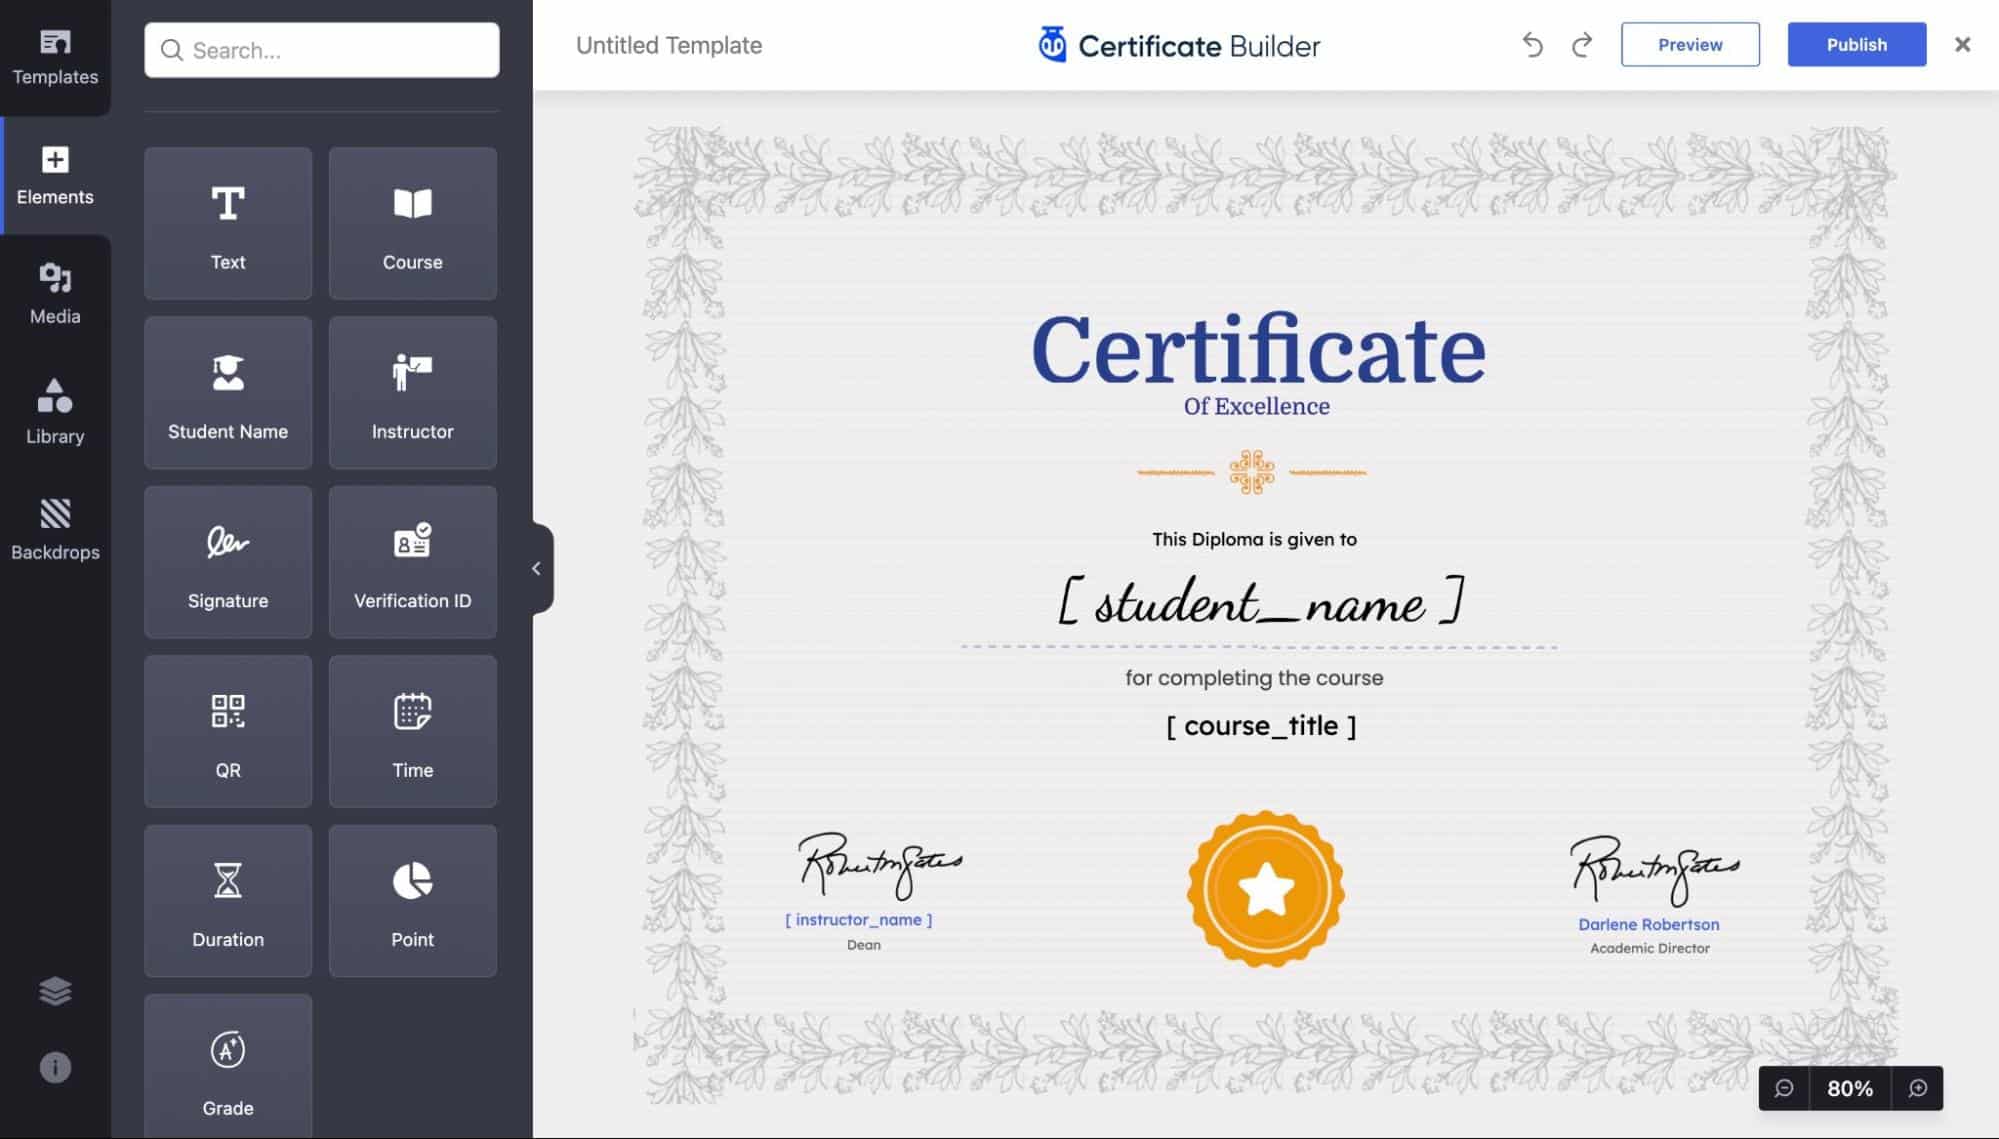
With certificate builder, you can create, edit, and design incredible certificates from scratch to dazzle your students at the end of courses. Learn more about the Tutor LMS Certificate Builder.
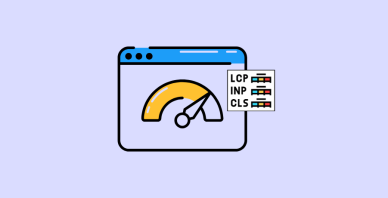
The Need for Speed
You’ve created a stunning eLearning course site and filled it with various vast, vivid courses. But you notice customers or students are regularly complaining that your site feels slow to use and visit. This could be a fatal issue that might ward visitors away. Slow load times and clunky site loading discourage users from clicking links on your site. They may usually close the site after a couple of clicks. So how do you troubleshoot this issue?
This needs to be addressed by page speed optimization. Page speed optimization is the end result that has many paths to help you reach it. One of the best ways to optimize page speeds is to use a caching plugin.
A caching plugin stores static HTML pages of your website on the server. So every time a user visits your LMS site, the caching plugin will show the much lighter, cached version of your site instead of loading your entire site with all the heavy Php.
This is where the beauty of WordPress shines once again, you can have a wonderful, easy-to-use caching plugin up and running in no time. Caching plugins almost work like magic. A good one can make your life much easier without having to go through any hassle.
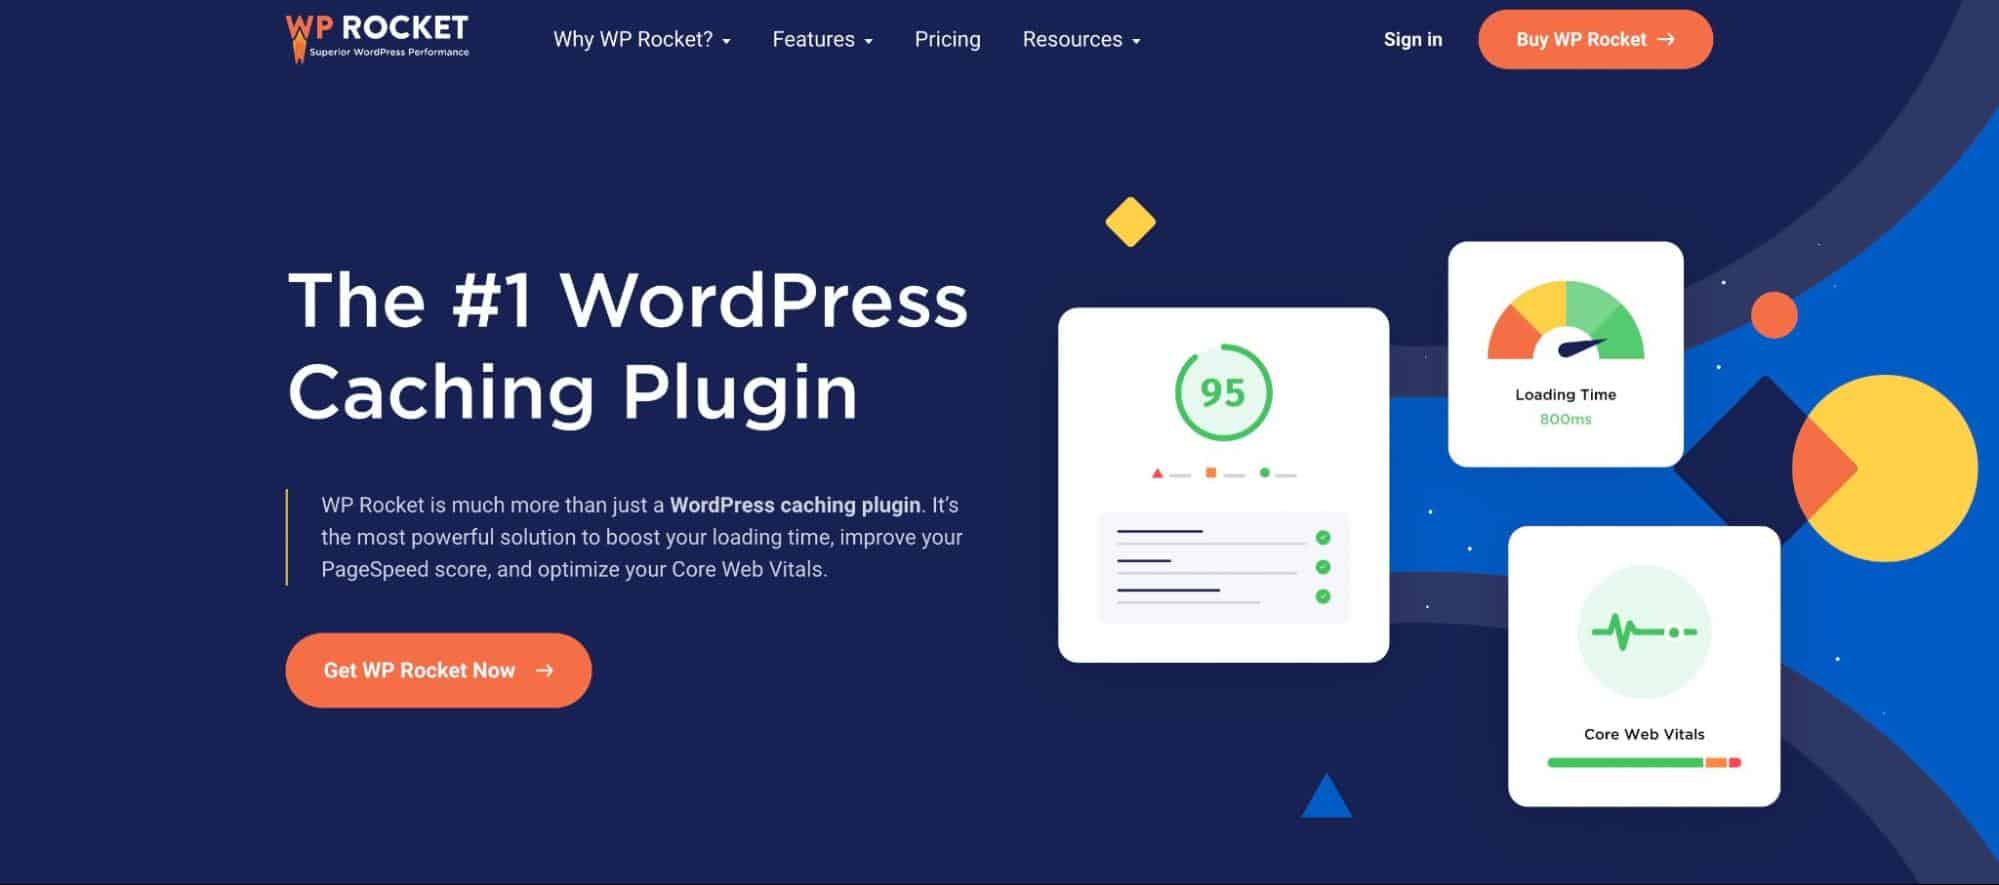
To achieve all that, we suggest WP Rocket.
WP Rocket has been hailed as the #1 WordPress Caching Plugin. Although the title defines it as just a caching plugin, it is much more than that. WP Rocket does 80% of the work of improving speeds just upon installation. Get WP Rocket depending on which plan suits your purpose the best.
Once purchased, install it like any other plugin on WordPress.
Using WP Rocket
You ideally want to use a caching plugin that makes performance optimization easy and straightforward. As a large user base of WordPress consists of people who aren’t as tech-savvy, having a plugin ready to use is quite beneficial.
WP Rocket does just that! As we said before, 80% of the performance optimization is done out of the box as soon as you activate it. WP Rocket offers key performance optimization such as page caching, browser caching, and GZIP compression, among many others, right after activation. These options don’t even appear on the settings page as they take care of it for you immediately.
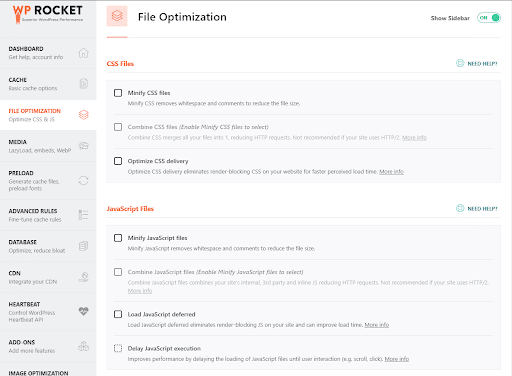
In addition to minifying CSS and JS options, WP Rocket offers advanced and powerful features such as Remove Unused CSS, Load JavaScript deferred, and Delay JavaScript execution. You can enable these features with just a click from the File Optimization tab.
Even then, the settings do not take much effort to enable and configure to boost your site. You can be on your way to a much faster site with a few clicks.
Of course, you can make many more tweaks to optimize your site speed. But we are not going to go over all the details. A more detailed guide to getting started with WP Rocket should help you if needed.
Wrapping Up
Well, that was quite a ride. But the work does not end here, rather this is only the beginning. The journey’s second half is marketing your courses to students, ensuring that your product reaches its desired customer. Ideally, you should:
- Identify your target students
- Advertise your courses efficiently for maximum outreach
- Promote your course as industry-standard material
- Offer sales to increase student
- Get affiliate personnel to promote your material elsewhere
- And much more
While this is definitely not a comprehensive list, these tips could help you get on track with marketing your course.
Now you embark on your eLearning site expedition armed with the amazing tools that you set up.