
Table of Contents
Last update on
Are you wondering how to use WebP on WordPress and how to convert your current images in the WordPress library? You’ve come to the right place!
If you run a web performance on PageSpeed Insights, you may see the recommendation to serve images in next-gen formats to boost performance. Google is telling you to forget about JPEG and PNG and focus your image optimization efforts on image formats like WebP.

This guide explains how to solve this warning and everything you need to know about WebP on WordPress. You’ll also get a list of the best tools to convert almost any format to WebP.
What’s WebP Image Format?
Created by Google, WebP is a next-gen format for the web. It provides superior lossless and lossy compression for images while preserving quality. Compared to the traditional JPEGs or PNGs, this modern format allows you to create even smaller file sizes, resulting in a faster loading page.
WebP vs. PNG vs. JPEG
If you are hesitating between the three formats and care about performance, choose WebP to serve optimized images on WordPress. You’re going to understand why.
JPEG vs. WebP
Both file formats compress images to make them easier to share on the web and preserve their quality. They look quite similar, so why choose WebP?
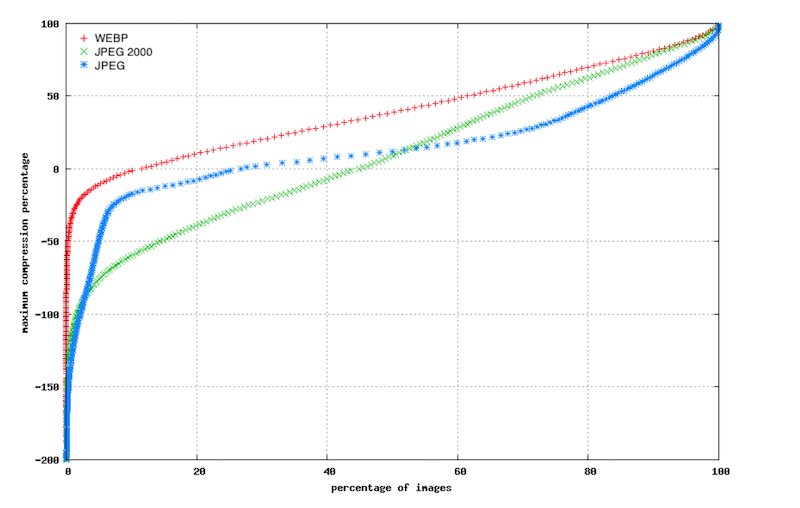
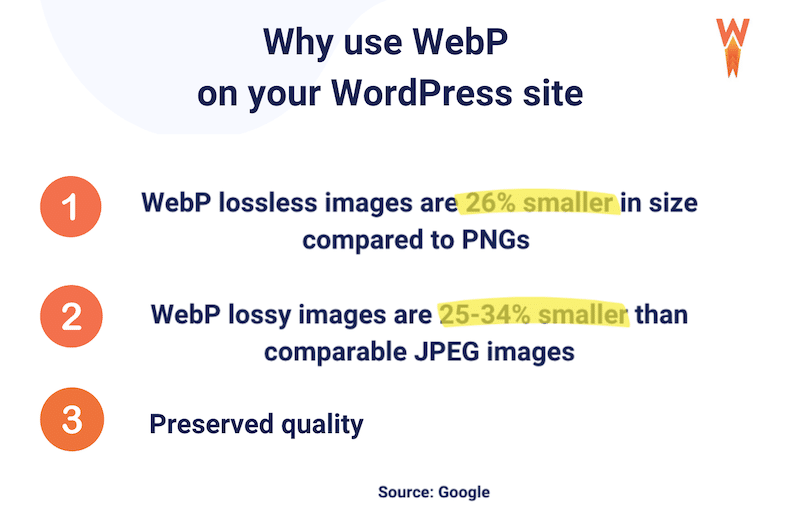
A WebP file is generally much smaller than a traditional JPEG. According to Google, a WebP image with lossy compression could be 25% to 34% smaller than a comparable JPEG file.
Have a look at the figure below: WebP (in red) achieves better compression compared to JPEG.
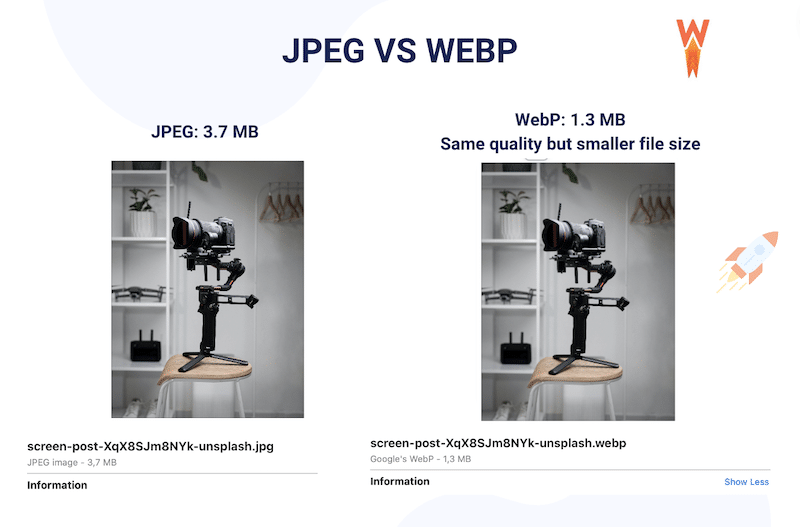
Let’s check this statement with our JPEG image weighing 3.7MB. After converting to WebP, the image kept the same quality, but the file size dropped to 1.3 MB.
PNG vs. WebP
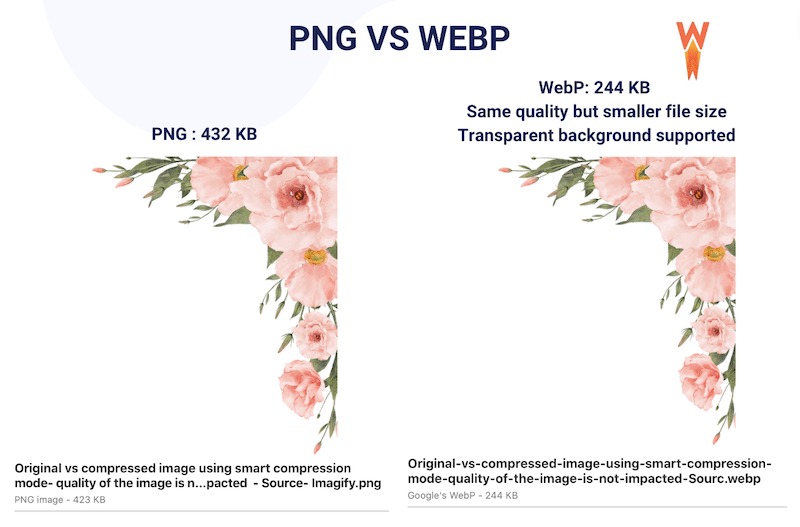
PNGs are mostly used for web graphics without background, such as logos and illustrations, rather than high-quality photos. They usually take up more storage space than the other formats. WebP lossless images are, on average, 26% smaller than PNGs.
Let’s do another quick test and convert a PNG image to WebP. Our original file weighed 432 KB, and with a simple conversion to WebP, it shrank to 244 KB.
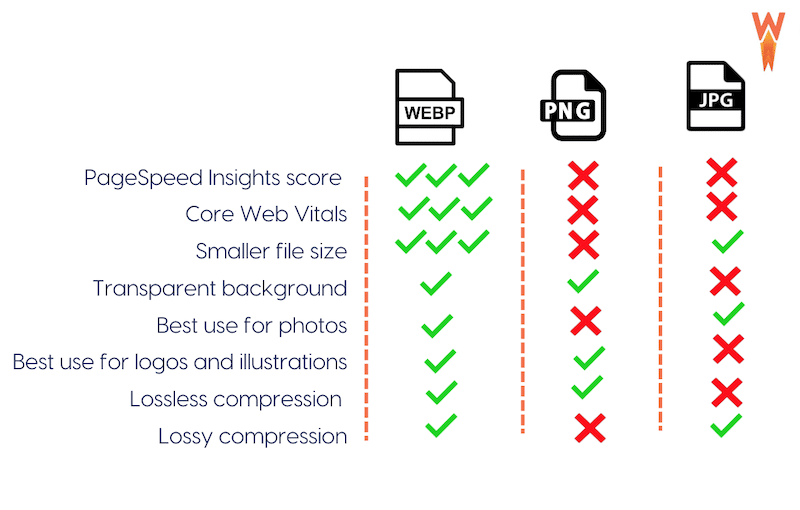
JPEG vs. PNG vs. WebP
To summarize, if you want to improve the Lighthouse performance score of your WordPress site, opt for WebP. That’s how the three formats compared to each other:
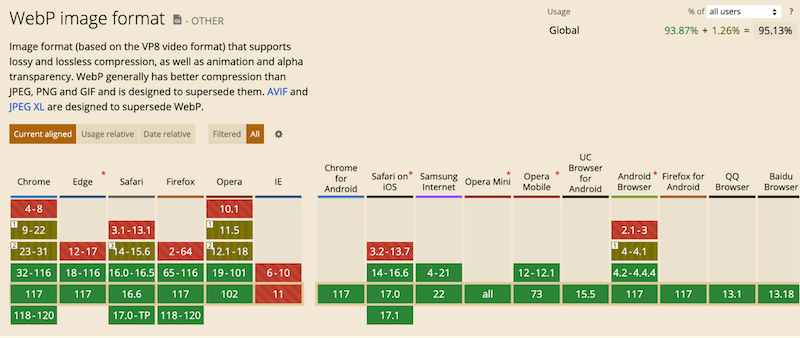
Which Browsers Support WebP?
In 2023, all the major browsers support WebP. For example, this modern format is natively supported in Google Chrome, Safari, Firefox, Edge, the Opera browser, and other tools.
Displaying WebP Images with Fallback for Older Browsers
Images are crucial to ensure a great user experience, so they should be displayed for every visitor, even the ones using older browser versions. If you want to play safe, you should enable a fallback to other traditional formats, such as PNG or JPEG.
How to Add Fallback to WebP Images
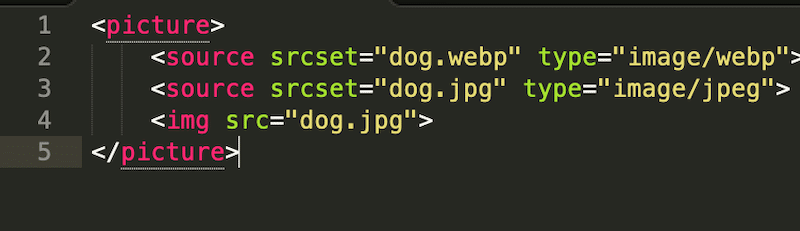
- You can add the <picture> tag for your image to implement fallback if your visitor uses an old version. Browsers supporting WebP will display “dog. webp” while the older browsers version that don’t support WebP will fall back to “dog.jpg” element.
- Using a WordPress plugin like Imagify that allows you to convert your images to WebP and use the <picture> tags to enable the fallback on WebP Images.

How to Create and Use WebP Images on WordPress
As of WordPress 5.8, the WebP format is fully supported by WordPress. Simply upload your images to your media library and include them in your content.
4 Best Plugins To Create a WebP Image
There’s no longer any need to install a third-party extension to upload Web images to WordPress, but you’ll need a plugin to convert your existing images to WebP. Here are 4 WebP WordPress plugins you can use to convert images to WebP:
- Imagify – an easy-to-use image compression plugin that offers WebP conversion. It’s free for around 200 images a month.
- WebP Converter for Media – converts files in standard JPEG, PNG, and GIF formats to the WebP format.
- WebP Express – adds a line of code to serve WebP images to users.
- Shortpixel Image Optimizer – another image optimization plugin that converts JPEG, PNG, or GIF to WebP and AVIF.
How to Create a WebP Image on WordPress
The easiest way to create a WebP image on WordPress is to use a plugin like Imagify. All your images can be converted to WebP in one single click, along with bulk compression.
- Upload your JPEG, PNG, PDF, or GIF to your WordPress library
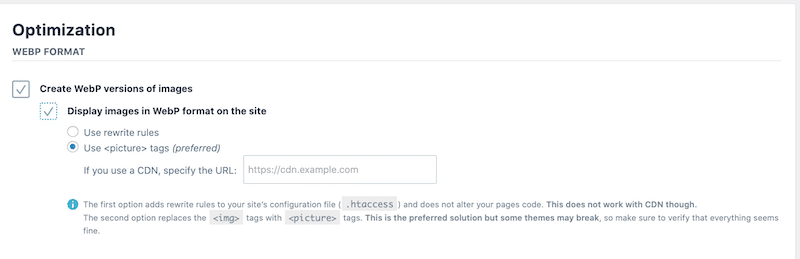
- From your WordPress dashboard, go to Settings > Imagify > Optimization Tab
- Check the following boxes: Create WebP versions of images and Display images in WebP format on the site
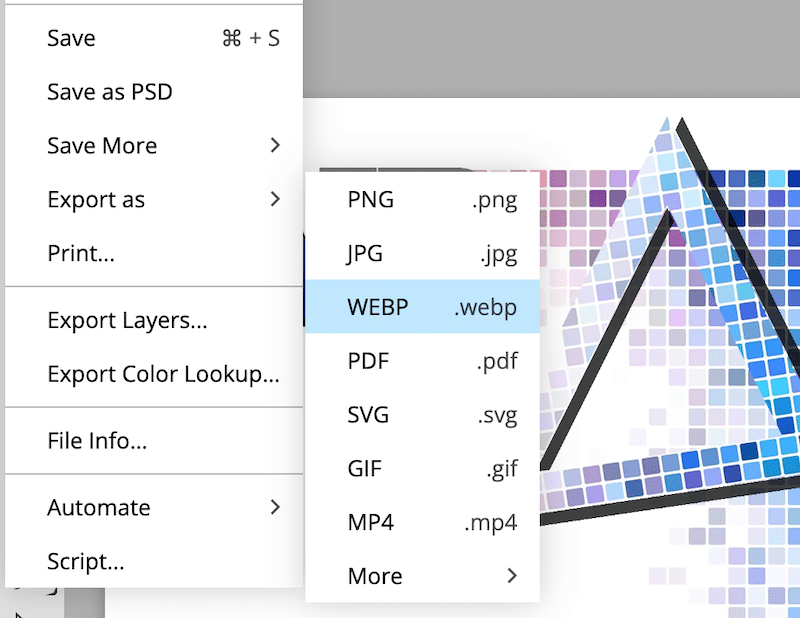
Bonus: If you are not a WordPress user you can also use design software such as Photoshop, Lightroom, or Sketch and export your media directly to WebP:

Give an Extra Boost to Image Optimization
Along with image compression and WebP conversion, lazy loading is an additional way to serve optimized images to your visitors and boost your page loading speed. Using a script like Lazy Load means the browser only loads images above the fold (in the user’s viewport).
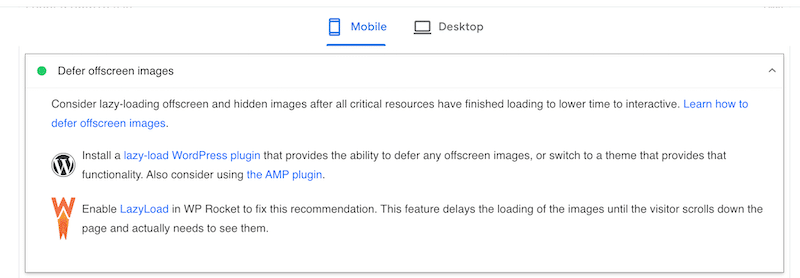
Additionally, in their performance report, PageSpeed Insights recommends to “defer offscreen images” which means applying lazy-loading:

How to Apply Lazy Loading to Your WebP Images
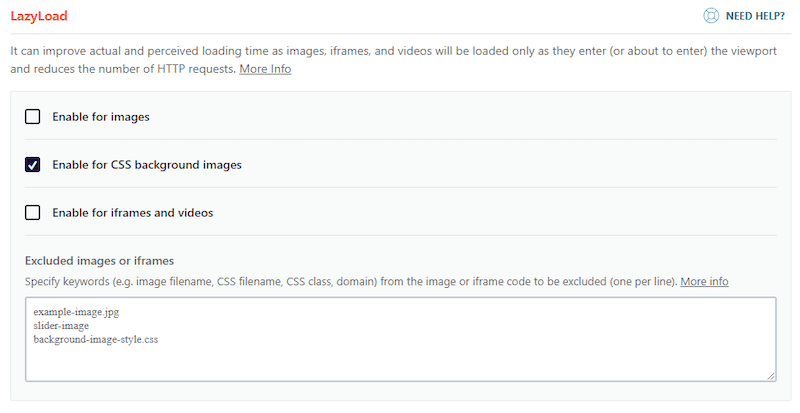
The easiest way to apply the lazy loading script to your WebP images is to use a WordPress plugin like WP Rocket. To implement lazy loading, follow those two easy steps directly from the WordPress admin:
- Go to Settings > WP Rocket > LazyLoad tab
- Tick the boxes of your choice amongst images, CSS background images, iframes, and videos.
Finally, PageSpeed Insights can detect if WP Rocket is installed on your WordPress site and eventually recommends you enable the LazyLoad feature:
| 🚀 Do you want to improve your overall web performance?WP Rocket is also one of the best WordPress cache plugins that optimizes your database, your code and improves your Core Web Vitals in a few clicks. |
Wrapping Up
Serving your images with the WebP format on WordPress is an easy way to boost performance. This next-gen format helps improve your Core Web Vitals by serving smaller image file sizes to your visitors – without impacting the quality!
WordPress and the major browsers now support WebP, so you don’t need to worry about compatibility. With a tool like Imagify or WebP Converter for Media, converting your images into WebP directly from the WordPress dashboard is easier than ever.
If you are willing to go the extra mile to boost your performance and optimize your images even more (with lazy load for example), give WP Rocket a try. It applies 80% of the performance best practice upon its activation and no technical knowledge is required. Also, there is a 30-day money-back guarantee, so you don’t take any risks – except the one to see your website loading faster!