Table of Contents
Last update on
Did you know that WordPress allows you to search and replace content across your entire site? However, it’s not a feature available from the dashboard that works out of the box — you’ll need a few tweaks to use it. If you need to update multiple elements simultaneously, a WordPress search and replace comes to the rescue!
WordPress search and replace is a powerful feature that allows you to find specific text, URLs, or code within your site’s database and replace it with new content—all in one go. Instead of manually editing each post, page, or database entry, this tool performs bulk updates and changes, making the process faster and more efficient.
In this article, you’ll learn:
- The best practices to follow before hitting the final button.
- How to easily find and replace content in WordPress (with a plugin or manually).
- The best scenarios when a bulk search and replace can save you time and effort.
Introducing WordPress Search and Replace
In WordPress, a search-and-replace operation scans your site’s database for specific strings, text, images, URLs, or code and replaces them with new content.
While this process is powerful and time-saving, it’s also sensitive and could lead to Advanced WordPress issues. If your search string isn’t an exact match — for example, if you forget a / or use a * wildcard incorrectly — you could accidentally alter more data than intended. This might even break your site, remove important content, cause internal links to stop working, and put your site offline.
Before running a search and replace, you must create a complete backup of your WordPress site (both files and database). A free plugin like BackWPup can efficiently perform this task, and if something goes wrong, you can quickly restore your site to its previous state.
How to Implement a WordPress Search and Replace Manually and with a Plugin
One of the best plugins for quickly implementing a WordPress search-and-replace is Search & Replace by WP Media. If you are looking for more advanced methods and don’t feel like using a plugin, you can do it via your host, phpMyAdmin, or using a developer tool. In fact, there are four recommended options:
Let’s dive into each method in detail so you can choose the right tool based on your skills, coding level, and search-and-replace needs.
Method 1: Install a WordPress Search and Replace Plugin
Installing a search-and-replace plugin from the repository is the easiest and fastest way to perform a search-and-replace in WordPress. Most of these plugins come with built-in backup options and a dry-run feature, allowing you to preview the changes before applying them.
Use This Method If…
You are a beginner or a user who wants to save time and quickly find and replace content without touching the code or opening the database manually.
How to Implement WordPress Search and Replace Using the Search & Replace Plugin
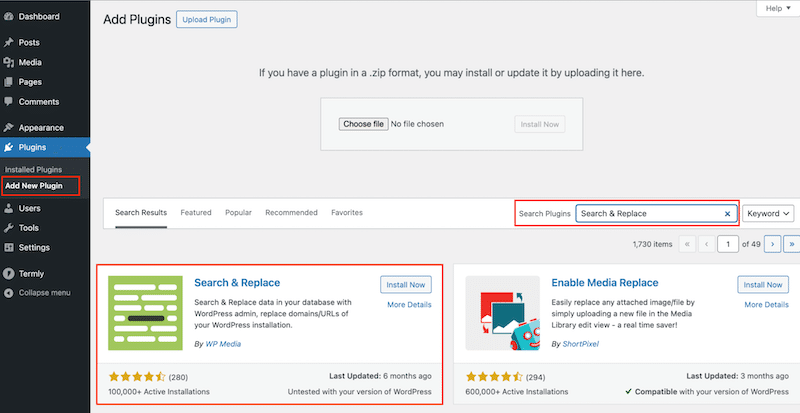
- Install the free Search & Replace plugin from Plugins > Add New Plugin > Add Plugins.
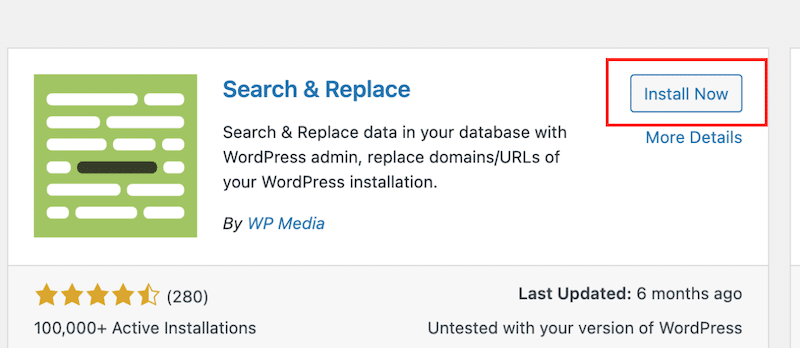
2. Click the Install Now plugin and then activate the plugin.
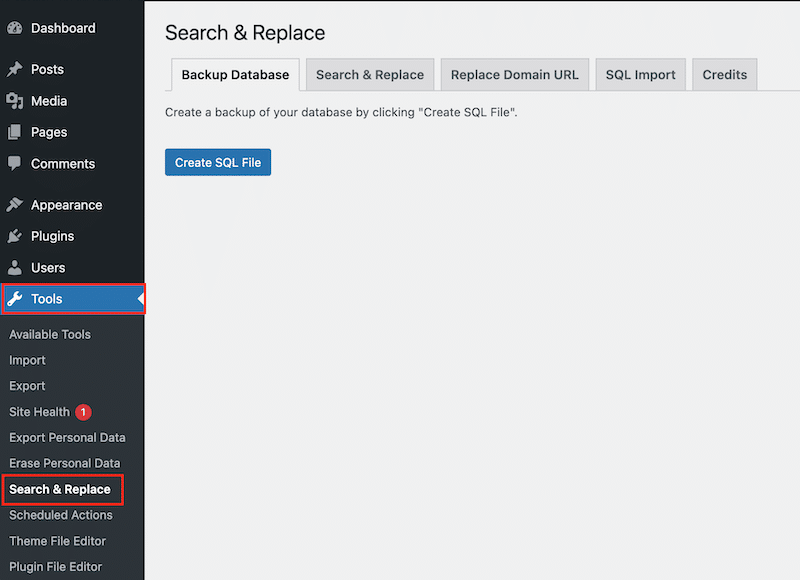
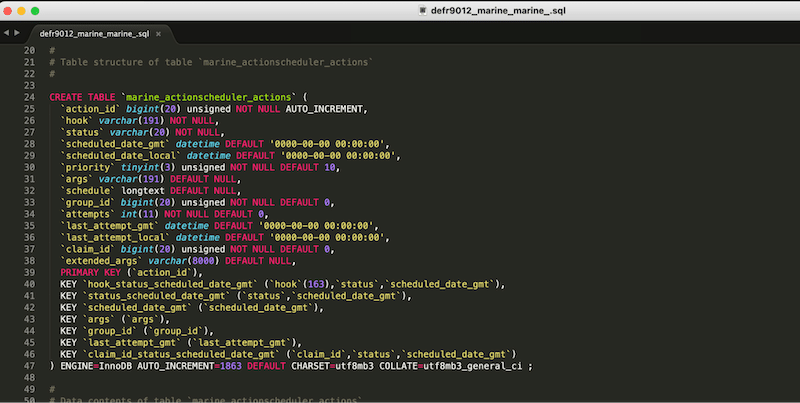
- Head to Tools > Search & Replace. The first tab, Backup Database, allows you to create a database backup by generating an SQL File. Simply click the Create SQL File button to perform the backup.
The file is automatically downloaded to your desktop.
4. In the second tab, you can decide how to search and replace the information.
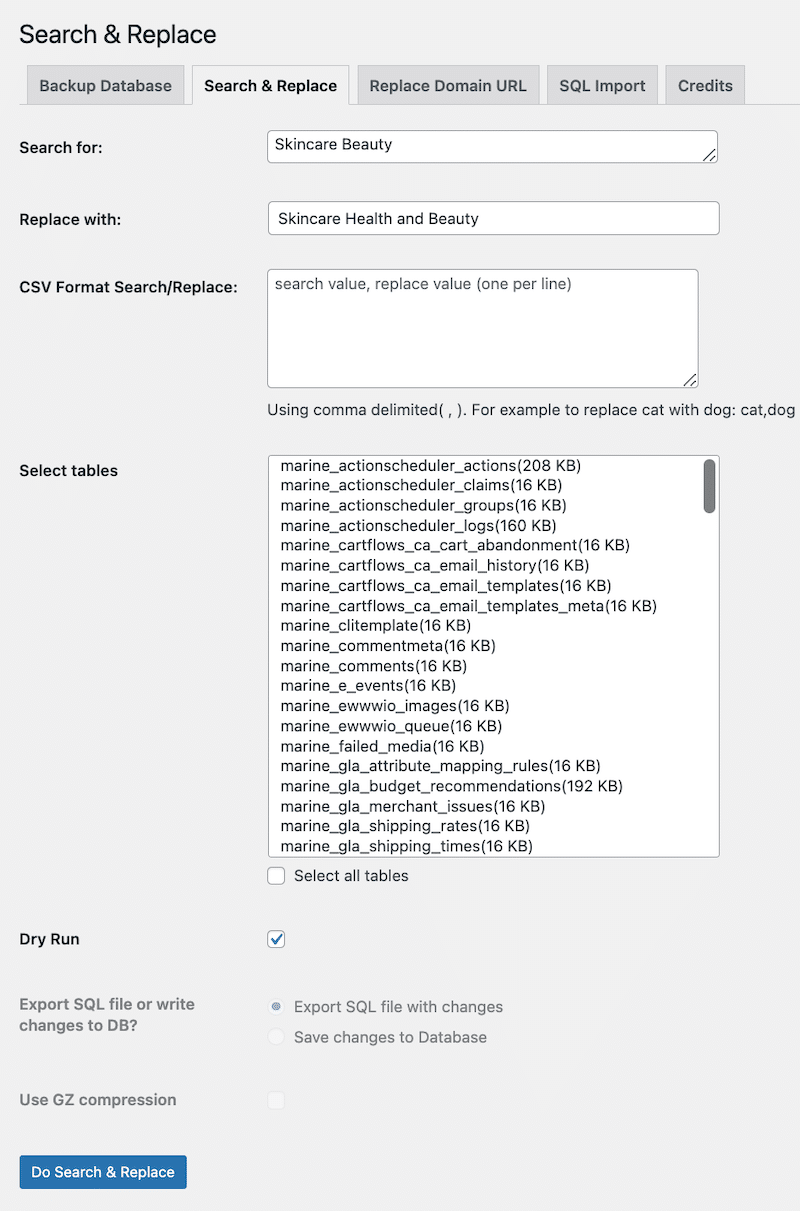
Use the first section if you need to change one string or one term.
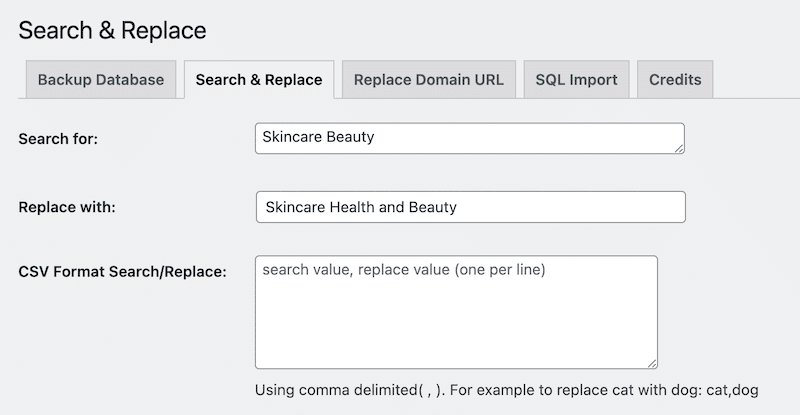
Let’s say you want to change your business name from Skincare Beauty to Skincare Health and Beauty.
5. In the Search for field, you can put “Skincare Beauty.”
6. In the Replace with field, “Skincare Health and Beauty.”
💡 Hint: Use the second section, CSV Format Search/Replace, to add a list of changes.
7. Select which tables you want to search and apply the changes to the Select Tables section.
💡 Hint: There is a button called “Select all tables” to select all of them in one click.

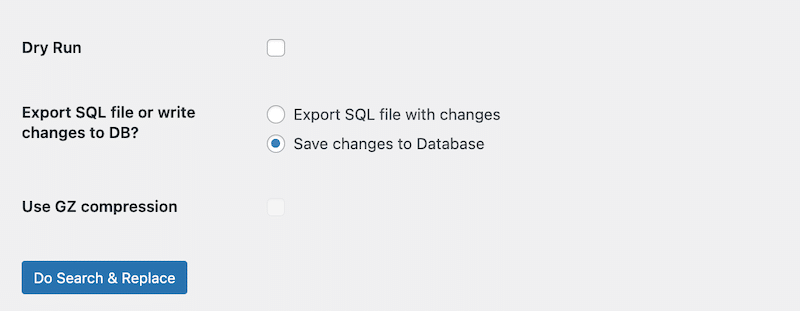
8. To be safe, do a dry run first (check the box) and click the Do Search & Replace button.
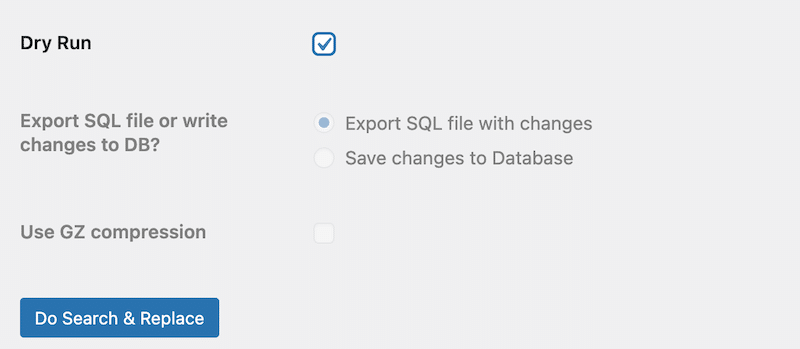
9. If you are satisfied with the results, uncheck the Dry Run box, and you can either export your database with changes or directly apply the changes to the Database.
10. Click on the Do Search & Replace button to run the final step.
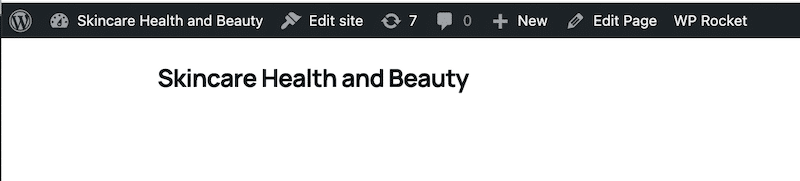
The changes have been made to the database.

You can see on the frontend that the brand name has been updated from Skincare Beauty to Skincare Health and Beauty everywhere:
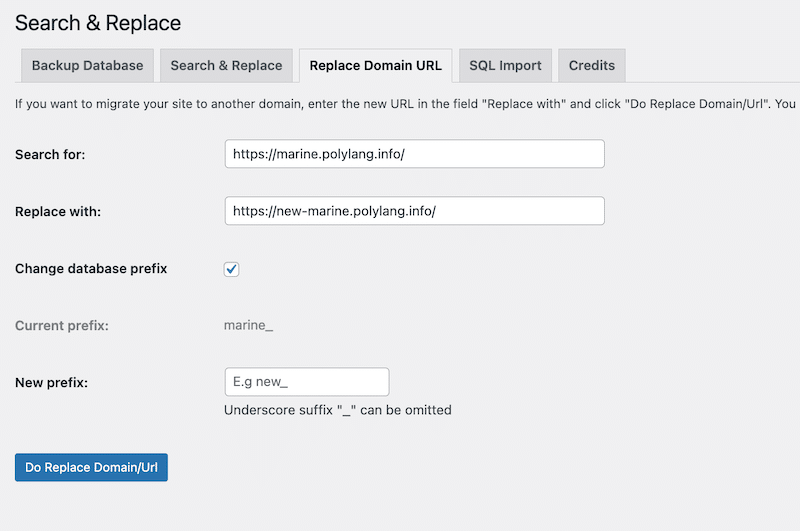
Similarly, you can open the Replace Domain URL tab to migrate your site to another domain or change a database prefix.
For example, you’ll need this if you are about to launch your WordPress site and need to move it from a local host to production. Enter all the information and click on the Do Replace Domain/URL button.
Method 2: Use Your Web Host’s Search & Replace Tool
Another easy way to perform a search and replace is to check if your hosting provider offers this feature from the admin panel or cPanel.
Use This Method If…
You are a beginner or a WordPress user who wants to save time, not touch the code, and not install a plugin. Just make sure that your host offers this option (for reference, Kinsta and SiteGround have it).
How to Implement WordPress Search and Replace Using Your Hosting Provider
- Simply navigate to the relevant section of your hosting panel—often under WordPress or Database Tools—and look for a Search & Replace option.
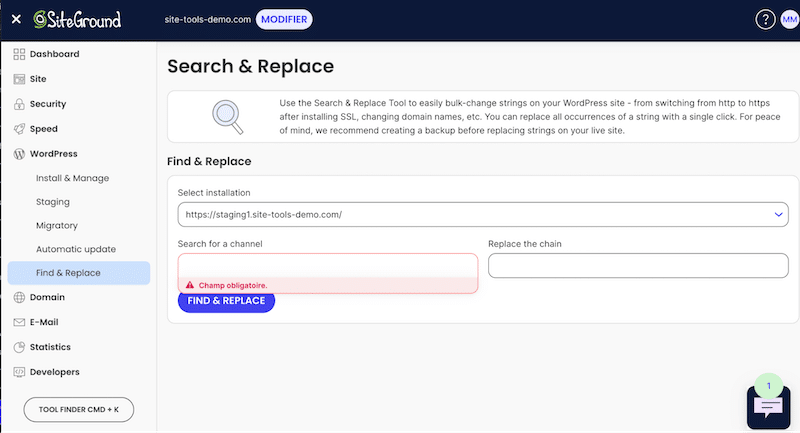
- From there, select your WordPress installation, enter the text you want to find in the Search for a channel field, and the replacement text in the Replace the chain field.
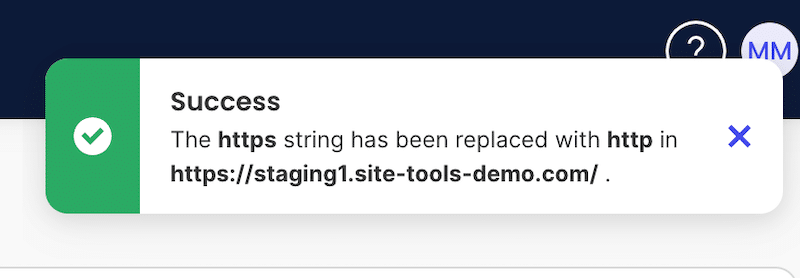
For example, if you have switched to HTTPS and need to update all your site’s URLs from http:// to https://, add both domains as shown below:

3. That’s it! The domain has been updated throughout your entire site.
Method 3: Use the Search Replace DB PHP Script (Developer Tool)
Another way to run a search and replace on your WordPress database is to use the free Search Replace DB tool. This powerful option for developers allows you to perform database searches through a simple web interface.
Use This Method If…
You don’t want to install another plugin on your WordPress site if your hosting provider doesn’t offer a built-in search and replace tool.
⚠️ Important note: This method can break your WordPress website if not done carefully. Using a plugin or your host’s built-in tools might be safer if you’re uncomfortable working with files and databases.
How to Implement WordPress Search and Replace Using Search Replace DB version 4 (Developer Tool)
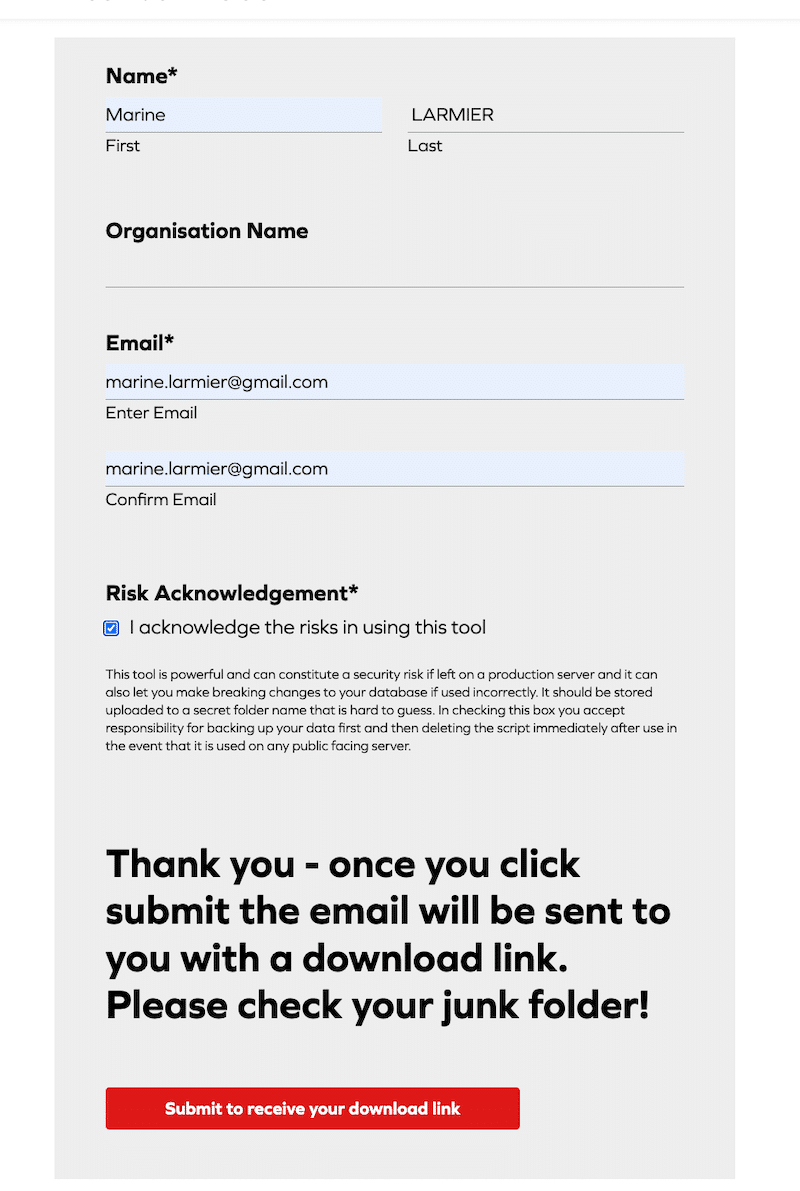
- Create an account and submit your information to get the download link.
2. Download the zip file of Search Replace DB version 4. And extract the folder called “search-replace-db-master.”

- Rename the extracted folder to something unique. We renamed it to “update-db-search-replace.”
- Use FTP to upload the folder to your web server and place it in your site’s public directory (the same directory that contains your /wp-content folder).

- After uploading, access the folder via your web browser: https://yoursite.com/update-db-search-replace
You’ll see the following screen where you can add database details and run a safe test run too.
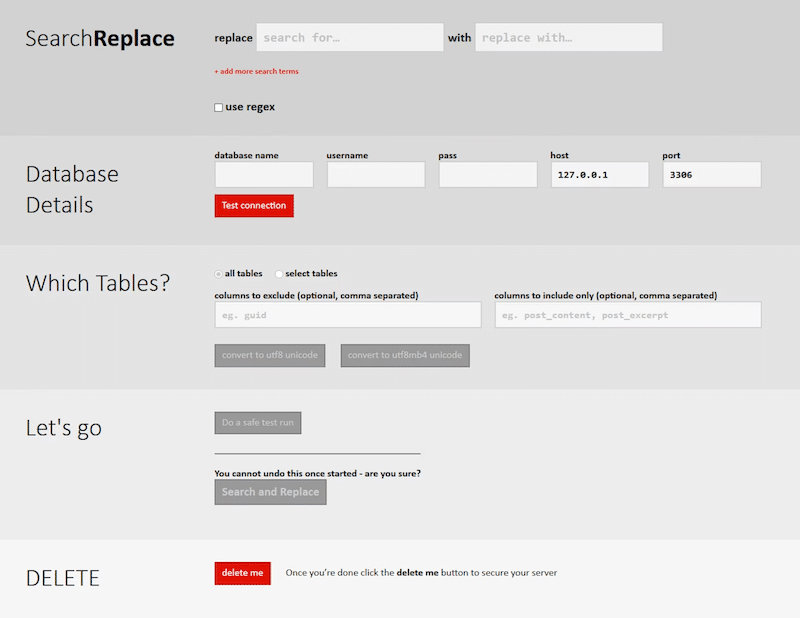
Note that the script will try to detect your database information automatically.
6. Double-check that the details are correct and that you’re working with the right database.
7. Click Do a safe test run to preview what the script will update or replace.
8. When ready, select Search and Replace to apply the database changes.
For security reasons, delete the script immediately after you’re done. You can do this by clicking the “Delete Me” button in the tool or by removing the folder via FTP.
Method 4: Run a Find and Replace MySQL Query With phpMyAdmin
PhpMyAdmin is a web-based tool that allows you to manage your MySQL database easily. One of its powerful features is the ability to find and replace queries directly in your WordPress database.
Use This Method If…
You’re comfortable working with code and MySQL. However, proceed cautiously—this should only be done by experienced WordPress developers.
How to Run a Find and Replace MySQL Query With phpMyAdmin
- Connect to your cPanel and select phpMyAdmin under the Databases section.
- A new tab will open with the phpMyAdmin interface. Enter your database username and password, then select Go.
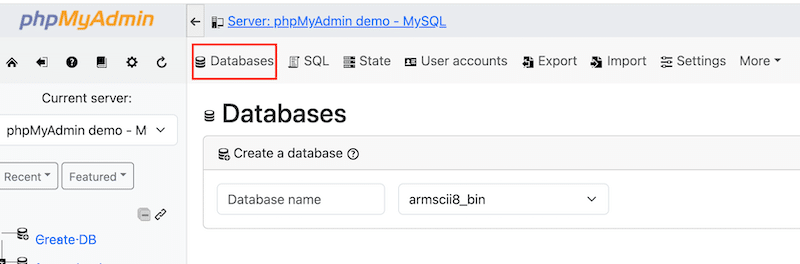
- Once inside phpMyAdmin, find your database name.
- In phpMyAdmin, select your database, then go to the SQL tab.
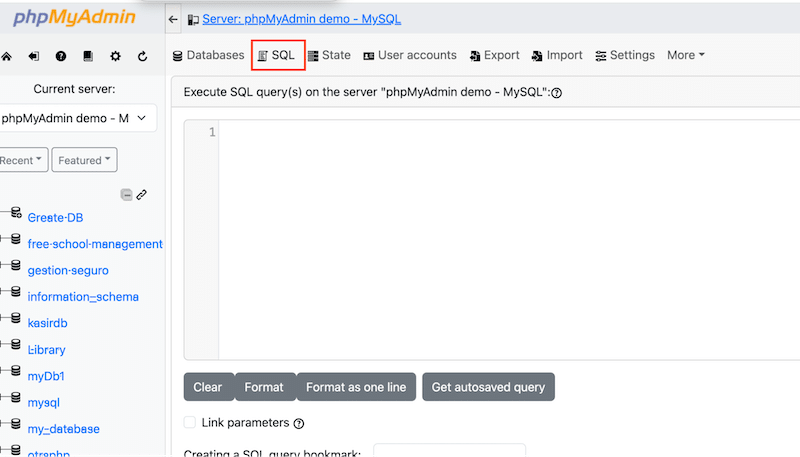
5. Add the following SQL query:
UPDATE TABLE_NAME SET FIELD_NAME = REPLACE(FIELD_NAME, 'Text to search', 'Text to replace it with'); 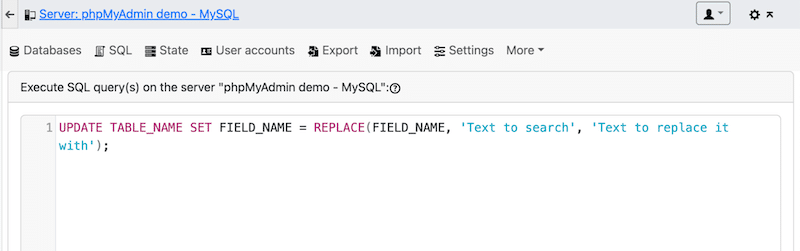
- Click Go to run your SQL query.
Check your WordPress site to confirm the changes.
These four methods range from beginner-friendly to more advanced techniques. We hope you’ve found the one that suits you best. Whatever you choose, review this checklist to ensure you follow best practices and avoid critical issues.
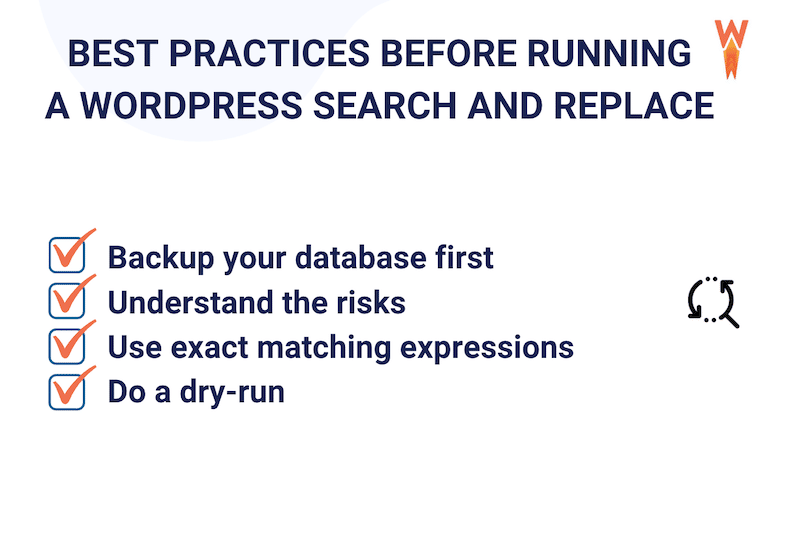
4 Best Practices Before Doing a Safe WordPress Search and Replace
Saving time? Yes. But doing it quickly without following these four best practices? Definitely not. Before following any of the methods presented, make sure you implement these tips and tricks:
1. Test the Search and Replace on a Staging Site First
Test your search and replace it on a staging or test site if possible. This will allow you to catch any issues before they impact your live site and fix problems without risk.
2. Do a Backup and Understand the Risks
Search and replace operations can have unexpected consequences because a single typo or incorrect code could break your site. Always back up your site before making any changes and double-check your search and replace strings before hitting the final button.
3. Be Precise With Your Search Terms
Narrow down your search terms as much as possible to avoid unintended changes. The more specific your search term, the less likely you’ll replace something you didn’t intend to.
4. Always Do a Dry-run First
A dry run is a trial that simulates a process without making permanent changes. In a search and replace script, a dry run shows what would change without altering your database. Many tools let you run a test search-and-replace, allowing you to preview the results and catch any issues before they go live.
Here’s the recap if you want to save this 4-step checklist for later:
Thankfully, most tools plugins offer helpful safeguards and let you easily back up your site or export your database before making final changes. Now that you know which method to follow and the safety tips, let’s see in which cases you may need to use the Search and Replace feature.
When You Need Search and Replace: 8 Beginners Real-World Scenarios
Search and replace isn’t just a handy tool that saves you time; it’s often essential for keeping your WordPress site in shape. It can handle almost any bulk update you need, and it’s invaluable for large-scale tasks like domain migration or mass content updates.
Let’s review eight everyday situations where this tool will come to the rescue.
- You spotted a recurring grammar or spelling mistake you’d like to fix site-wide. Another example would be if you change your business name, you must remove certain words from your entire content and replace them with others.
- You recently moved from HTTP to HTTPS and need to update all those hard-coded URLs in your WordPress database.
- You need to find all the development URLs and change them to production ones.
- If you move to a new domain name, you will need to update all your internal links and references.
- You may need to update or migrate your database records, and doing this manually can be time-consuming. The search and replace function allows you to clean up and update your WordPress database in bulk efficiently (including posts, pages, custom post types, metadata, and even user information).
| 🚀 A plugin like WP Rocket can also help streamline the database update process. WP Rocket helps optimize your WordPress database by scanning for improvement opportunities, such as post revisions, drafts, or transients. This process improves site performance by reducing unnecessary data and ensuring your database is not bloated. |
- When you update a plugin or design element, you may need to swap out old shortcodes or code blocks throughout your site.
- SEO-wise, you want to correct broken links in bulk. Read this guide to learn more about technical SEO and the importance of having up to date links.
- If you are an affiliate and use links across your site or blog, you can easily manage and replace outdated or broken affiliate URLs in your posts.
Why Using Search and Replace is Important for Performance and Database Optimization
Search and replace are essential for keeping your content accurate and up-to-date. They also play a key role in maintaining performance and user experience. For example, when migrating from HTTP to HTTPS, updating all hard-coded URLs is essential for Google Page Experience and SEO. The search and replace functionality makes this easy.
Additionally, your website relies heavily on its WordPress database, so optimizing your data regularly is important. Here are a few reasons why you might need to use the search and replace on your WordPress database:
- New URLs.
- Misspellings and typos.
- Deleting unnecessary characters.
- Change table prefix.
The search and replace function helps you quickly and efficiently update your WordPress database in bulk, saving you time compared to manual updates.
| 🚀Pro tip: To ensure high performance and maintain an optimized database on your WordPress site, consider using WP Rocket. This powerful performance plugin applies 80% of the performance best practices upon activation. It boosts your Core Web Vitals and ensures that your content is shown to visitors as fast as possible, improving the overall user experience. |
Wrapping Up
Performing a search and replace in WordPress is an invaluable and time-saving technique for updating links and URLs, modifying text, replacing images, and handling database migrations.
While a WordPress search and replace can save you hours of manual work, it’s important to proceed cautiously—one small mistake could break your site. Always backup your database before running any SQL queries.
In any case, keeping your database optimized and healthy is essential for delivering your visitors a fast, seamless experience. Use WP Rocket to optimize your database automatically without touching any code — no risks taken, with a 14-day money-back guarantee.