Table of Contents
Last update on
While the name sounds a bit odd, combining images using CSS sprites is a popular performance enhancement technique that can speed up your WordPress site by reducing the number of HTTP requests required to load the images on your site.
With a CSS sprite generator for WordPress, you can benefit from this performance optimization technique with minimal effort required on your part. You will need to work with CSS and HTML at a basic level, but you don’t need to understand the underlying code and we’ll show you exactly where to put everything.
In this post, we’ll explain a bit more about what CSS sprites are and when you should use them on your WordPress site. Then, we’ll show you how to combine images using CSS sprites in WordPress with a detailed, step-by-step guide.
What Does It Mean to Combine Images Using CSS Sprites?
Without CSS sprites, each image on your WordPress site is a separate file. When someone visits your website, that person’s browser issues an HTTP request to download each individual image file, which you can see if you look at the waterfall analysis chart in a performance optimization testing tool like Pingdom.
If you use five images on a page, that means five separate HTTP requests – one for each image.
This is a problem because, all things equal, fewer HTTP requests means a faster loading site.
To fix that, you can combine your images into as few images as possible using CSS sprites.
Essentially, this means that you combine all your separate images into a single image file. Then, you use CSS to manipulate that single image so that it only shows the specific image you want at each location. So you can still show five separate images on your page – they just all come from the same image file.
On the front-end, your human visitors won’t notice any difference between using CSS sprites and separate image files. But on the backend, visitors’ browsers will only need to download a single image file, which speeds up your site’s page load times.
When Should You Combine Images Using CSS Sprites on WordPress?
Although CSS sprites can speed up your page load times, you do not want to combine all your WordPress images using CSS sprites because there are some drawbacks.
Namely, combining your images with CSS sprites doesn’t let you add separate image alt text and titles to each image which:
- Can negatively affect your SEO efforts, especially if you want to rank your images in Google Image Search (which isn’t possible with CSS sprites because it’s a single image file).
- Hurts your site’s accessibility because people using screen readers will not be able to understand what each image is supposed to represent since they all come from the same file.
For those reasons, you want to limit your use of CSS sprites to decorative images.
Some examples where CSS sprites make sense are:
- Decorative icons on your homepage (if you’re not using an icon font already)
- Logos/pictures of your clients or people who have left you testimonials
- Social media share icons
Typically, these will probably be images that you display sitewide or on your core static pages.
On the other hand, you probably do not want to combine images using CSS sprites for images in your blog posts.
For example, these images on the AWeber homepage could be a good candidate for CSS sprites because:
- They’re not really important for SEO purposes.
- Losing the ability to add alt text won’t negatively affect the accessibility of the page.

How CSS Sprites Work at a High Level
Here’s the basic two-step process to combine images using CSS sprites:
- Use a CSS sprite generator tool to combine multiple images into a single image file.
- Use the CSS and HTML that the sprite generator tool provides to only display the specific part of the overall image file that contains the image you want to display.
So let’s say you want to display two separate images on your homepage:
- The USA flag
- The French flag
First, you would use the CSS sprite generator to combine the separate images of each flag into one single image. Here’s what the combined image looks like:

Then, you’d add the CSS that the tool provides to your site and then display each image by adding a <div> or <span> with that CSS class in your content.
Don’t worry if this isn’t making sense yet – we’ll show you step-by-step how to do this on your WordPress site in the next section!
How to Combine Images Using CSS Sprites on WordPress
Now, let’s take that high-level process from above and apply it specifically to how to combine images using CSS sprites in WordPress.
Let’s keep going with the flag example and add a third flag for Vietnam (that’s where I live!).
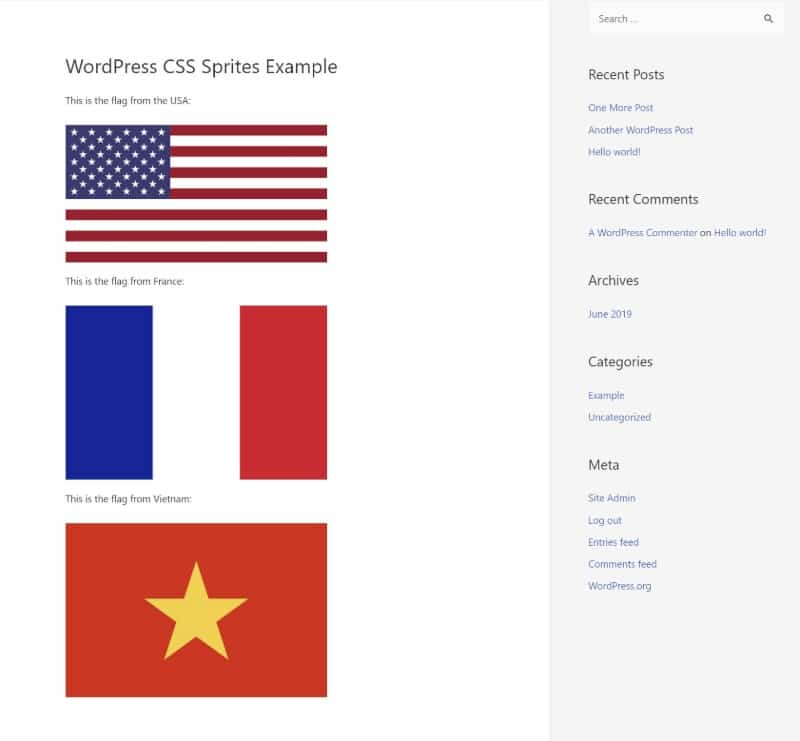
Here’s what the example page looks like without CSS sprites. Each image is a separate image file, so there are three images total and three HTTP requests for the images:
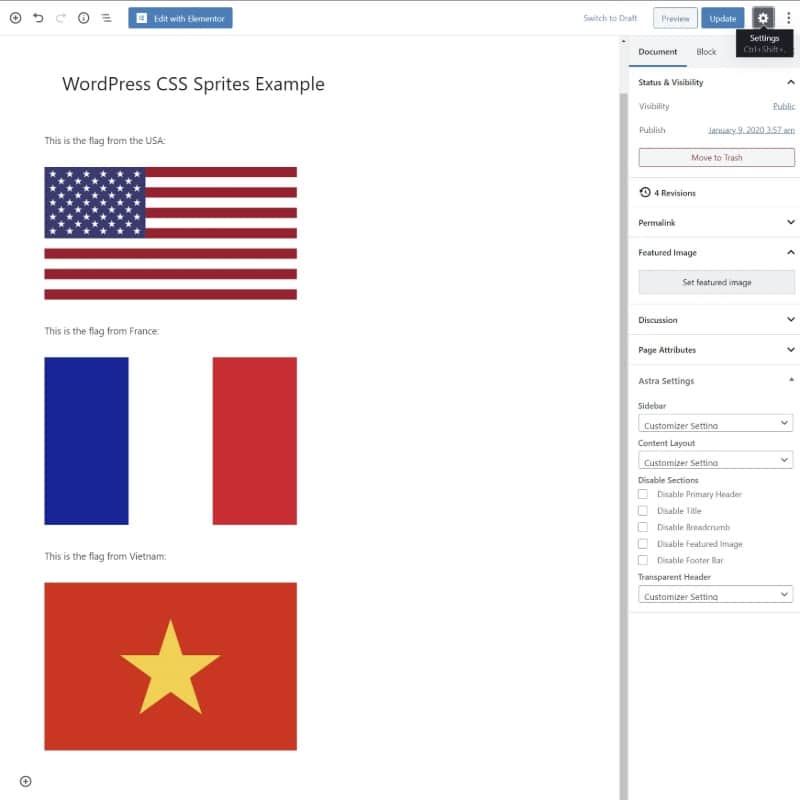
And here’s what that content looks like in the WordPress editor – again, you can see three separate image blocks:
Now, let’s combine those images using CSS sprites!
1. Combine the Images Using a CSS Sprite Generator
To get started, use a CSS sprite generator tool to combine your separate image files into a single file.
Make sure to properly size/resize your images before you upload them to the CSS generator tool. It will be a lot more difficult to do this later on because you’ll need to manipulate them with CSS, which is tough if you don’t know your way around CSS.
There are a lot of good generators, but I like this one called CSS Sprites Tool.
All you do is drag your images onto the interface. Then, click the Generate CSS Sprite button. You can leave all the other settings as the defaults:

Then, you should see three pieces of output:
- Some CSS code
- Some HTML code
- The combined image file
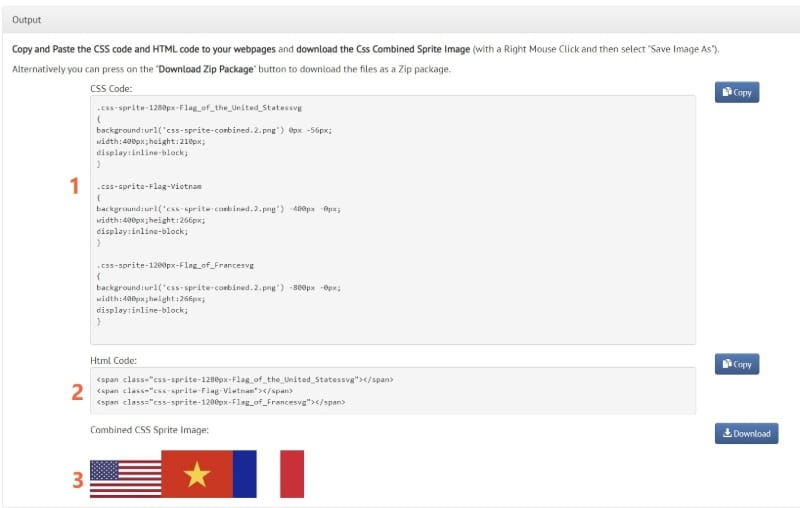
Download the combined CSS sprite image file and keep this page handy because you’ll need the code in the next steps.
2. Upload Combined Image to Your WordPress Media Library
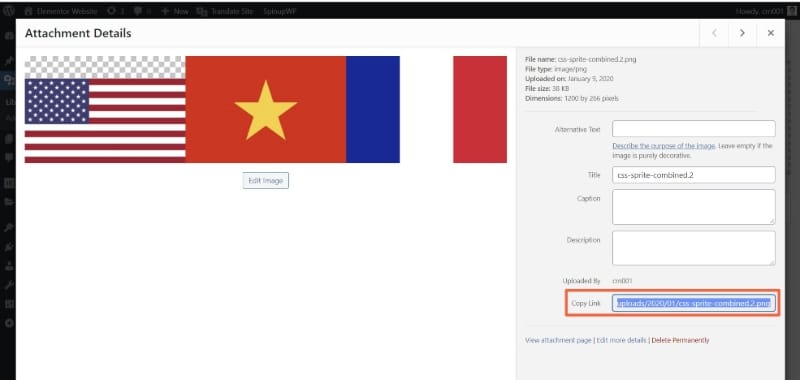
Upload the combined image file to your WordPress Media Library. You’ll also want to keep this handy because you’ll need the direct image file URL in the next step:
3. Add the CSS Code to Your WordPress Site
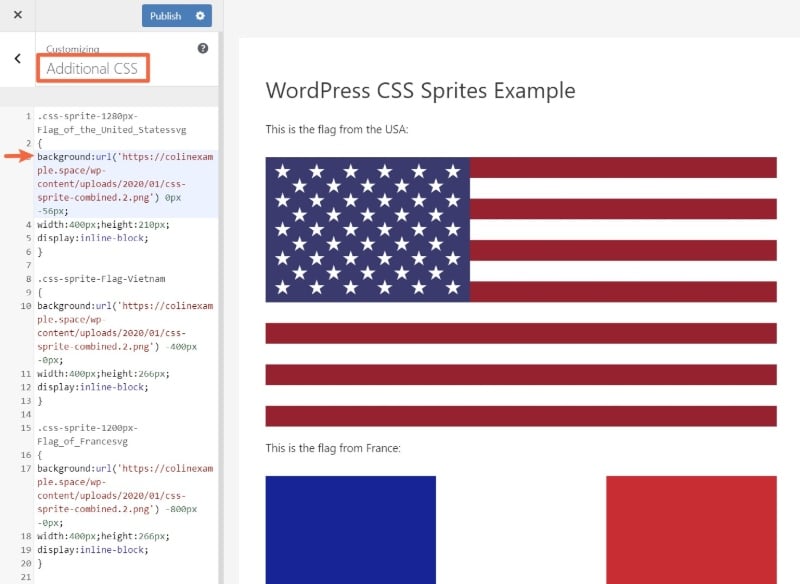
To add the CSS code to your WordPress site, go to Appearance → Customize → Additional CSS.
Then, paste in the CSS code from the sprite generator in step #1. As you do that, replace the background:url field with the direct link to the combined image file in your WordPress Media Library:
4. Use HTML Code to Display Images
To finish things out, you need to add the HTML code for each image at the location where you want that specific image to display in your content.
If you’re working in the WordPress block editor, that means that instead of using an image block to display each image, you’d use a custom HTML block instead. Here’s what it looks like:
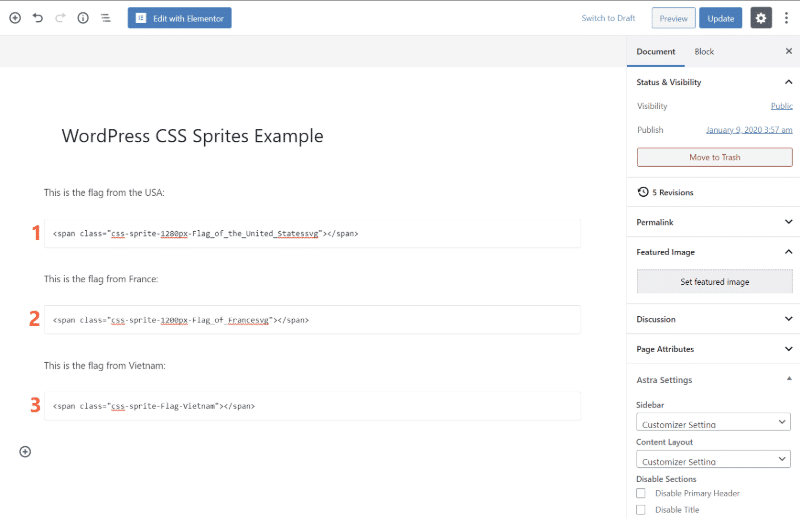
Remember, you can get this HTML code from the CSS sprite generator in step #1.
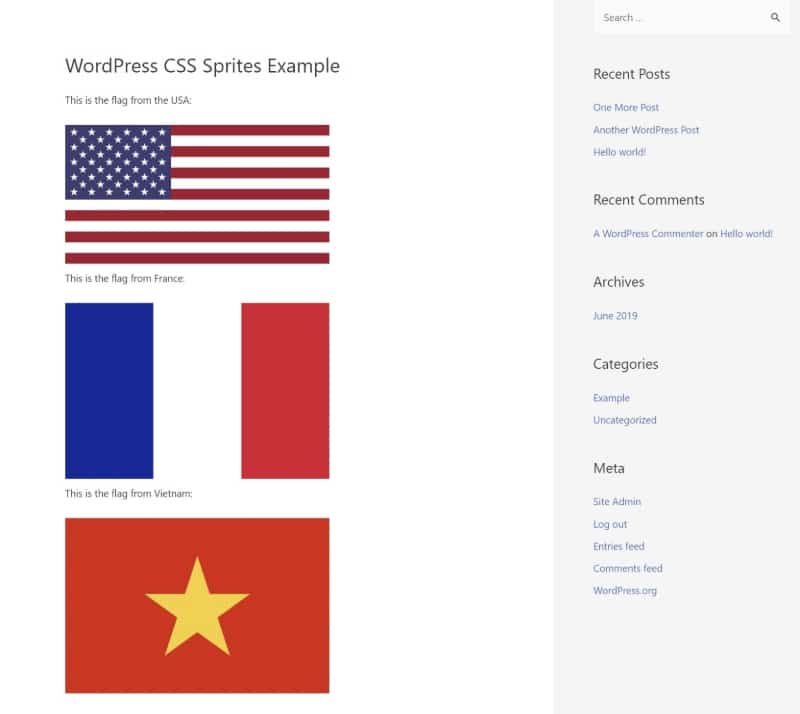
And on the front-end, it looks exactly the same. Only now, visitors only need to load a single image file instead of three separate images:
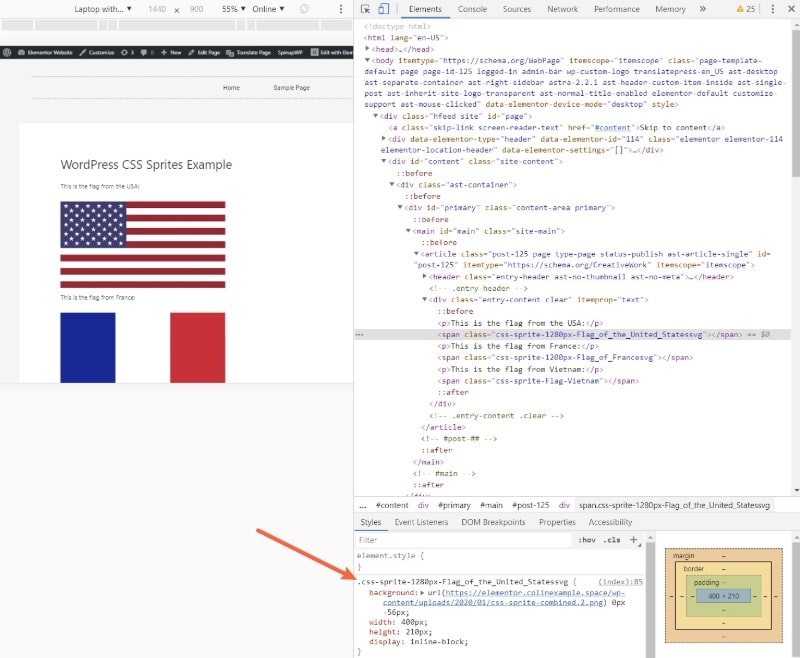
If you look at the underlying HTML, you can see that each image is displayed using CSS:
And that’s how to combine images using CSS sprites on WordPress!
Can You Combine Images Into CSS Sprites With WP Rocket?
No, WP Rocket does not offer a feature to help you combine images into CSS sprites on WordPress. Unfortunately, it’s difficult to reliably automate this process, which is why you have to follow the manual method that we detailed above instead of just installing a WordPress plugin and calling it a day.
With that being said, WP Rocket offers lots of other ways to optimize the images and other media content on your WordPress site.
For example, WP Rocket can help you implement image lazy loading, which lets you speed up your load times by waiting to load below-the-fold content until a user starts scrolling down the page.
WP Rocket also works great with Imagify, which is our dedicated image optimization plugin. Imagify can help you automatically resize and compress images to shrink their file sizes.
You can learn more about both approaches in our detailed guide to WordPress image optimization.
Get Started With WordPress CSS Sprites Today
CSS sprites can help you speed up your WordPress site by combining multiple image files into a single file.
You should not use CSS sprites for all your images because there are drawbacks when it comes to SEO and accessibility.
But for decorative images, like those on your homepage, CSS sprites are a smart performance optimization technique.
To combine images using CSS sprites in WordPress, you can:
- Use a WordPress CSS sprite generator tool to combine multiple images into one.
- Upload the combined image file to your site.
- Add the CSS code to your WordPress site using the WordPress Customizer.
- Add the provided HTML where you want to display each image.
Do you have any additional questions about how combine images using CSS sprites in WordPress? Leave a comment!

