Table of Contents
Last update on
Ever worried about breaking your site while running an update or testing a new plugin? That’s exactly why having a WordPress development environment is essential. It’s your safe playground, a space where you can build, test, and tweak your site freely without risking errors on your live website.
Whether you’re experimenting with design changes, optimizing performance, or checking WordPress core updates, a local WordPress development environment lets you do it all with peace of mind.
There’s a lot to explore when it comes to WordPress environments such as local, remote, staging, and production, each playing a different role. In this guide, we’ll break it all down for you, share best practices, recommend the top tools, and help you decide which WordPress development environment fits your needs best.
| TL; DR on WordPress Development Environment Choosing the right WordPress development environment depends on your goals, team, and technical level. Each stage has a purpose: you start with a local WordPress development setup, test in a staging or development environment, and then go live in production. Follow best practices: protect your staging site with strong passwords, turn off search engine indexing, clean up unused sites, and run final checks before going live. |
Key takeaways
✅ A local development environment for WordPress lets you build and test safely on your computer without affecting your live site.
✅ A staging or development site allows you to review, test, and secure updates before launch.
✅ A production site is your live version, where performance, stability, and security are critical.
✅ WP Rocket is the easiest and most powerful performance plugin to boost speed and optimize Core Web Vitals. Test it in your WordPress local environment or staging setup to compare before-and-after results.
✅ Beginners can use simple, host-provided or plugin-based staging tools to test updates safely.
✅ E-commerce owners need staging to test checkout flows, payments, and security before going live.
✅ Agencies rely on staging for teamwork, QA, and client approvals.
✅ Developers benefit from local control, version tracking, and structured deployment pipelines.
✅ Designers use local setups to build and test landing pages for responsiveness and design accuracy.
What Is a WordPress Development Environment?
A WordPress development environment is a local or online setup where you can build, test, update, and modify your WordPress website safely, without affecting your live site or customers.
Think of it as your website’s private “backstage.” It’s where developers, designers, marketers, and site owners can test new plugins, run updates, tweak the theme, add new landing pages, and optimize performance before those changes go public.
A development environment mirrors your live environment. It includes the same structure as WordPress: WordPress core, PHP, and MySQL, but it runs either locally on your computer or in a staging environment online.
4 Types of WordPress Development Environments
Understanding the different WordPress development environments is key to creating and maintaining your site efficiently. You can set them up manually, create a staging site with plugins, or use your hosting provider’s built-in tools. Let’s go over each environment so you can better understand what they’re for and how to set them up.
1. Local Environment
A local WordPress development environment runs directly on your computer, allowing you to build and test your site offline. It’s ideal for experimenting safely before putting anything online.
💡 Example: Working on http://localhost/mysite using tools like Local, MAMP, @wordpress/wp-en or XAMPP.
💻 Tech level: Hard (configure yourself)
⚙️ How it works: Let’s take the example of @wordpress/wp-env, an official tool maintained by the WordPress team that lets you quickly set up a local WordPress development environment for building and testing plugins or themes. It runs on Docker, so you don’t have to install WordPress manually or configure servers.
It creates a fully functional local WordPress site on your computer where you can safely test your code. It’s great for ensuring your plugin or theme works before deploying it to staging or production. It’s simple, consistent across setups, and perfect for team projects.
As Hugo Drelon, developer from Polylang explains:
One of its biggest strengths is flexibility. It offers powerful customization options and works seamlessly across different setups, making it highly portable.
Here’s how to set it up:
- Make sure Docker, Node.js, and Git are installed and open your plugin or theme folder in the terminal: cd /path/to/your/plugin
- Install wp-env globally: npm -g i @wordpress/env
- Start your environment: wp-env start
- Visit http://localhost:8888 in your browser.
- Username: admin
- Password: password
If you want to set up a local environment, you can also use tools like MAMP or Lando. Lando creates a ready-to-use local WordPress setup on Docker with a simple configuration, giving developers fast, consistent environments without the need to manually configure Docker.
We asked some WordPress developers what they actually use for their local setup, and here’s what Sébastien, developer at Polylang, told us:
I use Lando for my development environment because it makes setting up a project easy without having to handle or configure Docker manually.
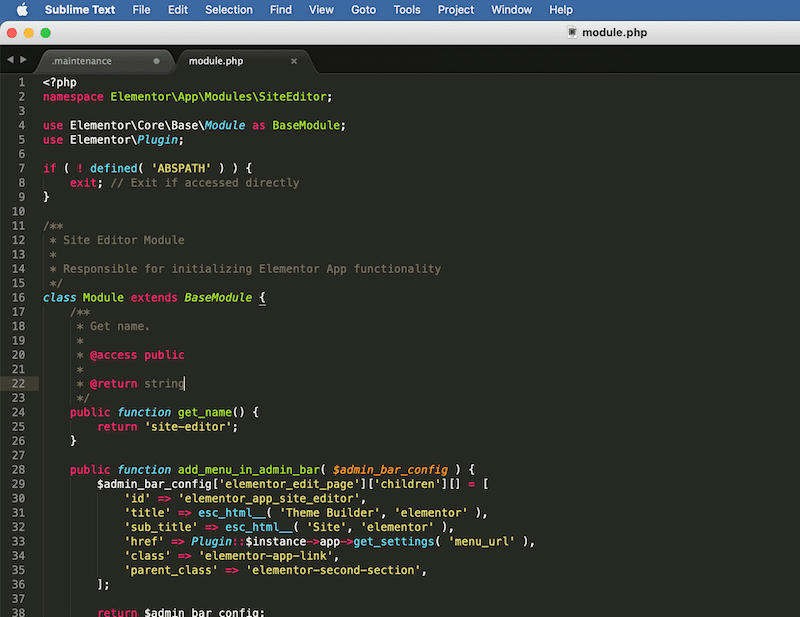
2. Developer Tool: IDE (Integrated Development Environment)
An IDE is not a server environment but more of a developer’s workspace. It helps you write, edit, and debug WordPress code more efficiently by combining features like syntax highlighting, version control, and error detection in one place.
💡 Example: Editing a plugin or theme file and testing it in your local setup.
⚙️ Tools: Visual Studio Code, PhpStorm, Sublime Text
3. Staging Environment
A staging environment is a clone of your live website where you can test updates or changes before deployment. It acts as a final review area to ensure everything works perfectly. The staging environment should mirror production as much as possible.
💡 Example: Previewing your updates on https://staging.yoursite.com
⚙️ Tools: From your hosting provider like the WP Engine’s staging feature, or SiteGround’s staging tool. You can also use plugins like WP Staging.
💻 Tech level : Easy
Here’s a short, step-by-step guide to set up a staging site on WP Engine:
- Log in to your WP Engine User Portal.
- Go to Sites > Add Site.
- Enter a name for your new site and confirm.
- When prompted, choose Environment: Staging (STG) and finish creation.
- In Sites, locate your new site and click the STG badge next to its name.
- You’ll land on the staging dashboard, where you can push changes to production and open the WordPress Admin for the staging site
- Make your updates on staging and verify everything.
- When ready, use the Push to Live action to merge changes back to your production site.
4. Production Environment
The production environment is your live website, the version visitors see. It must remain stable, secure, and optimized for performance.
💡Example: Your main site https://yoursite.com.
| ⚠️ The three development environments we just mentioned are a private testing zone that is not visible to the visitors. The Production environment is the live website that visitors see. Every change you make here is visible in real time. |
Best Practices for WordPress Development Environments
Now that you know the different types of WordPress environments and tools, here’s how they all fit together in a typical workflow and the best practices you can follow.
Developers usually start locally, build and test their work, then move through staging before pushing updates to the live site.
Typical WordPress Development Cycle Best Practices (for Developers)
- Set up a local environment and install WordPress on your computer using a tool like Local or MAMP.
- Use an IDE to write or edit code (themes, plugins, or custom features) in VS Code or PhpStorm.
- Test and push your changes to a staging environment that mirrors your live site. This is where you check that everything works correctly.
- Review and QA to run performance checks, debug issues, and test plugins and integrations.
- Go live (production environment) once your site is stable and ready for visitors.
Besides following this cycle, here are a few more best practices to keep WordPress environments safe, efficient, and reliable:
- Protect your development and staging environment. Use strong passwords, HTTPS, and IP whitelisting to prevent unauthorized access. Never leave test data or credentials exposed.
- Turn off the indexing. Disable search engine indexing for your staging site to prevent test or incomplete content from appearing in search results. This avoids duplicate content and broken link issues.
- Do final checks before going live. Use your staging environment for a full round of QA, testing all updates, design changes, and new features before deploying them to production.
- Clean up regularly. Remove outdated staging sites, old backups, or unused files to prevent confusion and potential security risks.
- Follow manual setup steps carefully. If you’re managing your staging site manually, double-check subdomain setup, file imports/exports, database duplication, and configuration updates (like wp-config.php or URLs in wp_options).
- Don’t forget the performance. Performance testing should happen in the staging phase, not locally, so you can accurately measure speed and Core Web Vitals on a live server. Aim for a 90/100 score or higher on GTmetrix to make sure your Core Web Vitals are in the green zone.
To help you reach that performance goal, use WP Rocket, the easiest and most effective performance plugin for WordPress. Upon activation, WP Rocket automatically applies 80% of web performance best practices, including caching, GZIP compression, code minification, critical image optimization, and lazy rendering. Its intuitive interface also lets you enable powerful features such as:
- Removing unused CSS.
- Loading JavaScript deferred.
- Delaying JavaScript execution.
- Lazy loading images, videos iframes and CSS backgrounds.
- Preloading fonts and self-hosting Google fonts.
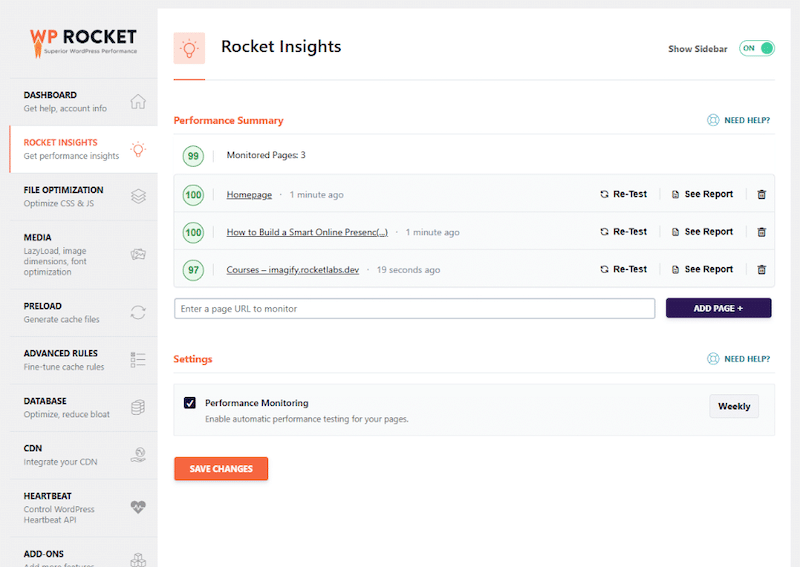
💡Hint: If you use WP Rocket to improve performance, we recommend tracking your results directly in the plugin’s interface under the Rocket Insights tab after making your optimizations.
Rocket Insights is WP Rocket’s built-in performance monitoring tool that lets you track your top pages, measure their results instantly, and quickly identify what slows your site down inside WP Rocket:
How to Choose Your WordPress Development Environment
Not every WordPress user needs the same setup. The right WordPress development environment depends on who you are, how you work, and how complex your website is. Here’s how to pick the best one for your needs.
Bloggers: Keep Your Site Stable While Testing New Plugins and Themes
If you’re running a personal blog or a simple website, you don’t need a complex setup. You generally won’t need to test long user scenarios or advanced workflows. The main reason to use a staging environment is to check theme or plugin updates before applying them to your live site, so you don’t risk breaking your layout or content.
💡 Example: A food blogger on Bluehost can clone their site to staging, test a new recipe plugin with advanced search, and then safely push it live once it works perfectly.
⚙️ Recommended setup:
- A staging environment that mirrors your production site for realistic testing.
Cons:
- Limited control over the server environment.
- Not ideal for large design or code changes.
✅ Recommended tools: WP Staging, Duplicator, or your hosting provider’s staging feature. WP Rocket to optimize speed and Core Web Vitals before going live.
WooCommerce Store Owners: Test Payments, Checkout, and Updates in Staging
If you’re running a WooCommerce store, a staging site is absolutely essential. You’ll need to test orders, payments, and checkout flows before they reach real customers.
A staging environment lets you simulate transactions with dummy credit cards, check if discount codes work, and verify that shipping and tax settings are calculated correctly.
💡 Example: An online shop owner uses a staging copy of their site to test a new Stripe plugin and confirm that payments are processed correctly. Once everything is smooth, they deploy it live.
⚙️ Recommended setup:
- A local development environment to push the latest products and changes.
- A staging environment that mirrors your production site for realistic testing such as dummy payments.
- WP Rocket to optimize the speed of your WooCommerce site and Core Web Vitals before going live.
⚙️ Recommended tools: Local, MAMP, WP Staging, Duplicator, or your hosting provider’s staging feature and WP Rocket for final performance optimization.
Agencies: Coordinate and Test Content Safely Before Campaigns Go Liv
If you’re part of a WordPress marketing agency or a multi-developer team, you’ll need a workflow that supports collaboration, testing, and review. Typically, each developer works locally on their own setup, pushes code to Git, and then moves to a staging environment for QA and client approval.
💡 Example: A digital agency tests new features on staging, runs QA with its internal team, and lets the client review on a password-protected URL before publishing.
⚙️ Recommended setup:
- Production parity to mirror your live site’s data, configuration, and load.
- End-to-end (E2E) testing and validating real-world workflows and scenarios.
- User Acceptance Testing (UAT) to let stakeholders or clients approve before deployment (e.g.: a purchasing process).
- Test performance before and after enabling tools like WP Rocket.
- Deployment testing to make sure everything pushes correctly to production.
Cons:
- Staging environments can be resource intensive.
- Configuration drift (small differences between staging and live) can cause issues later.
⚙️ Recommended tools: Local (by Flywheel), Lando, GitHub or GitLab for version control, a staging site with WP Rocket for final performance optimization.
Developers: Build and Test Locally with Full Control
If you’re a developer, you need full control of your workflow, from local testing to live deployment.
Start locally to build and debug without touching your live site. Then, move to a testing or staging environment for final validation before pushing live.
💡 Example: A developer builds a new search feature for an e-commerce site code locally using Lando, pushes updates to staging for QA, and then deploys to production once the feature is validated.
⚙️ Recommended setup:
Use a development environment to:
- Test new plugins, themes, and updates safely on a local setup.
- Develop and fine-tune custom features.
- Debug and fix issues before they affect users.
- Collaborate with other devs using Git and shared environments.
Use a staging environment to:
- Experiment with caching, CDN integration, or image optimization.
- Present demos to clients on temporary or staging URLs. This allows you to showcase the website on a “real” site that isn’t accessible through the official URL yet.
⚙️ Recommended tools:
- Local environment: Local by Flywheel, Lando, or @wordpress/wp-env
- Testing & staging: Plugin or a host-based staging site
- Performance optimization: WP Rocket (aim for 90/100 on PSI)
Designers: Create and Preview Layouts in a Local Environment
If you’re a designer creating landing pages or redesigning parts of a site, a local WordPress environment is the best place to start. You can work safely on your computer, preview your designs, and test everything before publishing.
💡 Example: A designer creates a new landing page in Figma, builds it locally with Elementor, tests it on different devices, and finally pushes it to staging for review before publishing.
⚙️ Recommended setup:
You’ll likely begin with your design in Figma or Photoshop, then move through these quick steps:
Step 1: Set up a local environment using MAMP, XAMPP, or Local by Flywheel. Install WordPress and access your local dashboard.
Step 2: Choose or import a theme that matches your design, then customize colors, fonts, and layouts to match your mockup.
Step 3: Integrate your design elements (HTML, CSS, images) into WordPress templates or use a page builder like Elementor or Block Editor for visual editing.
Step 4: Test responsiveness and interactivity on desktop and mobile to make sure the design looks great everywhere.
Step 5: Move your site to a staging environment to test the full page, ads, and track scripts before it goes live.
⚙️ Recommended tools: Local, MAMP, WP staging or your host’s staging site for a final integration check.
FAQs on WordPress Development Environment
Is WordPress a development environment?
WordPress is a content management system (CMS) and one of the most popular website development platforms in the world, powering over 40% of all websites. You can build any type of site with it, from simple blogs to advanced e-commerce platforms, but you’ll need a separate WordPress development environment to test and develop safely.
How can I set up a WordPress dev environment?
You can set up a WordPress development environment in three main ways: locally on your computer with tools like Local, MAMP, or Lando; through a staging site provided by your hosting provider; or with a WordPress plugin such as WP Staging. Each option lets you test updates, plugins, and design changes without affecting your live site.
What is the IDE for WordPress development?
WordPress doesn’t include a built-in Integrated Development Environment (IDE), but you can use tools like VS Code or PhpStorm for development. VS Code offers a vast library of extensions, including WordPress Snippets and WordPress Toolbox. PhpStorm provides full support for WordPress Coding Standards, hooks, database management, and debugging.
Wrapping Up
Whether you’re a blogger, developer, designer, or part of an agency, choosing the right WordPress development environment is key to building and testing your site safely. By working locally, using staging for testing, and following best practices, you can launch updates with confidence, knowing your site will stay stable and secure.
If you want to maintain top performance for your WordPress site and guarantee your clients a good score on PageSpeed Insights, try WP Rocket, the most powerful performance plugin for WordPress. It automatically applies the most effective optimization techniques, helping your site stay fast across all environments.