Table of Contents
Last update on
According to the HTTP Archive, about 50% of the file size of an average web page on the Internet comes from images. For a WooCommerce store with lots of product images, it’s a safe bet that that number might be even higher.
Images are an important part of any eCommerce store – you want to give your shoppers detailed product images to help them make their decisions.
But at the same time, you can’t afford to let huge image sizes slow down your site because every increase in page load times has a negative effect on your store’s conversion rates.
There is a happy middle ground, though. By optimizing your WooCommerce store’s product images, you can still provide plenty of detailed product images, but without slowing down your store’s load times (or at least making the impact as small as possible).
In this post, we’re here to help with some actionable tips to optimize WooCommerce product images.
Six Ways to Optimize WooCommerce Product Images
1. Compress Your Product Images
One of the best ways to optimize your WooCommerce store’s images is with compression, which shrinks the size of your images without changing the dimensions themselves.
There are two main types of compression:
- Lossless – a small reduction in file size with zero change in quality.
- Lossy – a larger reduction in file size, but sometimes there can be some small change in quality.
A lot of times, the human eye can’t even pick up the difference in lossy compression, especially if you choose a less aggressive algorithm.
No matter what, you should always be using some type of compression on your WooCommerce product images, as it’s an easy way to cut file size without changing anything else.
If you already use Photoshop as part of creating your product images, you can use Photoshop’s Save for Web option.
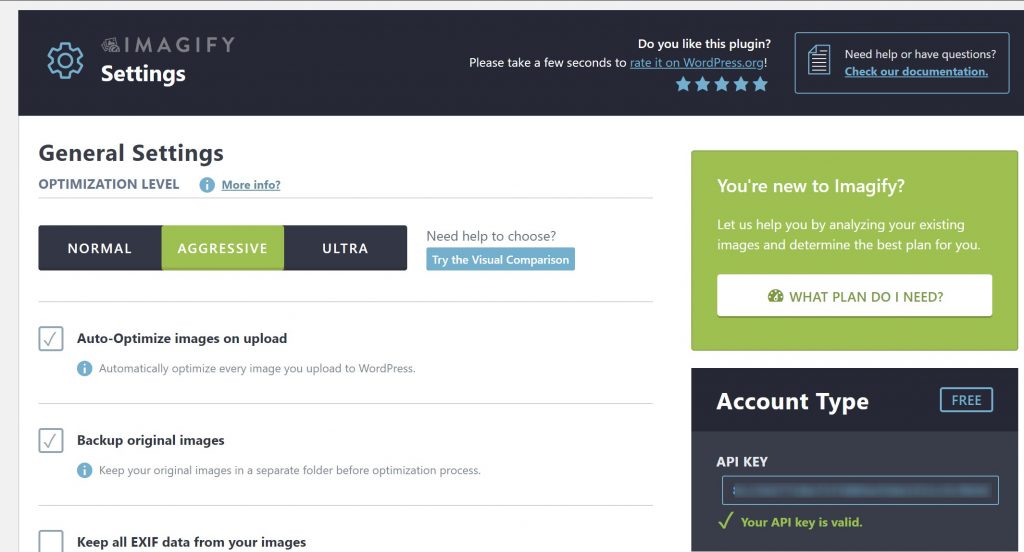
Or, you can also use the Imagify WordPress plugin to put image compression on autopilot. Imagify comes from the WP Rocket team and will help you automatically compress your images as you upload them to WordPress using your preferred level of compression (lossless plus two levels of lossy compression):
You can also find online cloud tools that you can use before you upload images to your WooCommerce store. Two good options are TinyJPG and Kraken.
2. Resize Image Dimensions
In addition to compressing your images, you’ll also want to change the actual image dimensions to further shrink your sizes. All else equal, smaller dimensions (height and width) equal a smaller file size.
WooCommerce will automatically do this for some areas of your store (more on this next), but it won’t do this for the main image on your single product page.
So how much should you resize images? Well, a lot of this depends on what you’re selling. If you’re selling a simple product – like a plain white t-shirt – you might be able to do 800-1,000 px because there isn’t a lot of detail there.
However, if you’re selling jewelry or something where people will want to really zoom in on small details, you might want to go up to more like 2,000 px.
Either way, you never want to be uploading the massive 5,000 px images that come out of your camera by default, and you should always try to go as small as possible without negatively affecting the shopping experience.
You can either resize your images before you upload them. Or, the Imagify compression plugin can also automatically resize your images to a set maximum dimension when you upload them to WordPress:

3. Pay Attention to Your WooCommerce Thumbnail Sizes, Too
When you upload an image to WordPress, WordPress will automatically resize that image to different dimensions – AKA thumbnails.
These dimensions are usually controlled by your theme, but WooCommerce also comes with its own thumbnail dimensions that control the size of the images used on your catalog page and some other areas.
You can control the size of these thumbnails by going to Appearance → Customize. Then, in the WordPress Customizer, go to WooCommerce → Product Images:
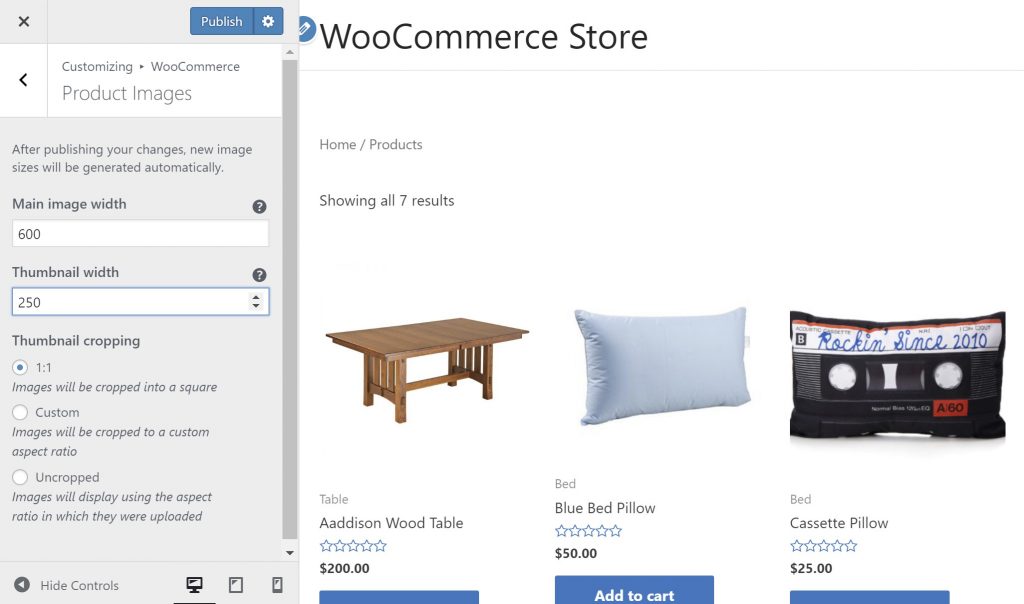
Ideally, you want to make these values as small as possible without sacrificing usability.
For example, if your theme only displays 200px wide images on the catalog page, you might want to make the Thumbnail width equal to 200px instead of the default of 300px.
4. Use JPEG Images (Most of the Time)
When it comes to online images, there are several different formats that you can use, with the most common options being PNG, JPEG, or GIF.
Typically, you’ll want to use JPEG for product images, as JPEGs are great for images with lots of colors and also are usually smaller than PNG files and easier to compress. That’s why Amazon, Walmart, and most other big eCommerce stores use JPEG as the format for their product images.
The one caveat is transparency – JPEGs don’t support it. So if you need transparency for your product images, then you might want to use PNG instead.
5. Keep Image Backgrounds Simple
It can be tempting to get creative with your product images…but there’s a reason almost every single store uses a plain white background (again, this is how big stores like Amazon and Walmart do it).
Not only does it clearly showcase your product, but it also helps keep your product images’ file sizes down by limiting the amount of information in a picture.
Basically, fewer colors means a smaller file size, and a simple white background is a way to achieve that without compromising on image clarity.
6. Use a CDN for Faster Global Delivery
By default, all of your store’s images load from your WordPress site’s server.
That’s fine if all of your visitors live near your server…but that’s probably not the case, especially if your store ships internationally.
See, physical proximity still affects how quickly content loads. So the further people are located from your server, the slower your content loads.
To fix this issue, you can use something called a content delivery network (CDN). With a CDN, you can load static files – like your images – from a network of global servers.
That way, visitors can load files from the server that’s nearest to them, and thereby speed up image download times even more.
For a free CDN, you can consider Cloudflare. Or, there are lots of paid CDN services like Stackpath, KeyCDN, Amazon CloudFront, and others. Learn about the difference between Cloudflare and something like CloudFront.
No matter which CDN service you use, WP Rocket can help you integrate the service into your site, with a dedicated CDN feature and a built-in Cloudflare integration.
Optimize Your WooCommerce Product Images Today
High-quality product images are a must for your WooCommerce store, but you also want to make sure you avoid slowing down your store’s load times with unoptimized images.
To still offer high-quality images that load fast, you should:
- Use a compression plugin or tool to shrink the file size of your images.
- Resize image dimensions.
- Set optimized WooCommerce thumbnail sizes.
- Use the JPEG image format (unless you need transparency).
- Keep your product image backgrounds simple.
- Consider a content delivery network to speed up global image load times.
Overall, the right WordPress caching plugin for WooCommerce will also help you boost your site’s performance right away!
Read our full guide on how to speed up a slow WooCommerce site, optimize your product images today and enjoy a faster loading WooCommerce store!